Loading tools
The loading tools allow you to bring models, data, and schemas onto the platform via the UI.
Note
If you plan to use the Business Segments tag, it’s best to set this up first.
Upload a table schema
Schema objects of the type ‘Table’ can be loaded as .csv files from a repository.
First log-in, then select the branch and commit, locate the schema file and click ‘Select file’. A pop-up window will appear showing the files than can be selected.
By default, only csv files are shown but you can toggle to view the entire file structure.
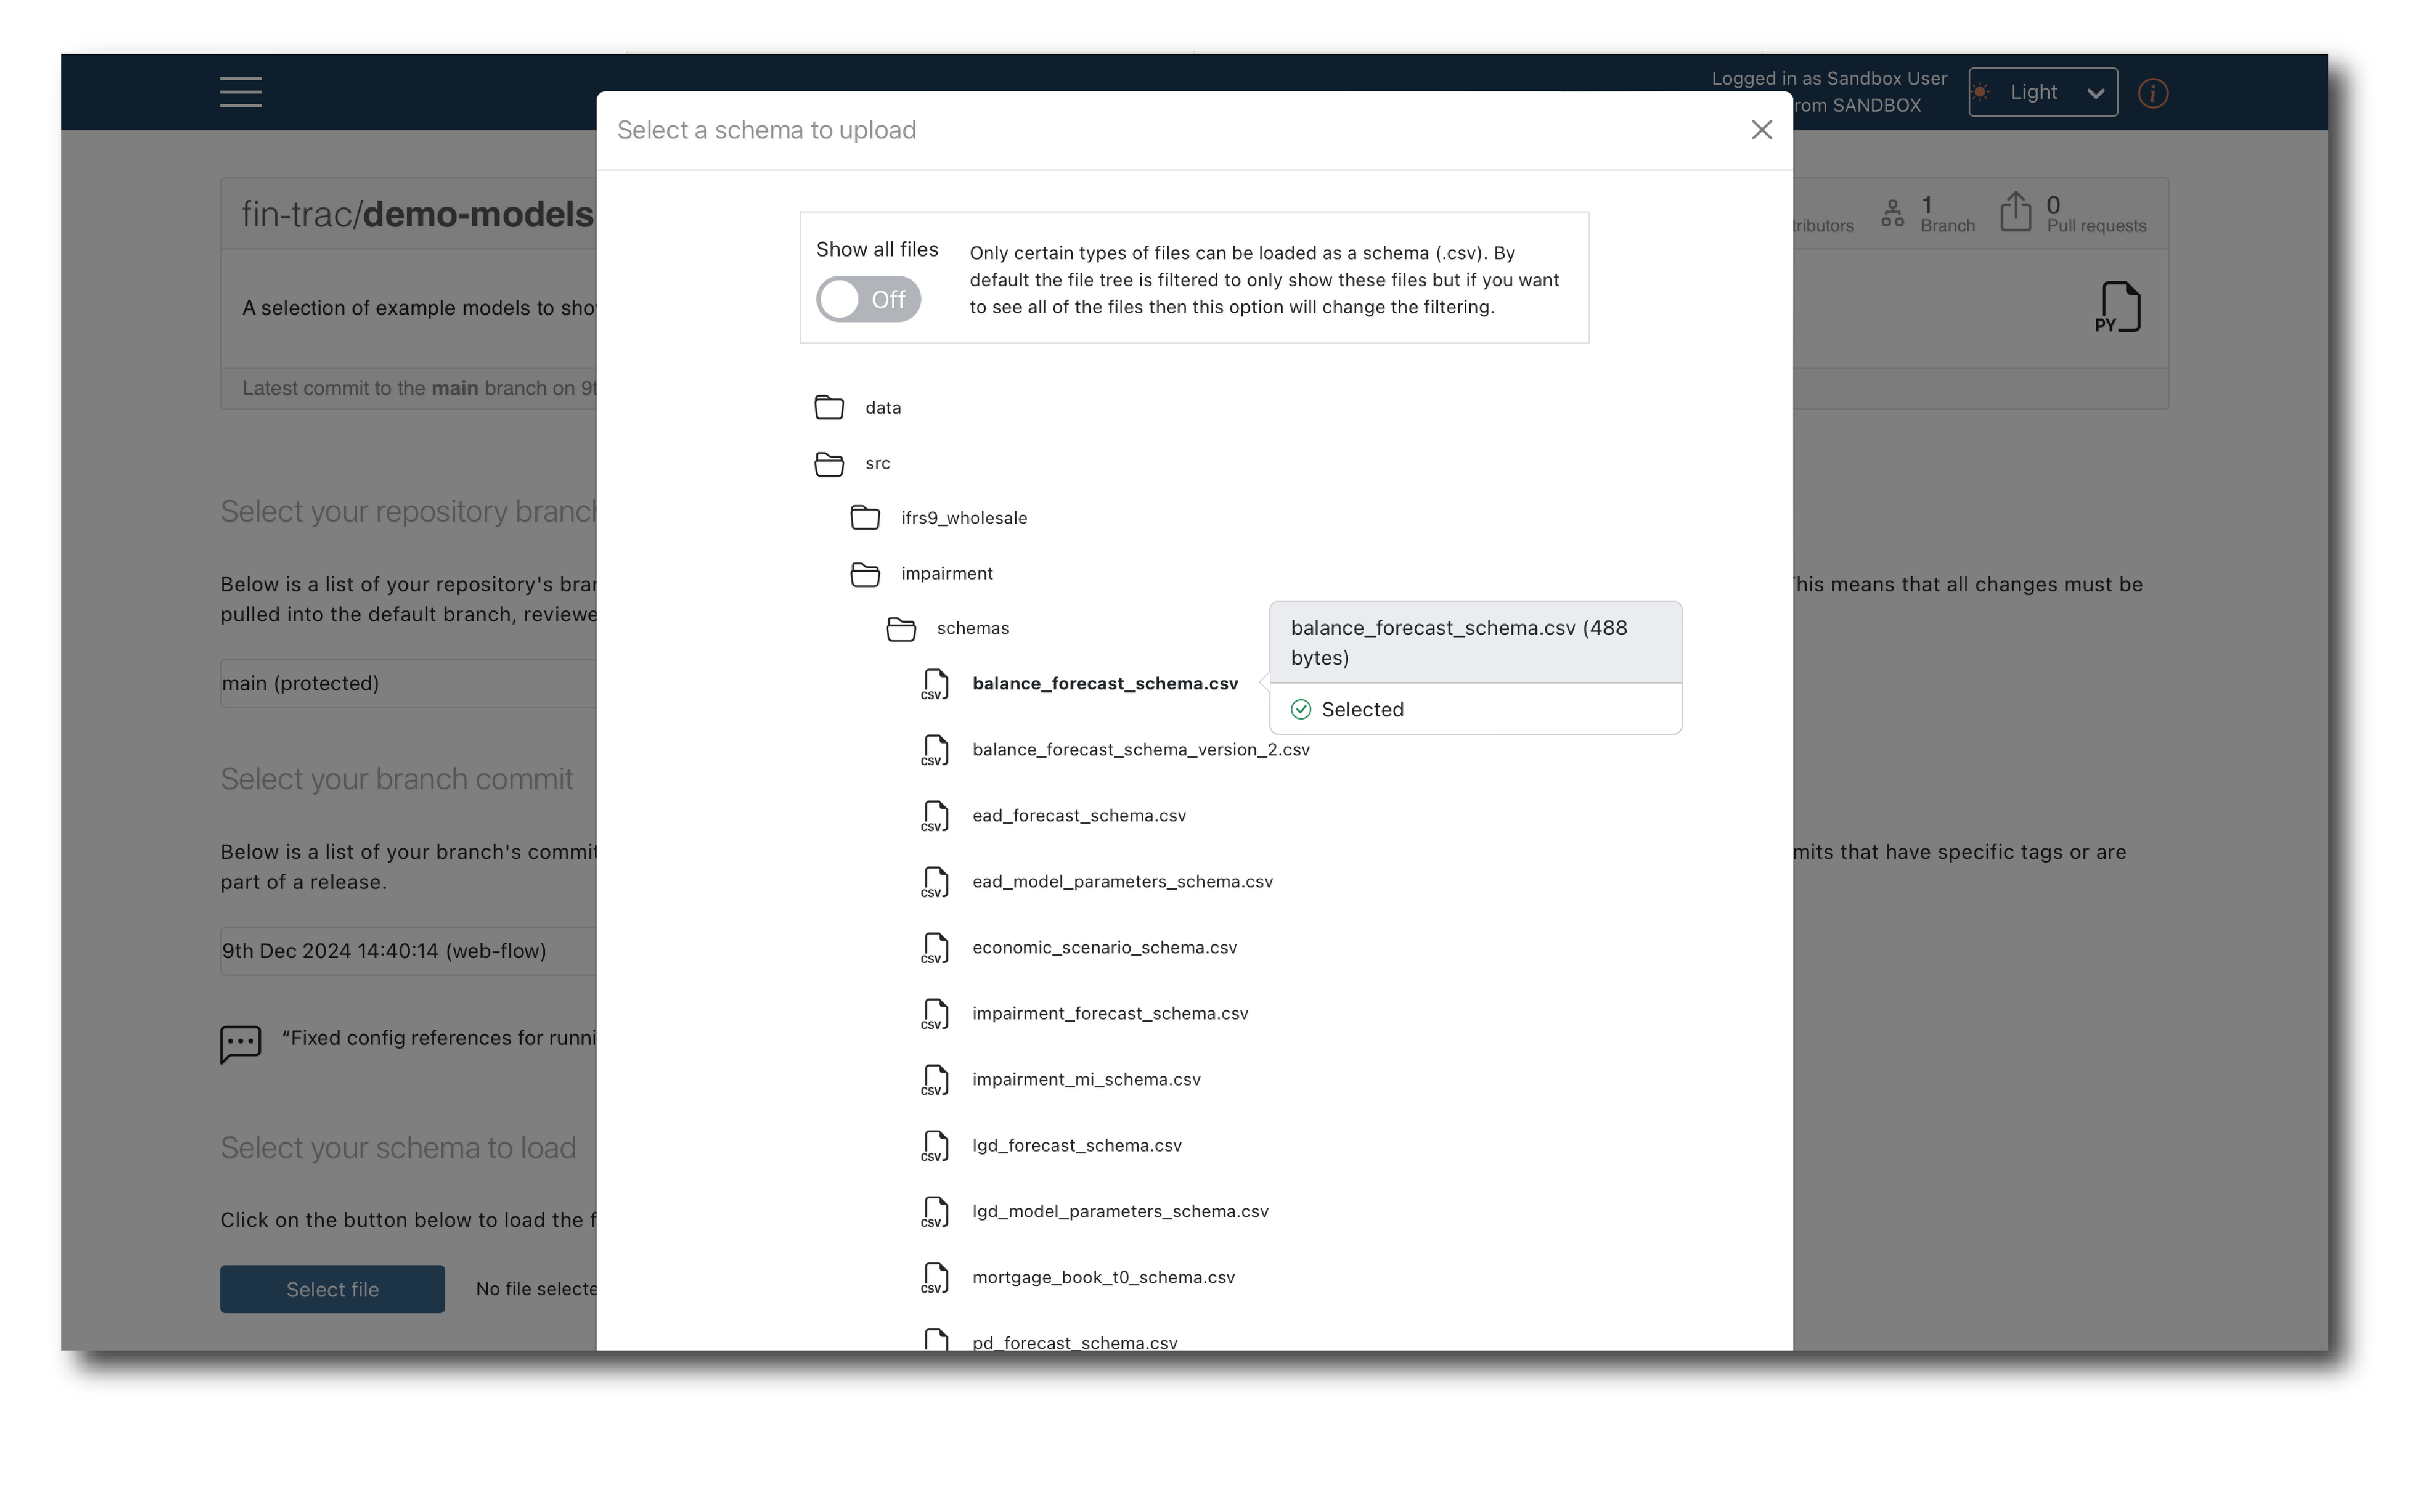
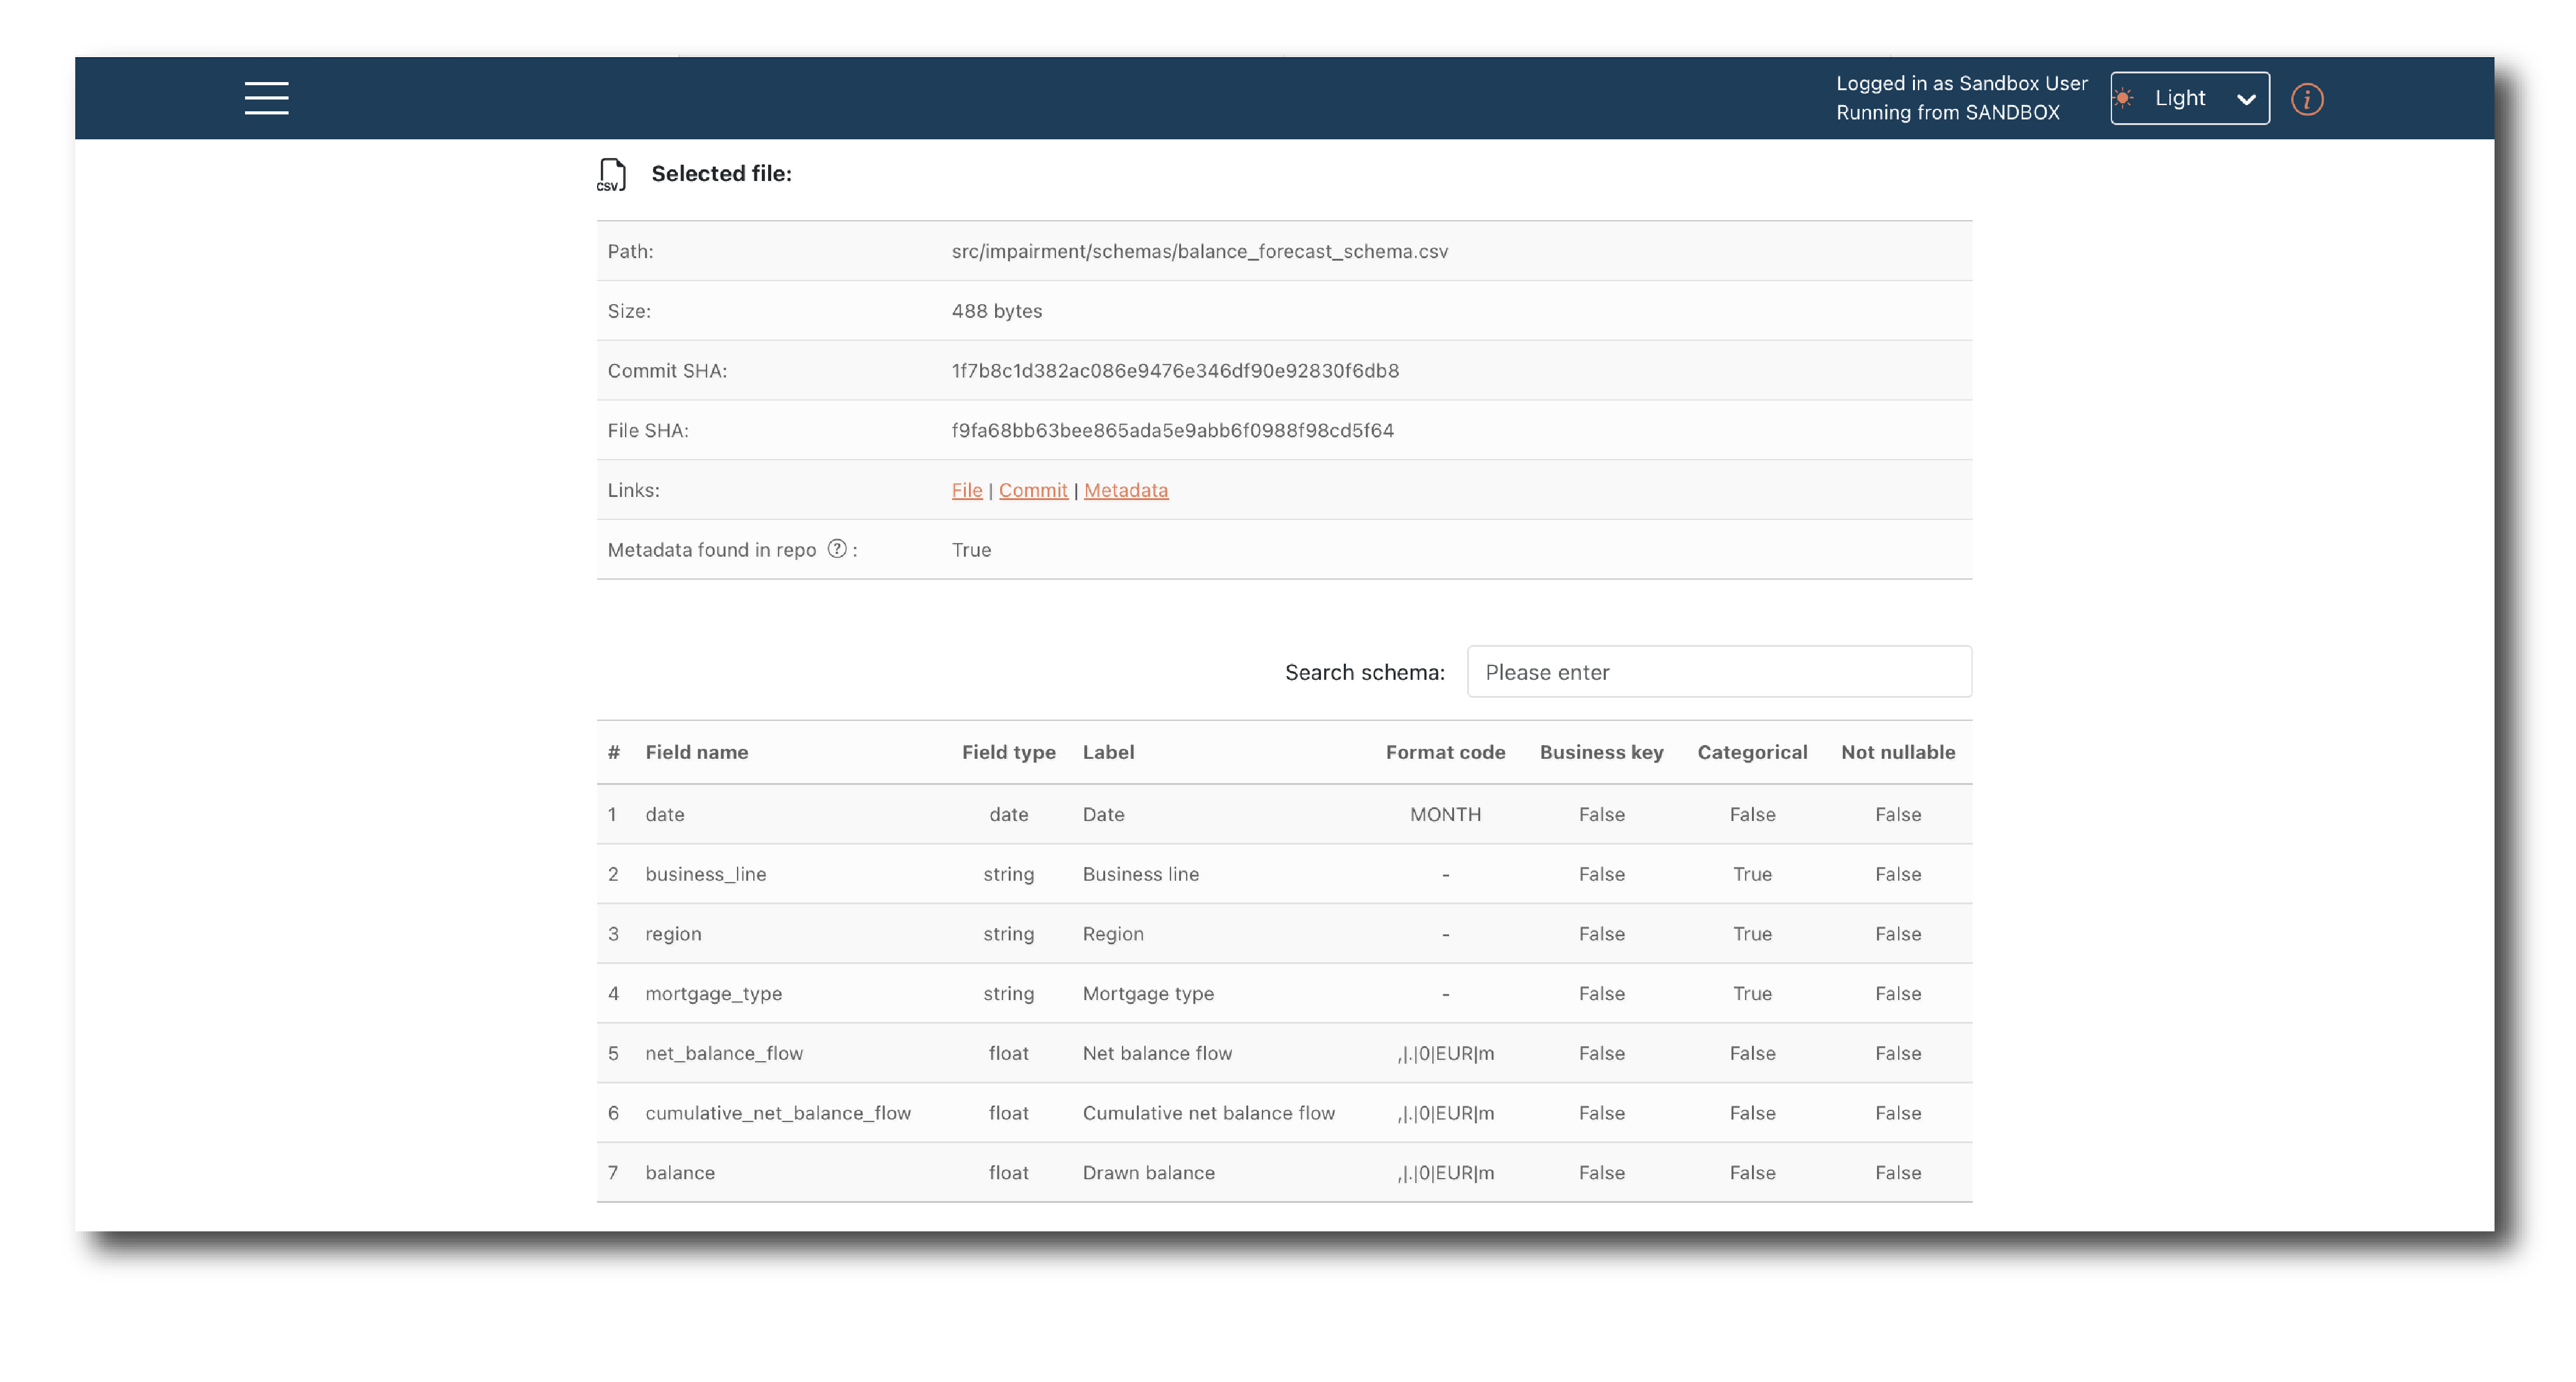
Once a schema file is selected, you can preview it before Uploading.
To complete the upload you must provide a Key, Name and Description and decide if the object will appear in search results. You can optionally assign a Business segment.
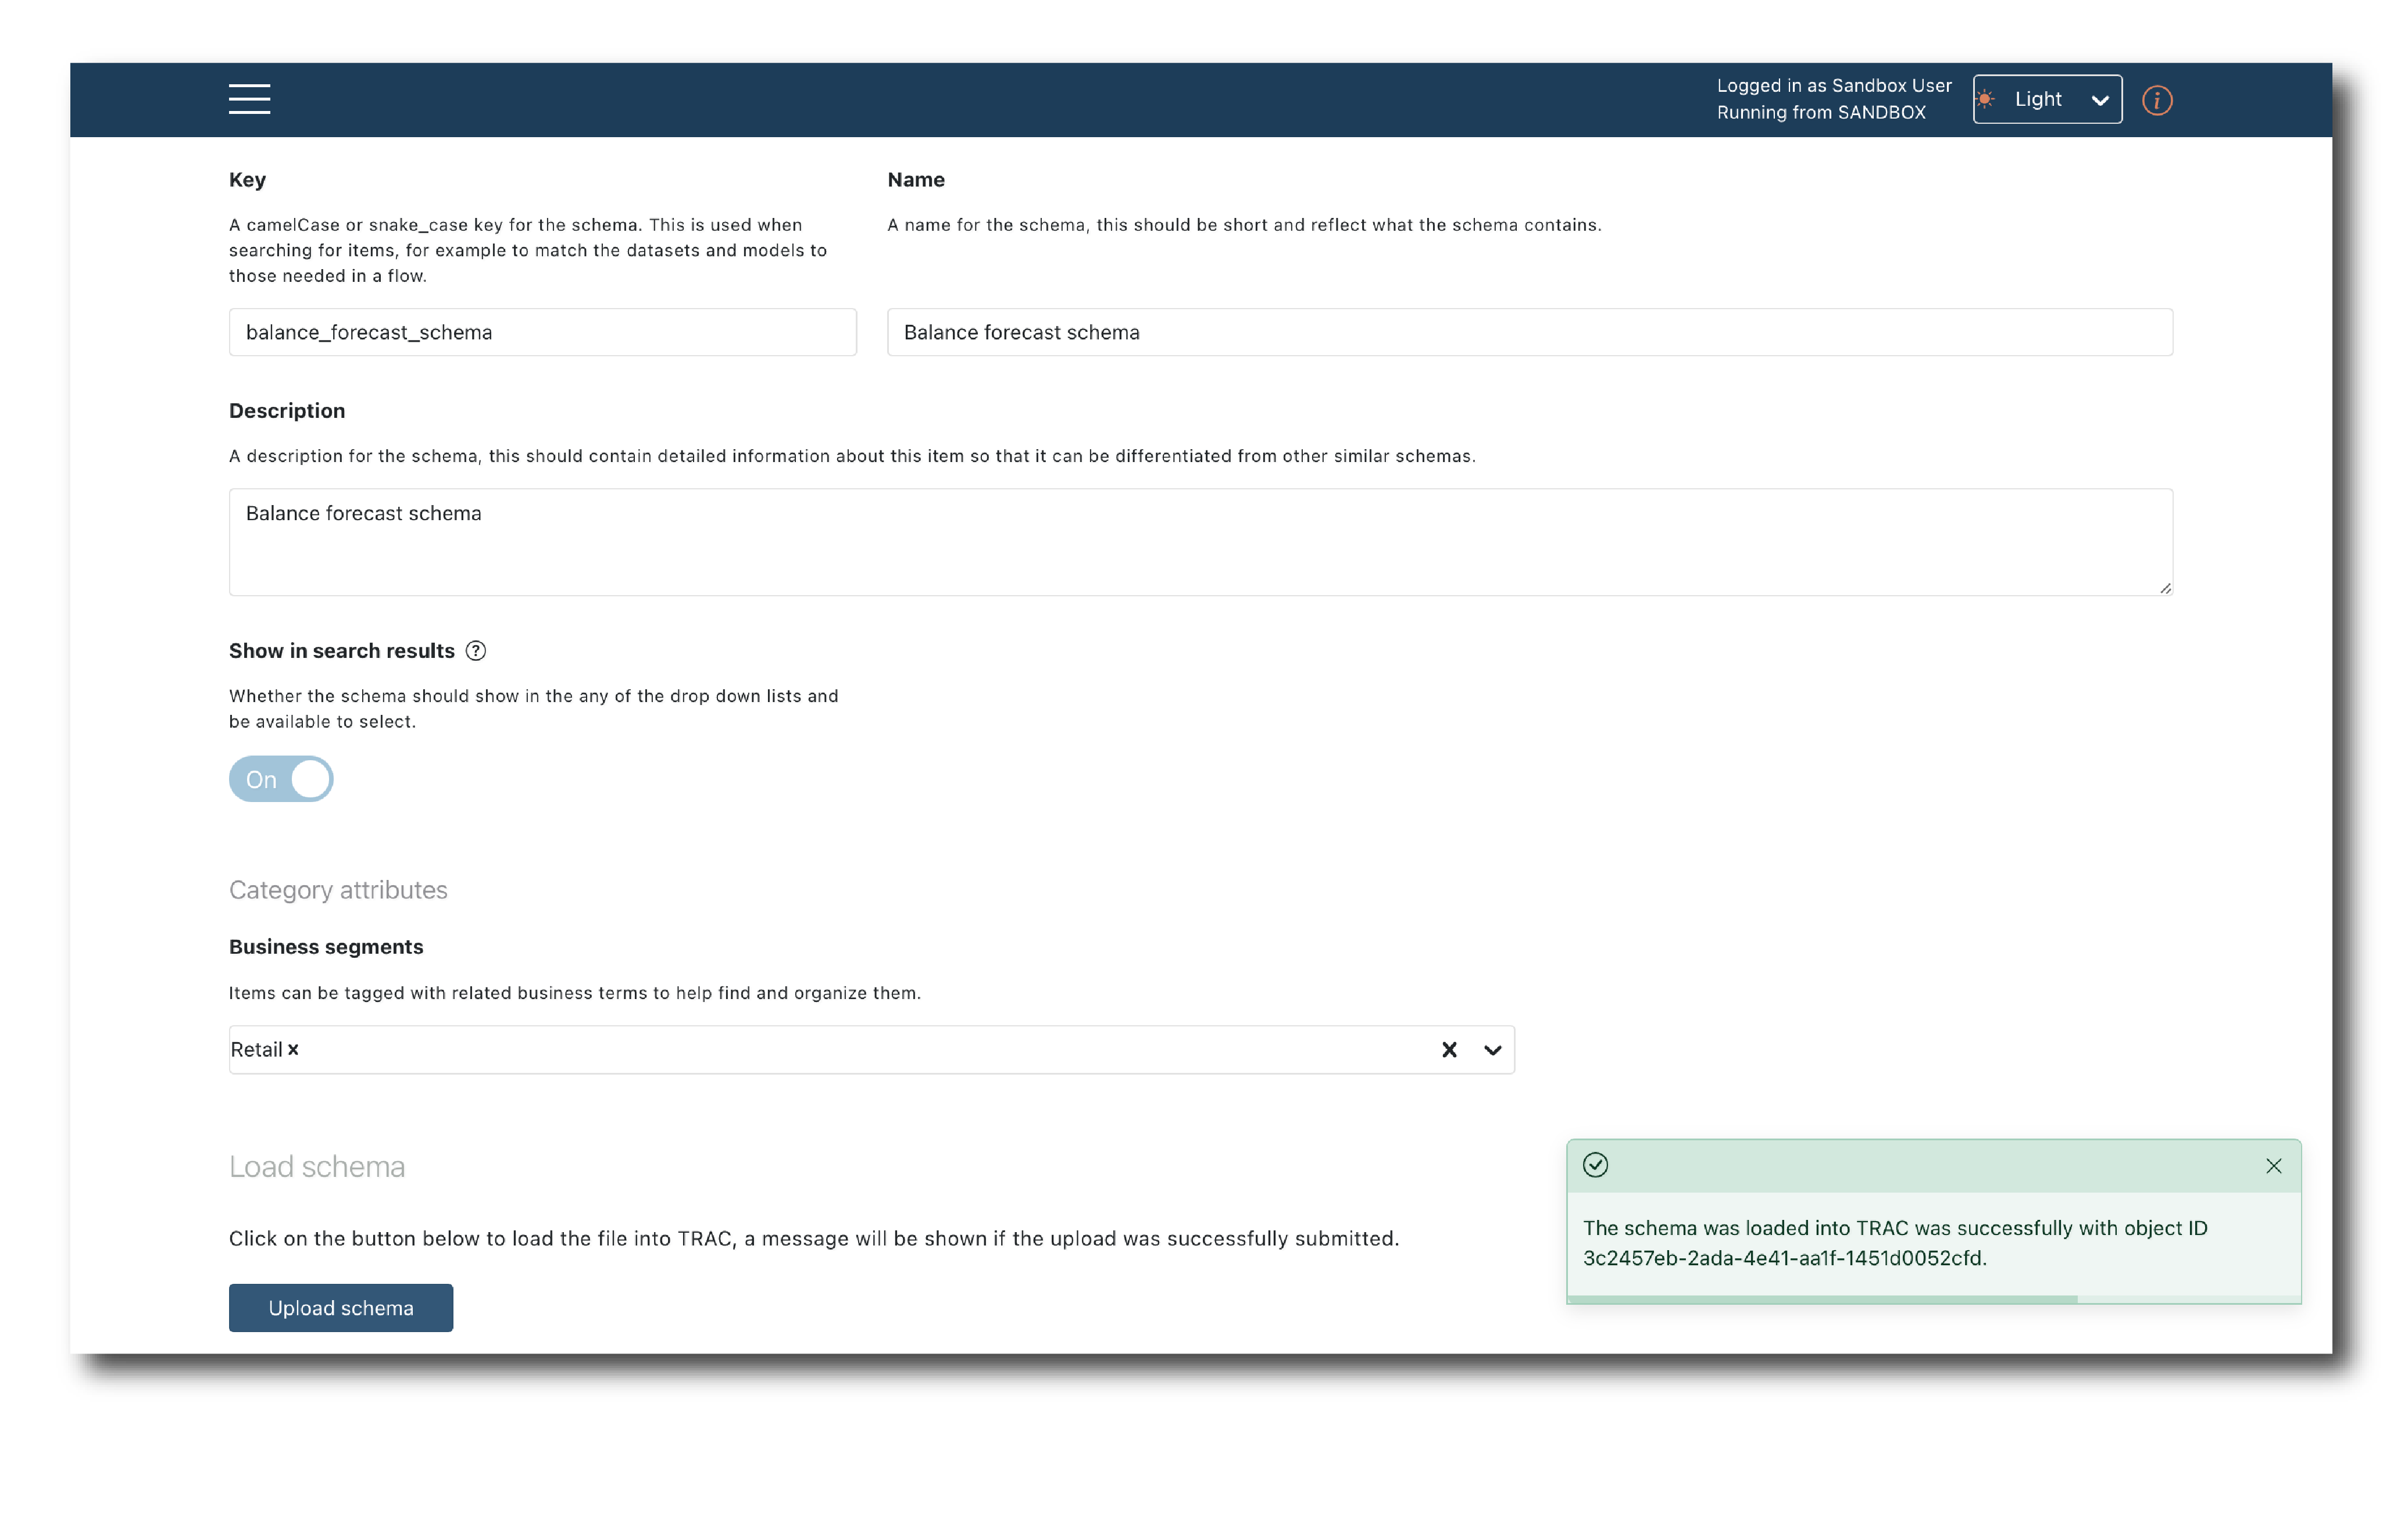
These tags are required whenever an object is created. They can be changed later via the (Update Tags) page but it is better to set them correctly upfront.
Generate a schema
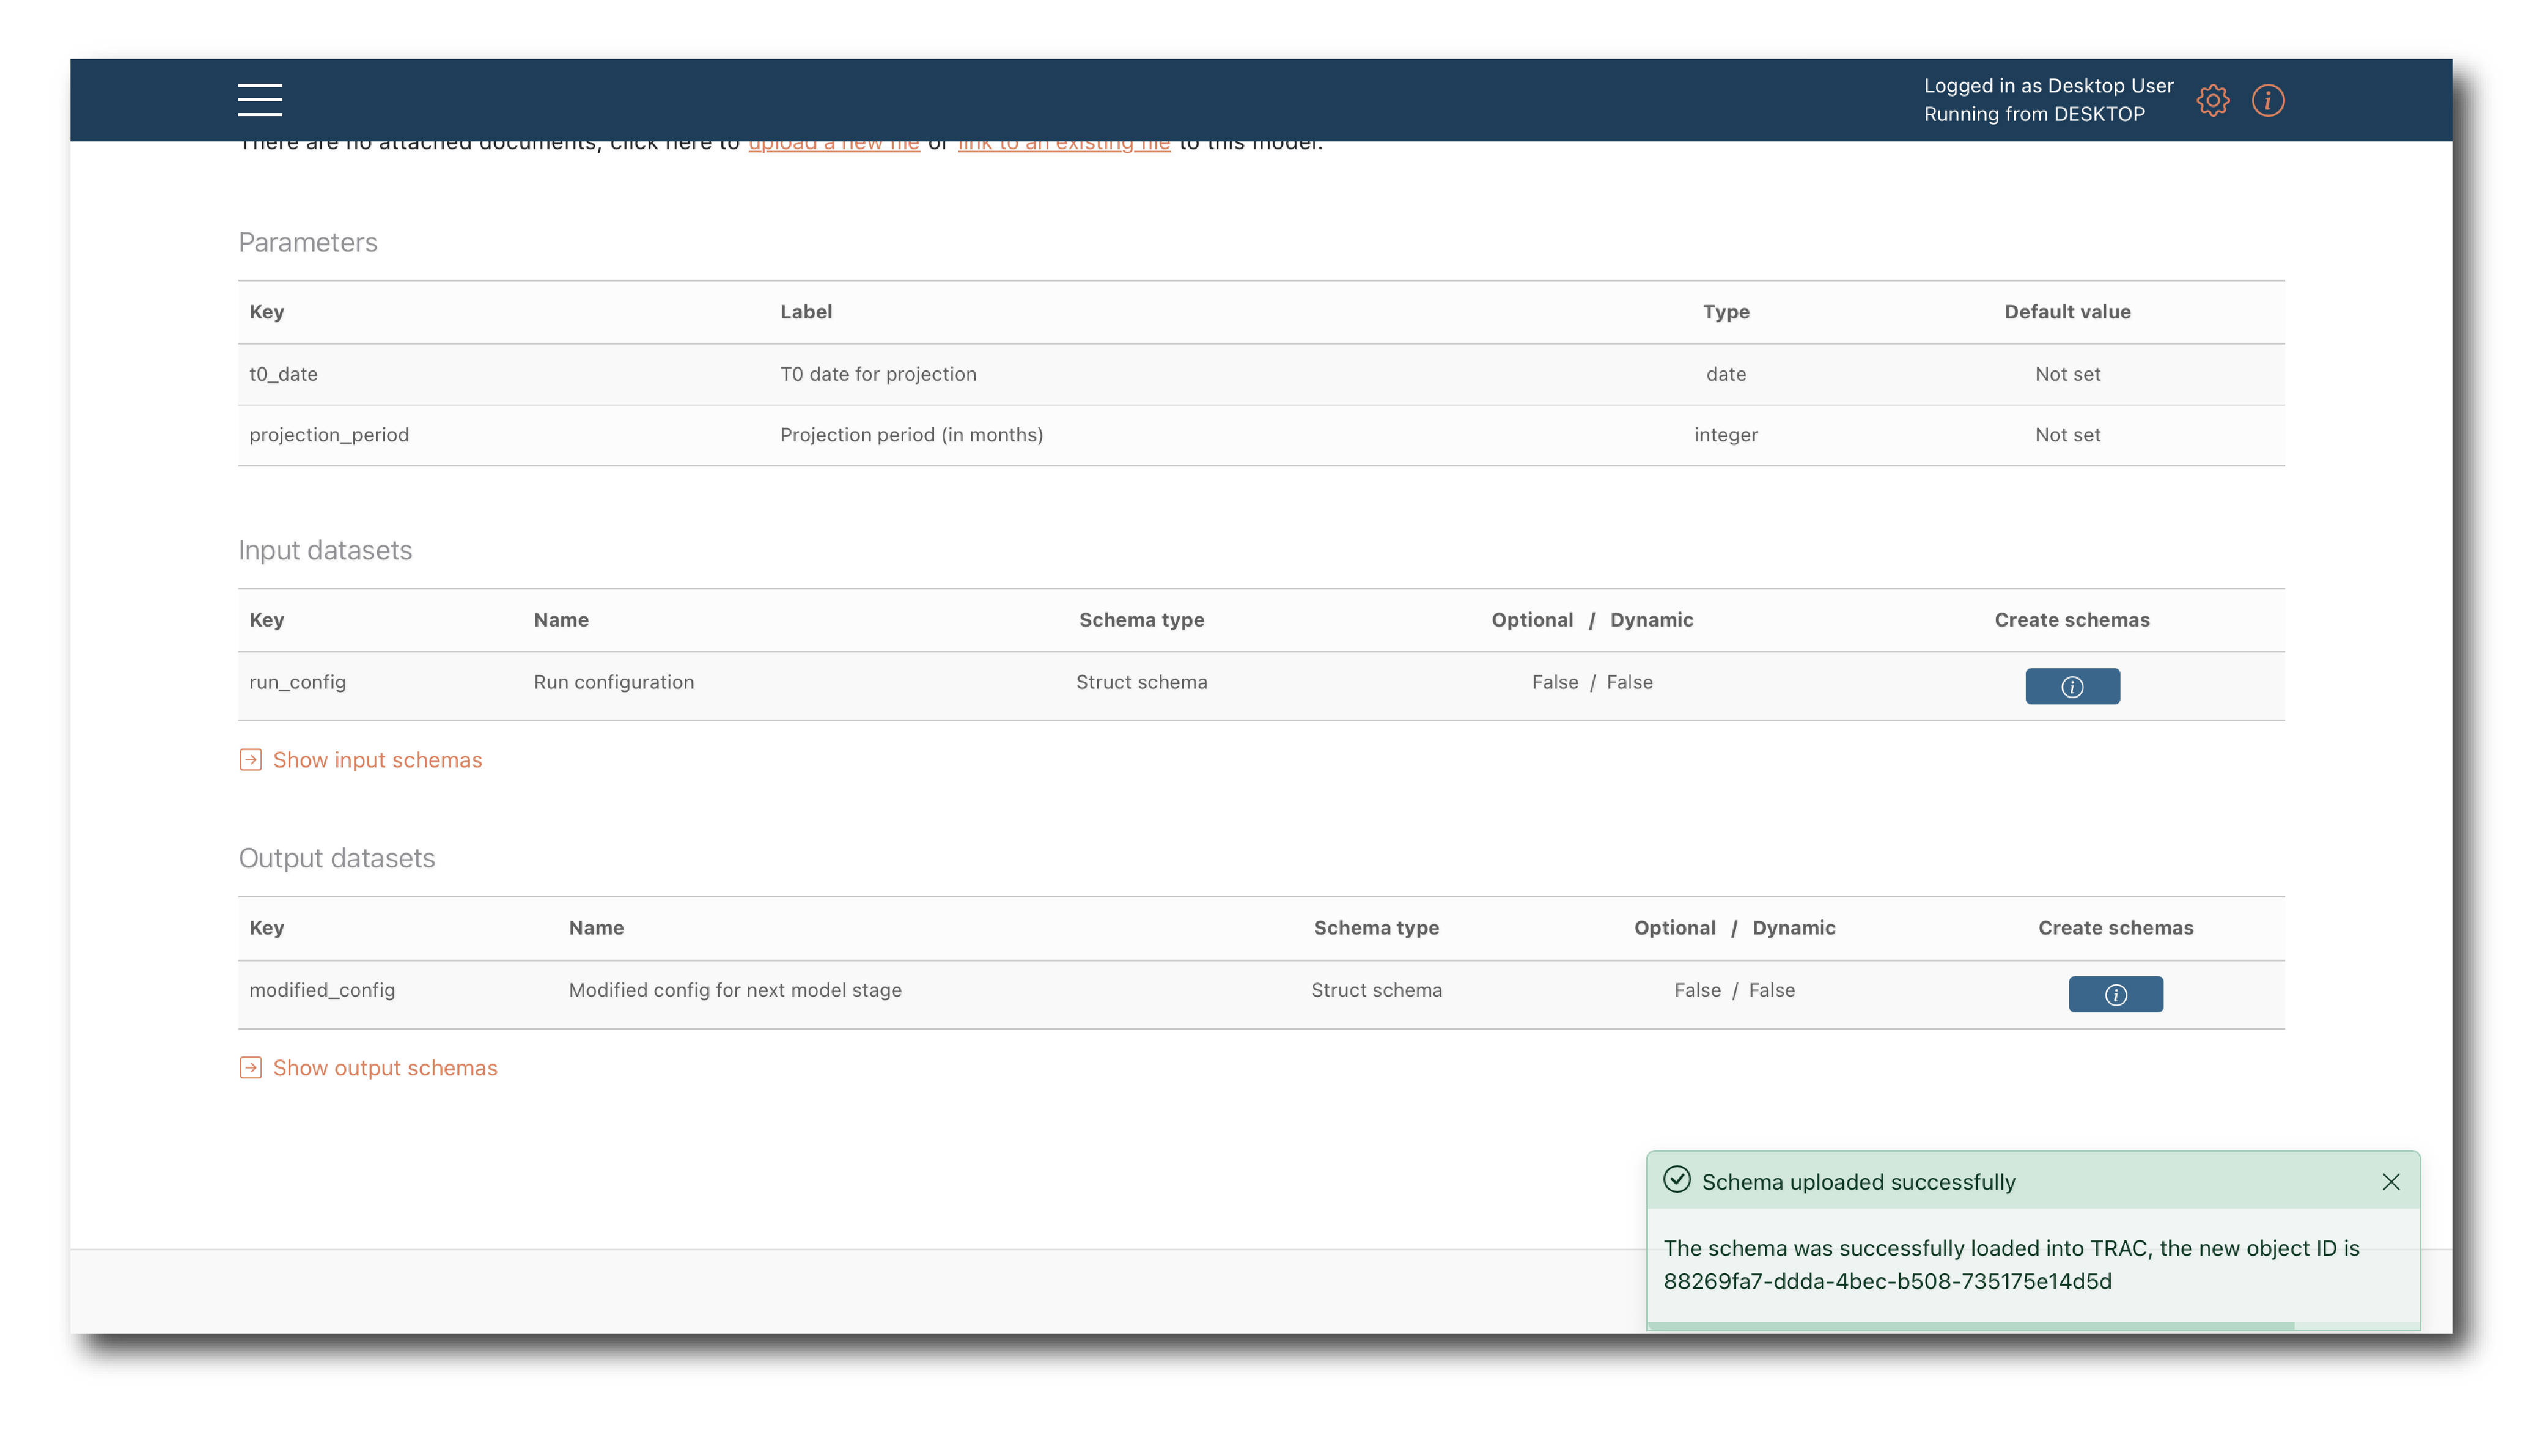
A schema can be generated from a model object instead of uploading it as a file.
First, navigate to a model summary page, for a model with a data input or output that uses the schema you want to create.
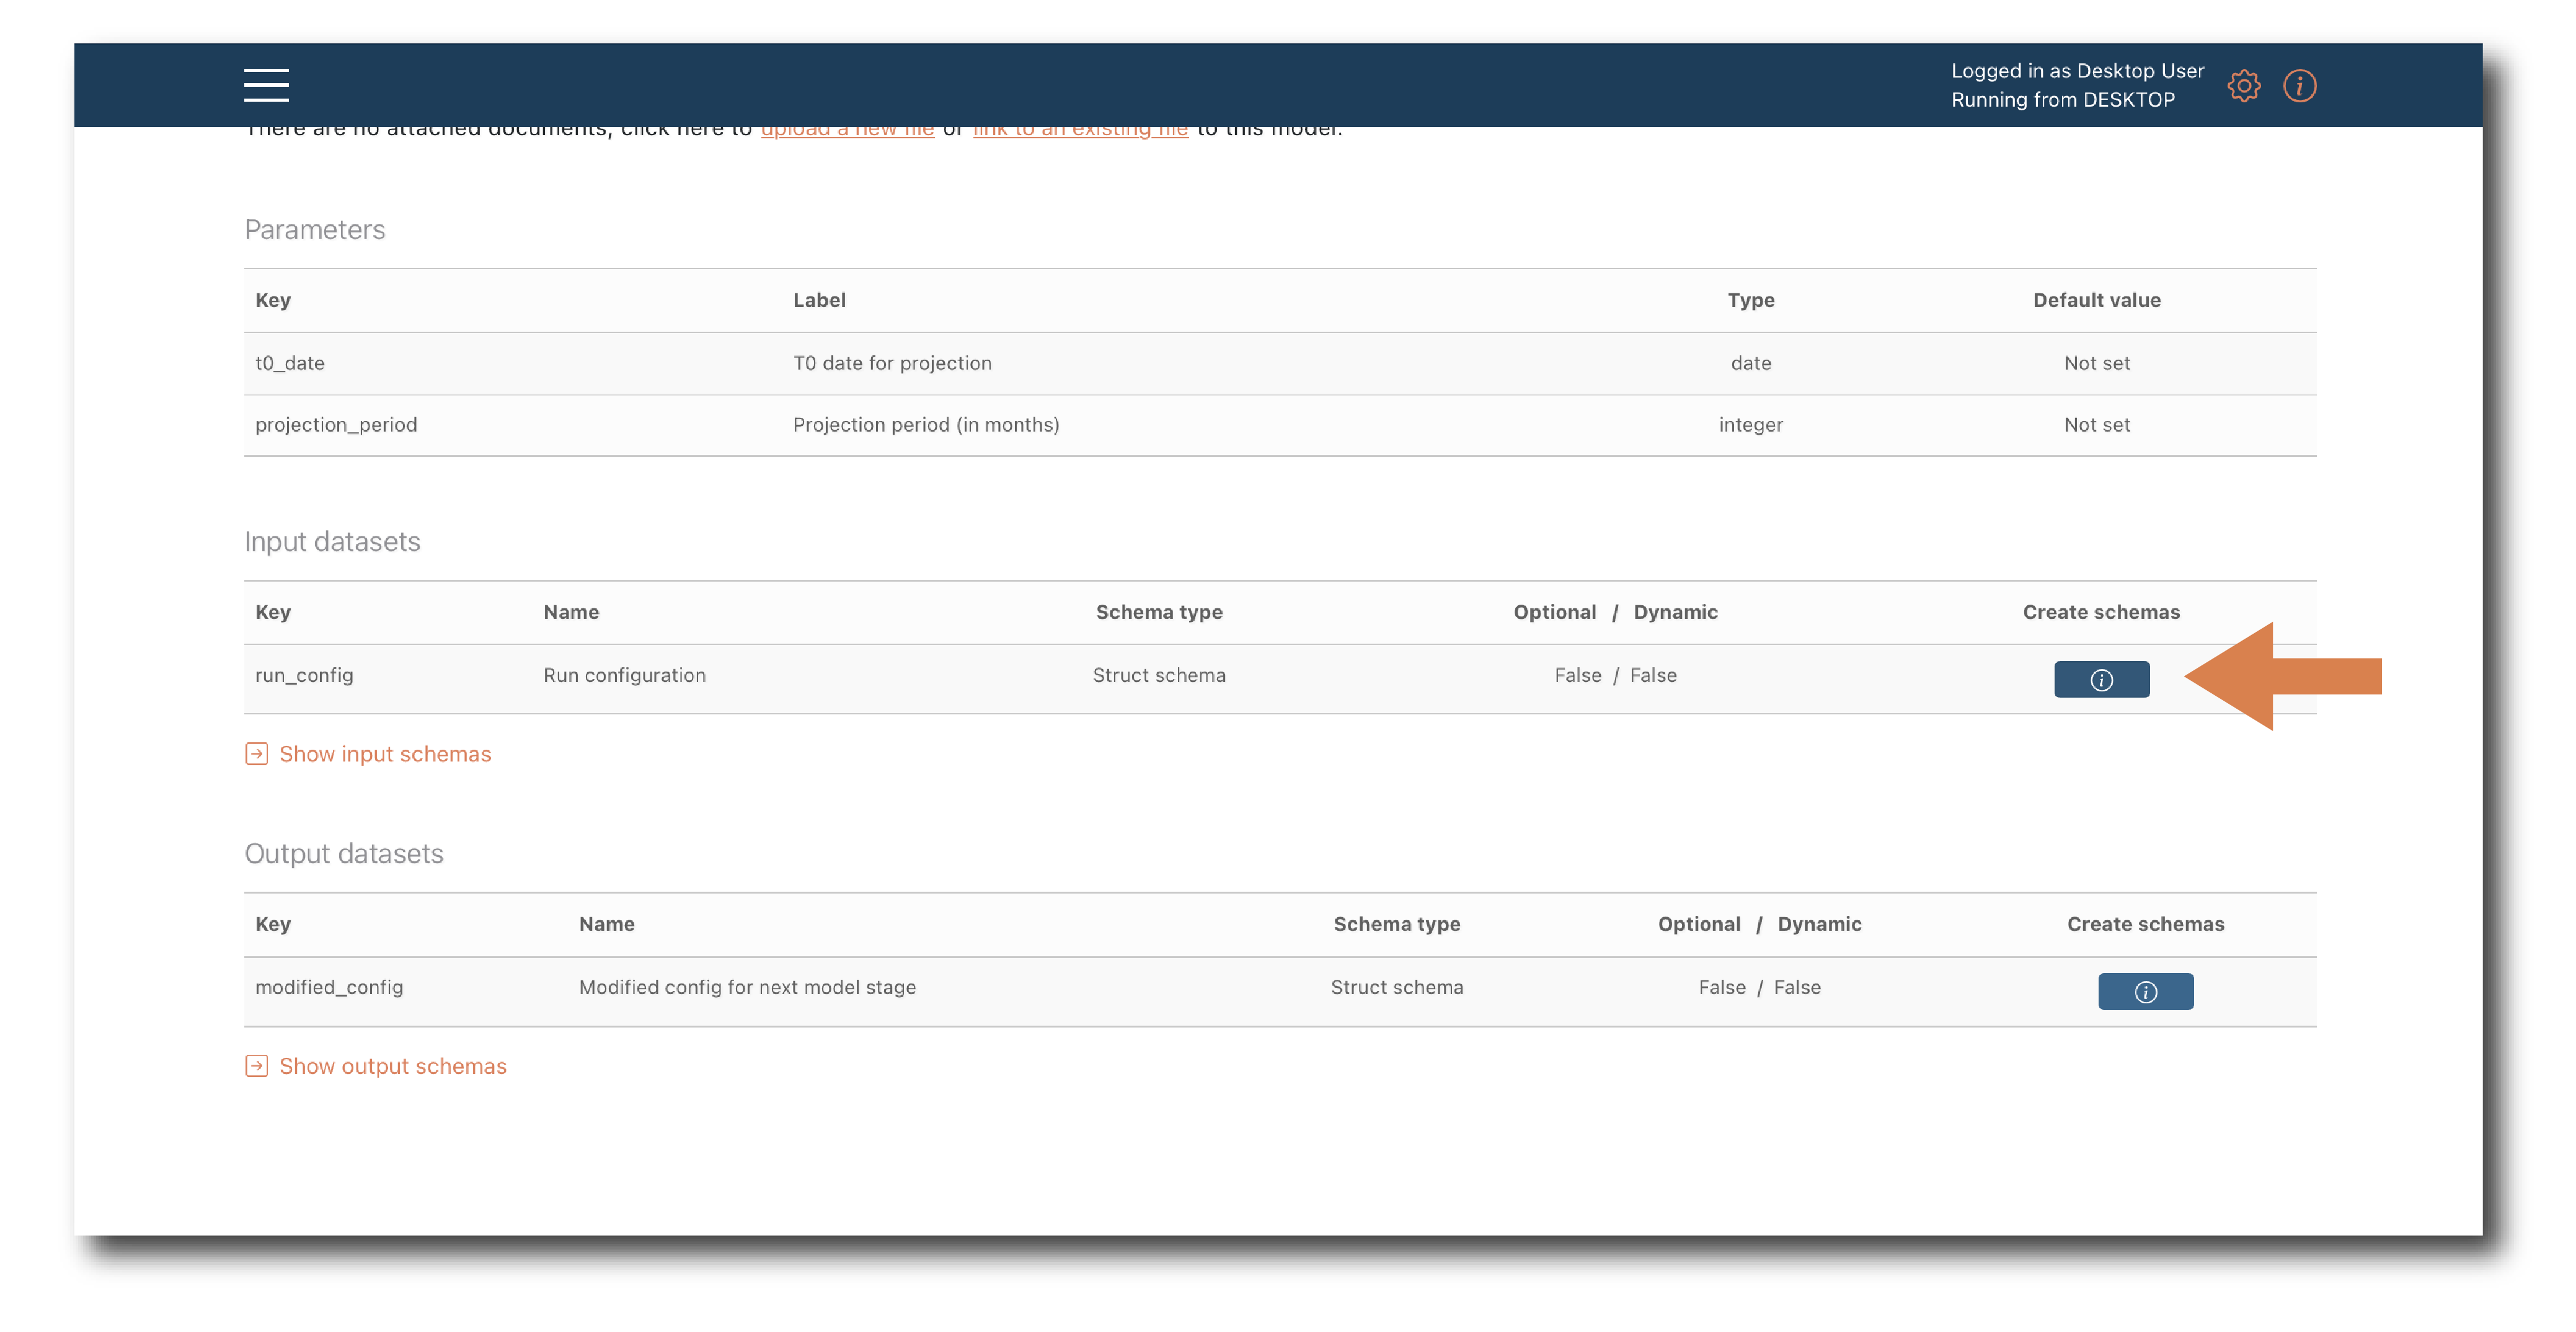
Click ‘Create schema’ use the pop-up to name and tag the new schema object.
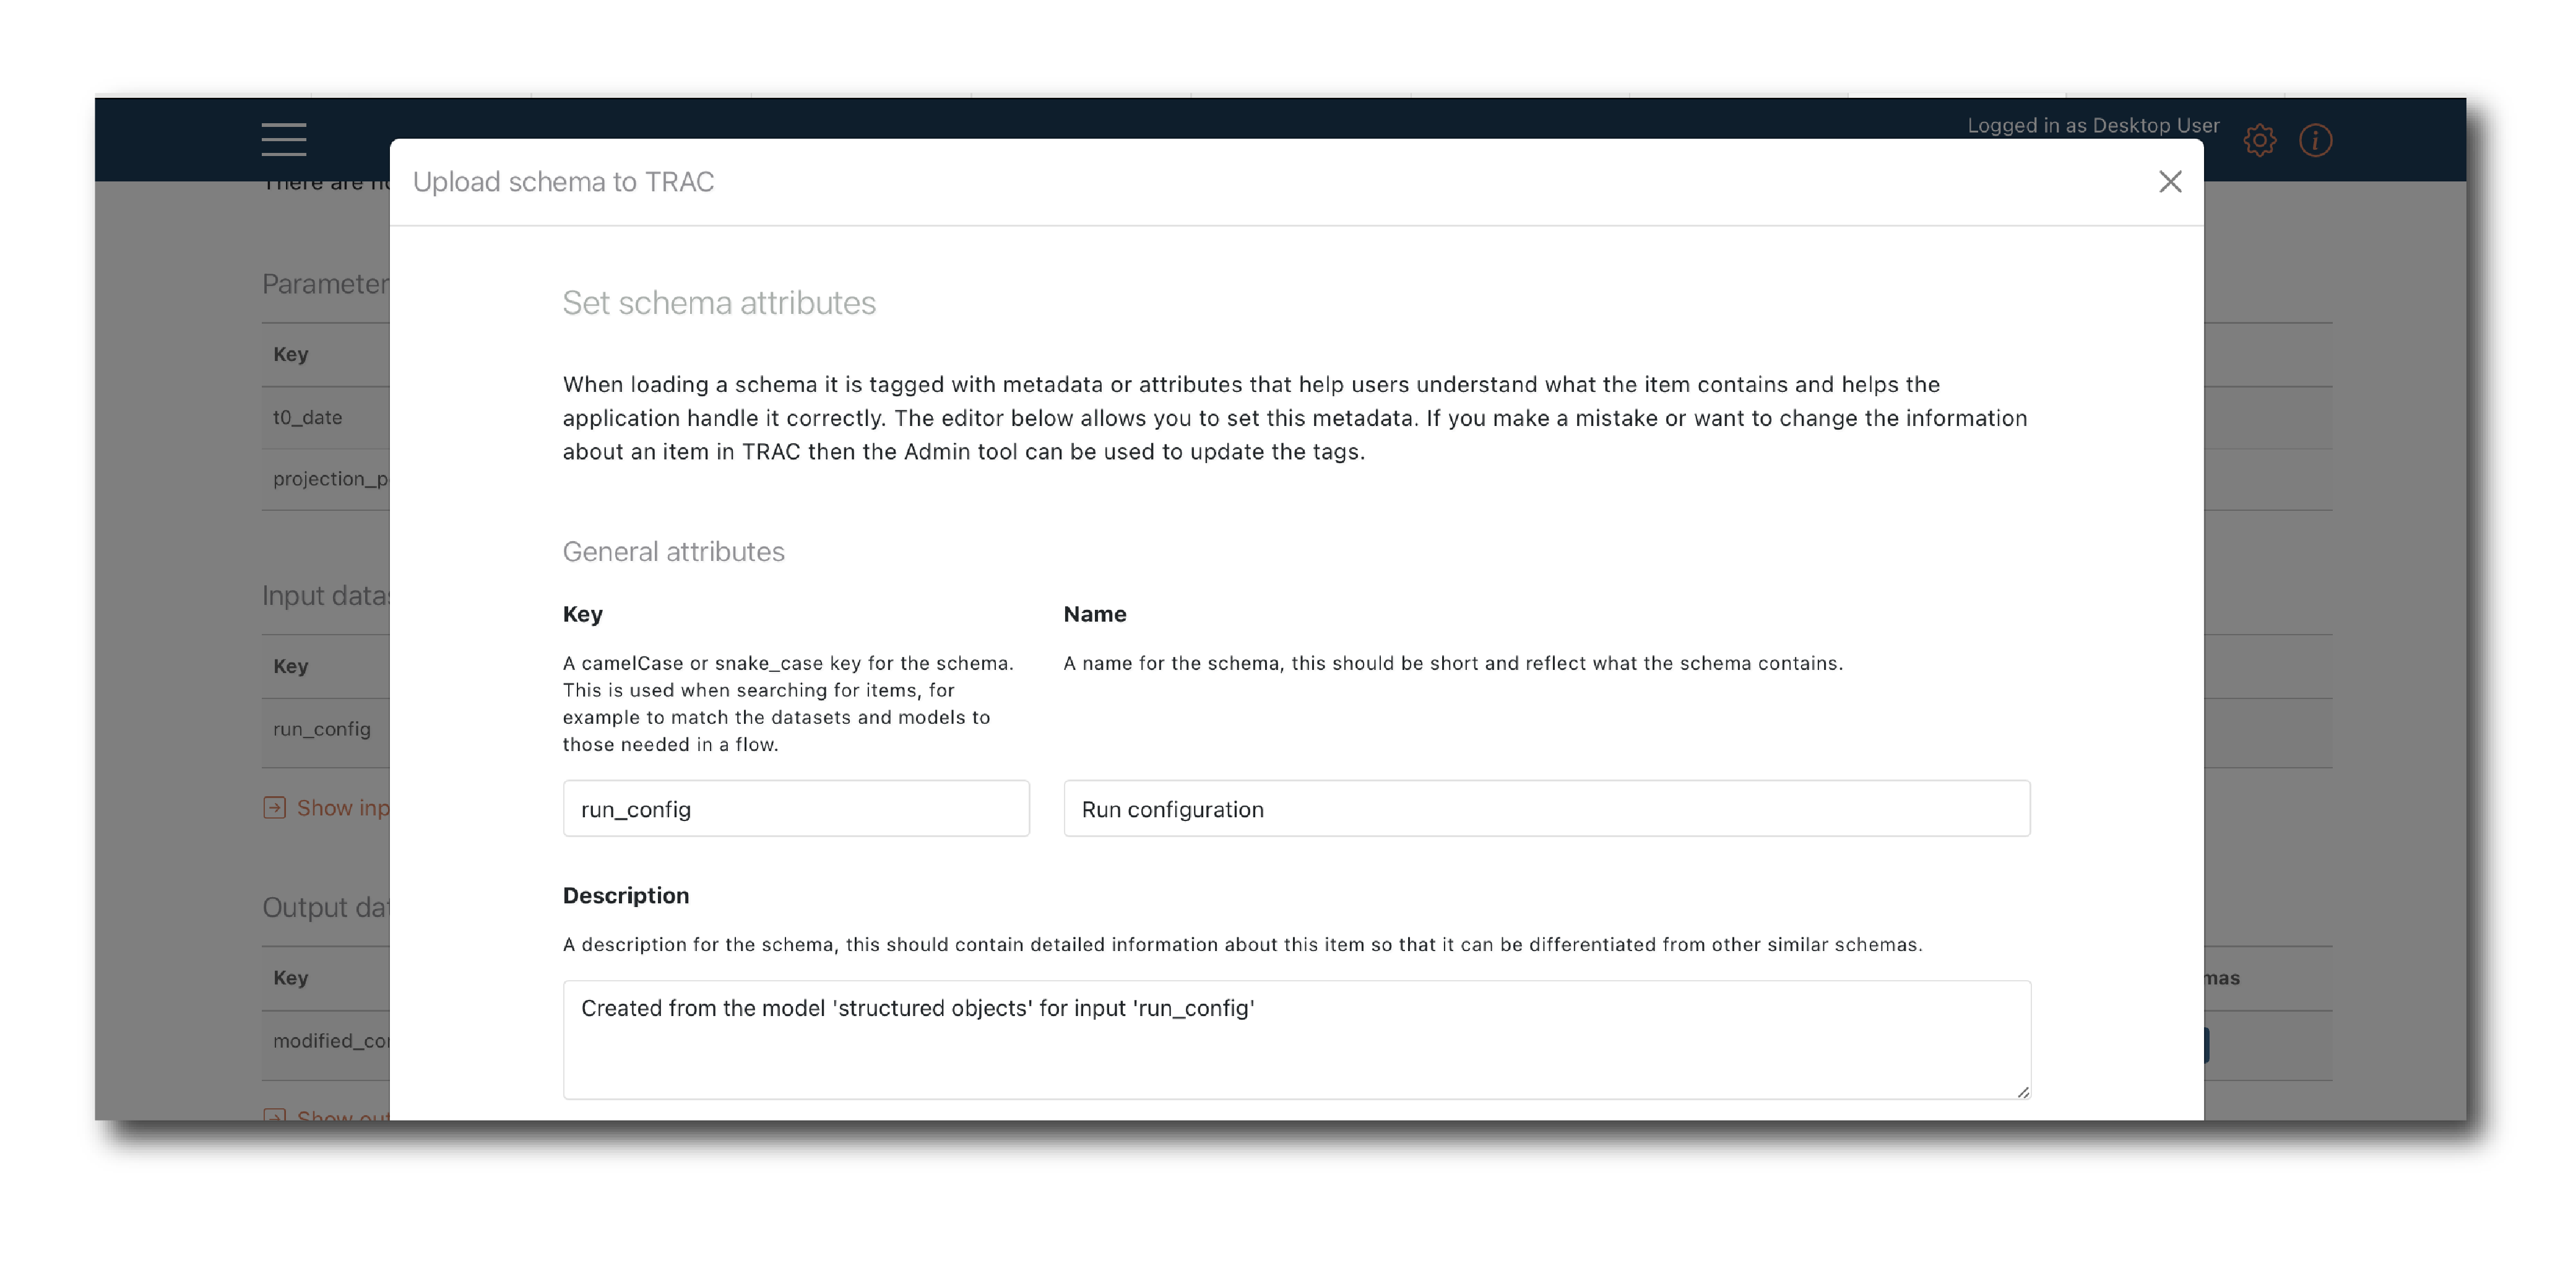
Click ‘Upload’ to create the schema object or ‘Close’ to exit the process.
Note
The schema object will correspond exactly to what’s defined in the model code - you can’t edit before saving.
Upload data (table)
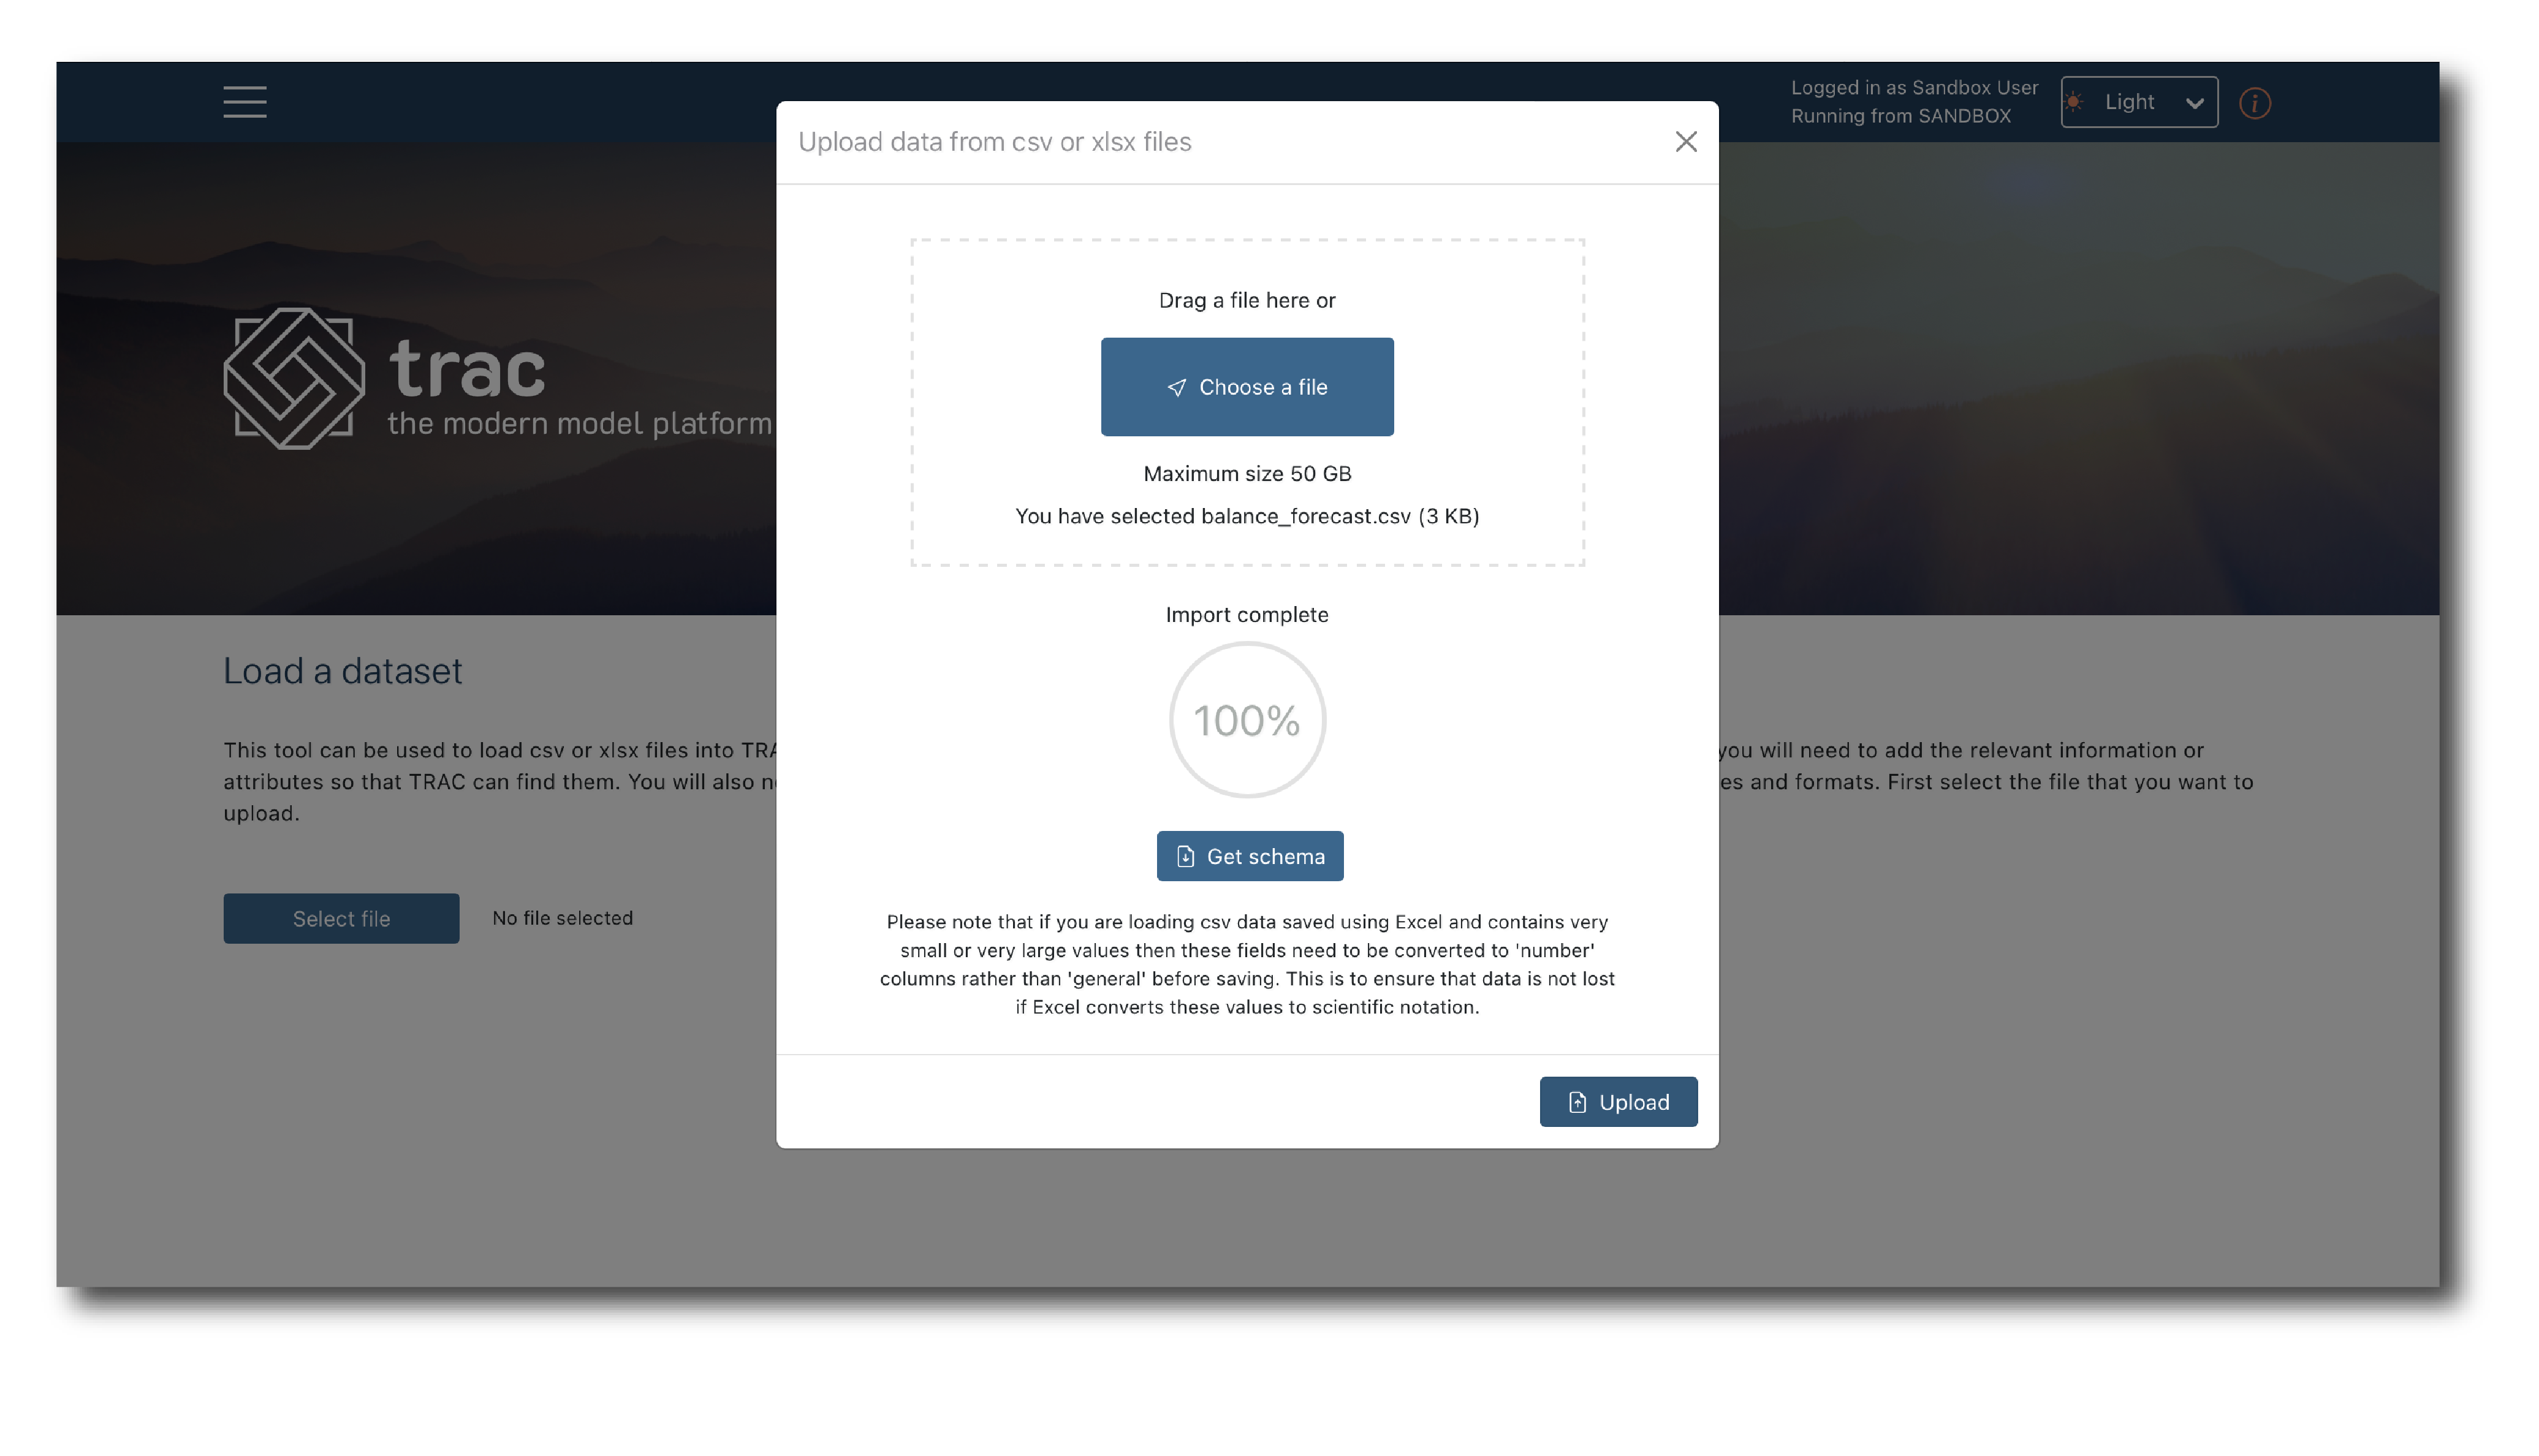
Select ‘Upload a data set’ from either the homepage or the main drop-down menu.

Note
Fairly large data files (multiple GB) can be loaded via the UI, in .xlsx or .csv format. In enterprise deployments, data can also be imported using an ImportData job.
Select a file, click ‘Get schema’ and once you see ‘Import 100% complete’ click ‘Upload’.
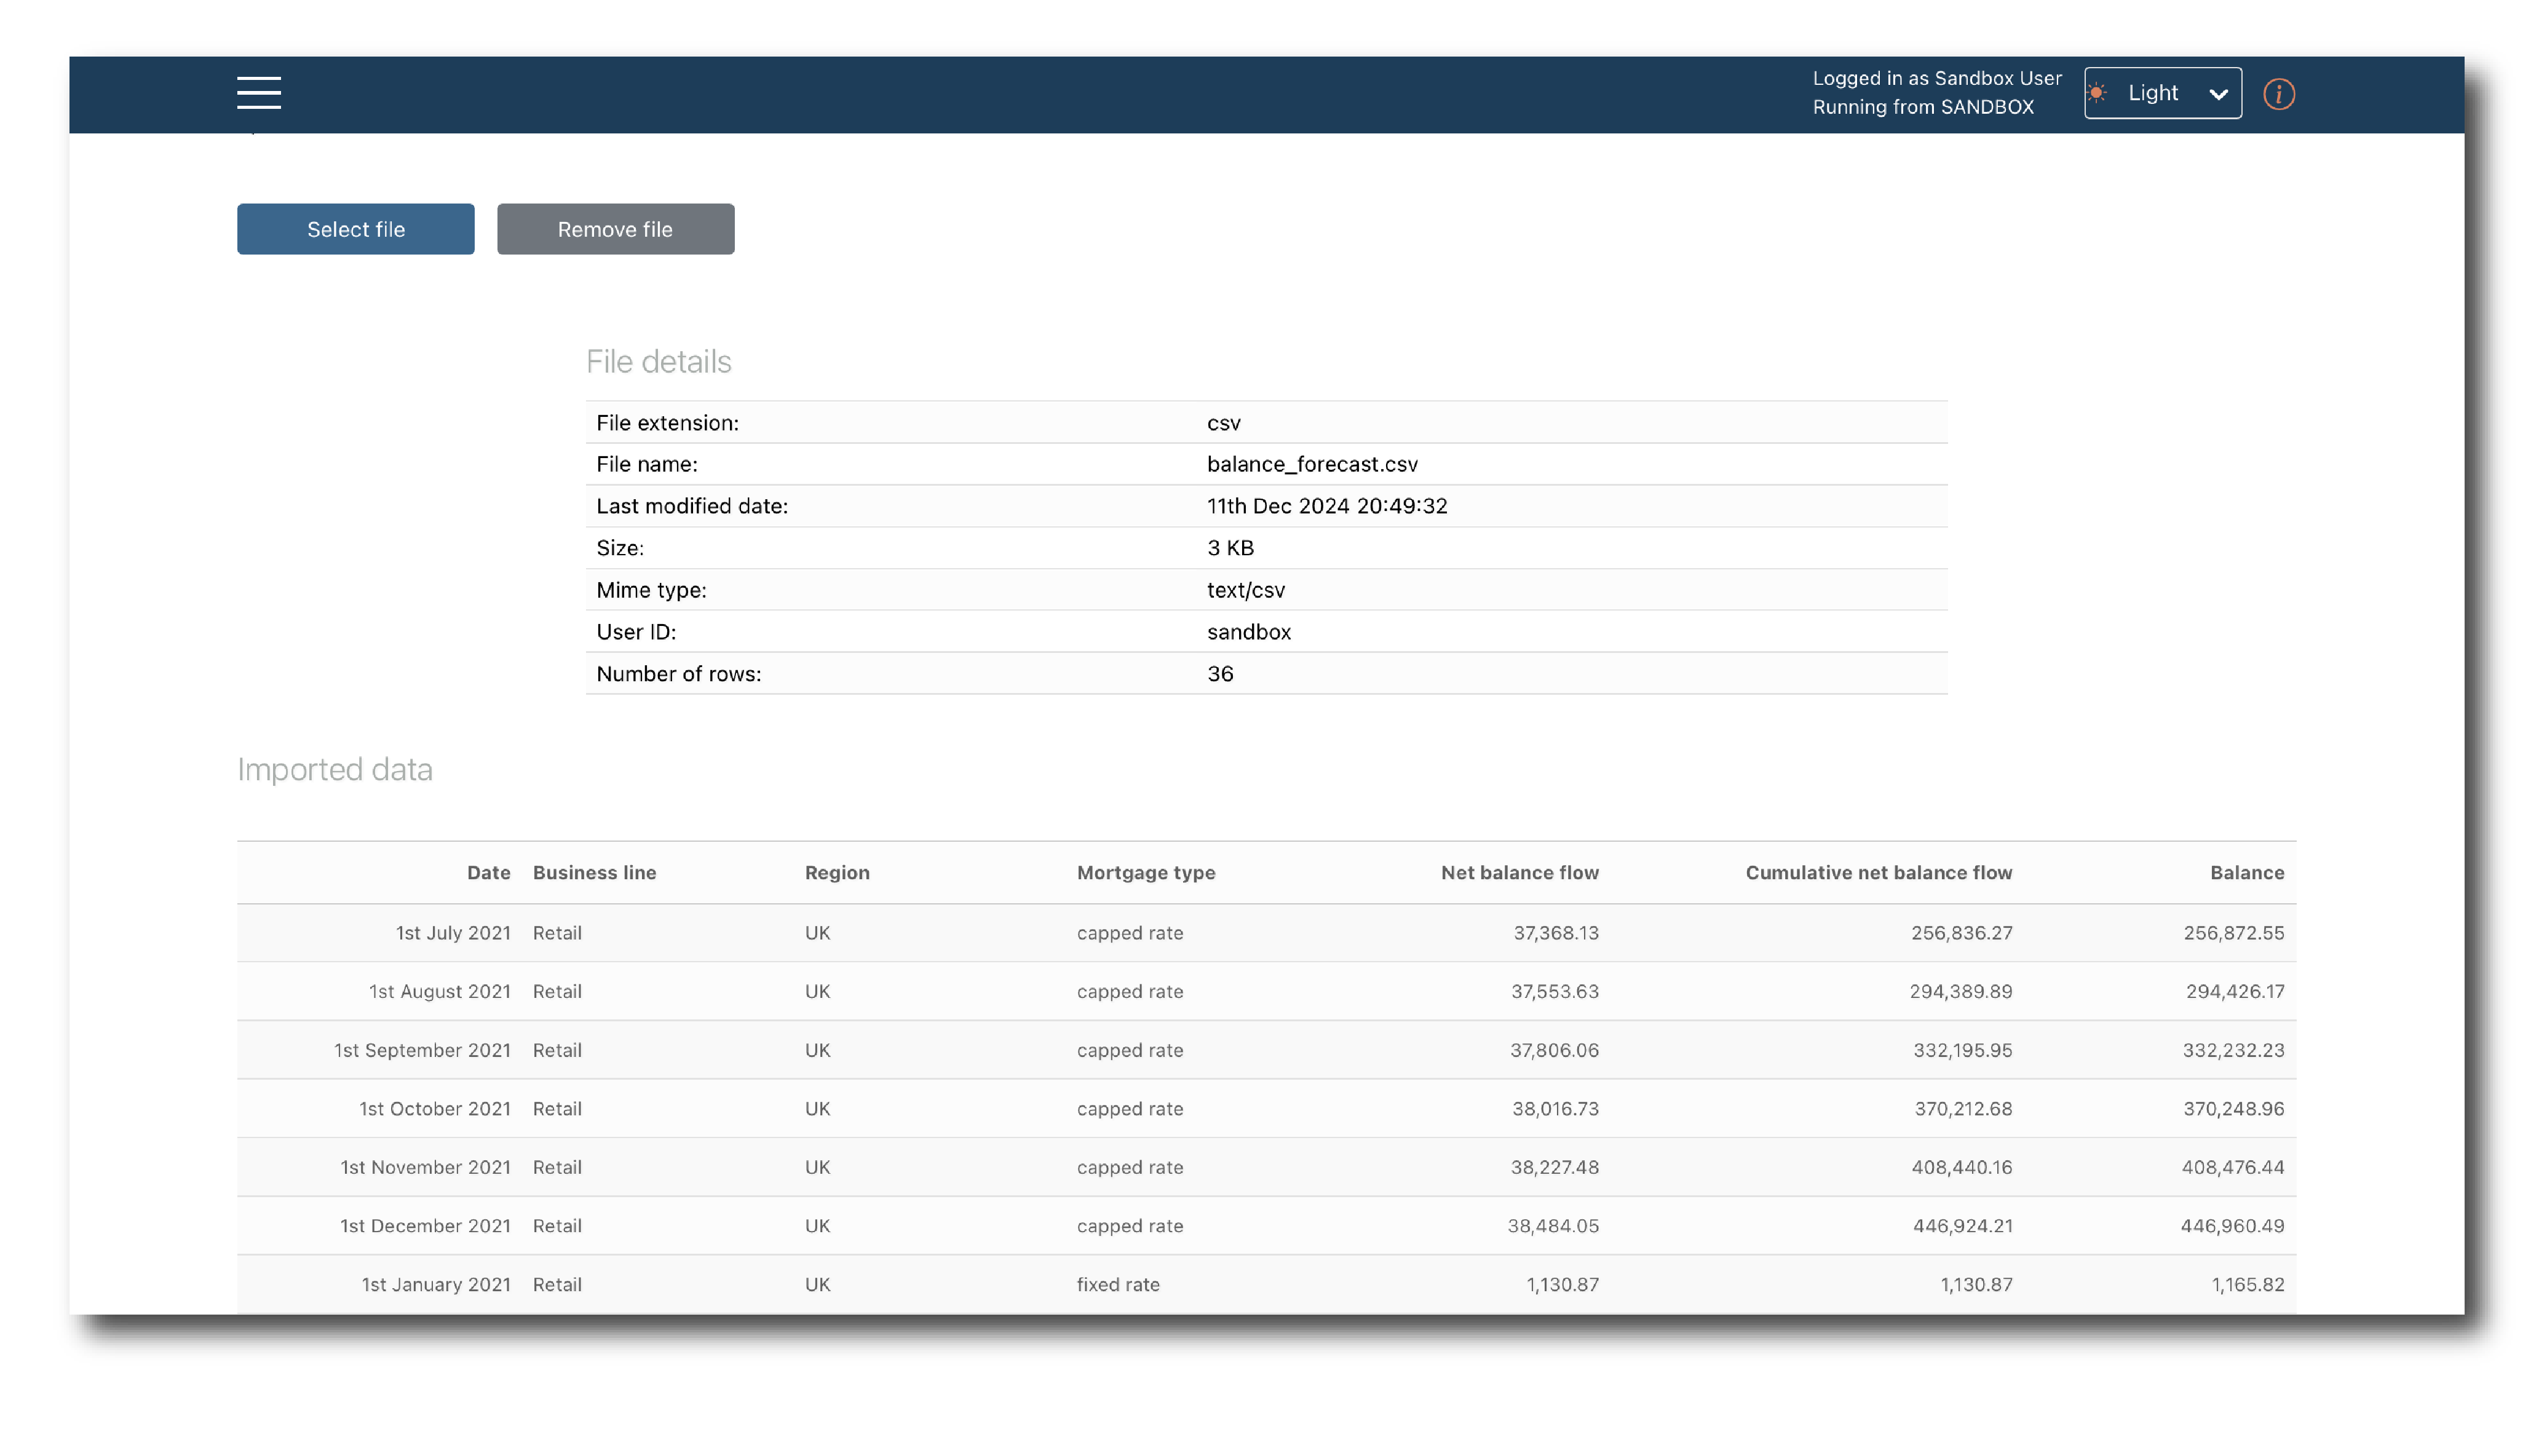
The file has been selected but to complete the import you need to review and label it. The top of the page shows the system generated tags (‘File details’) and previews the first 100 rows (‘Imported data’).
Lower down you confirm the schema. The first tab gives the option to directly edit the inferred schema.
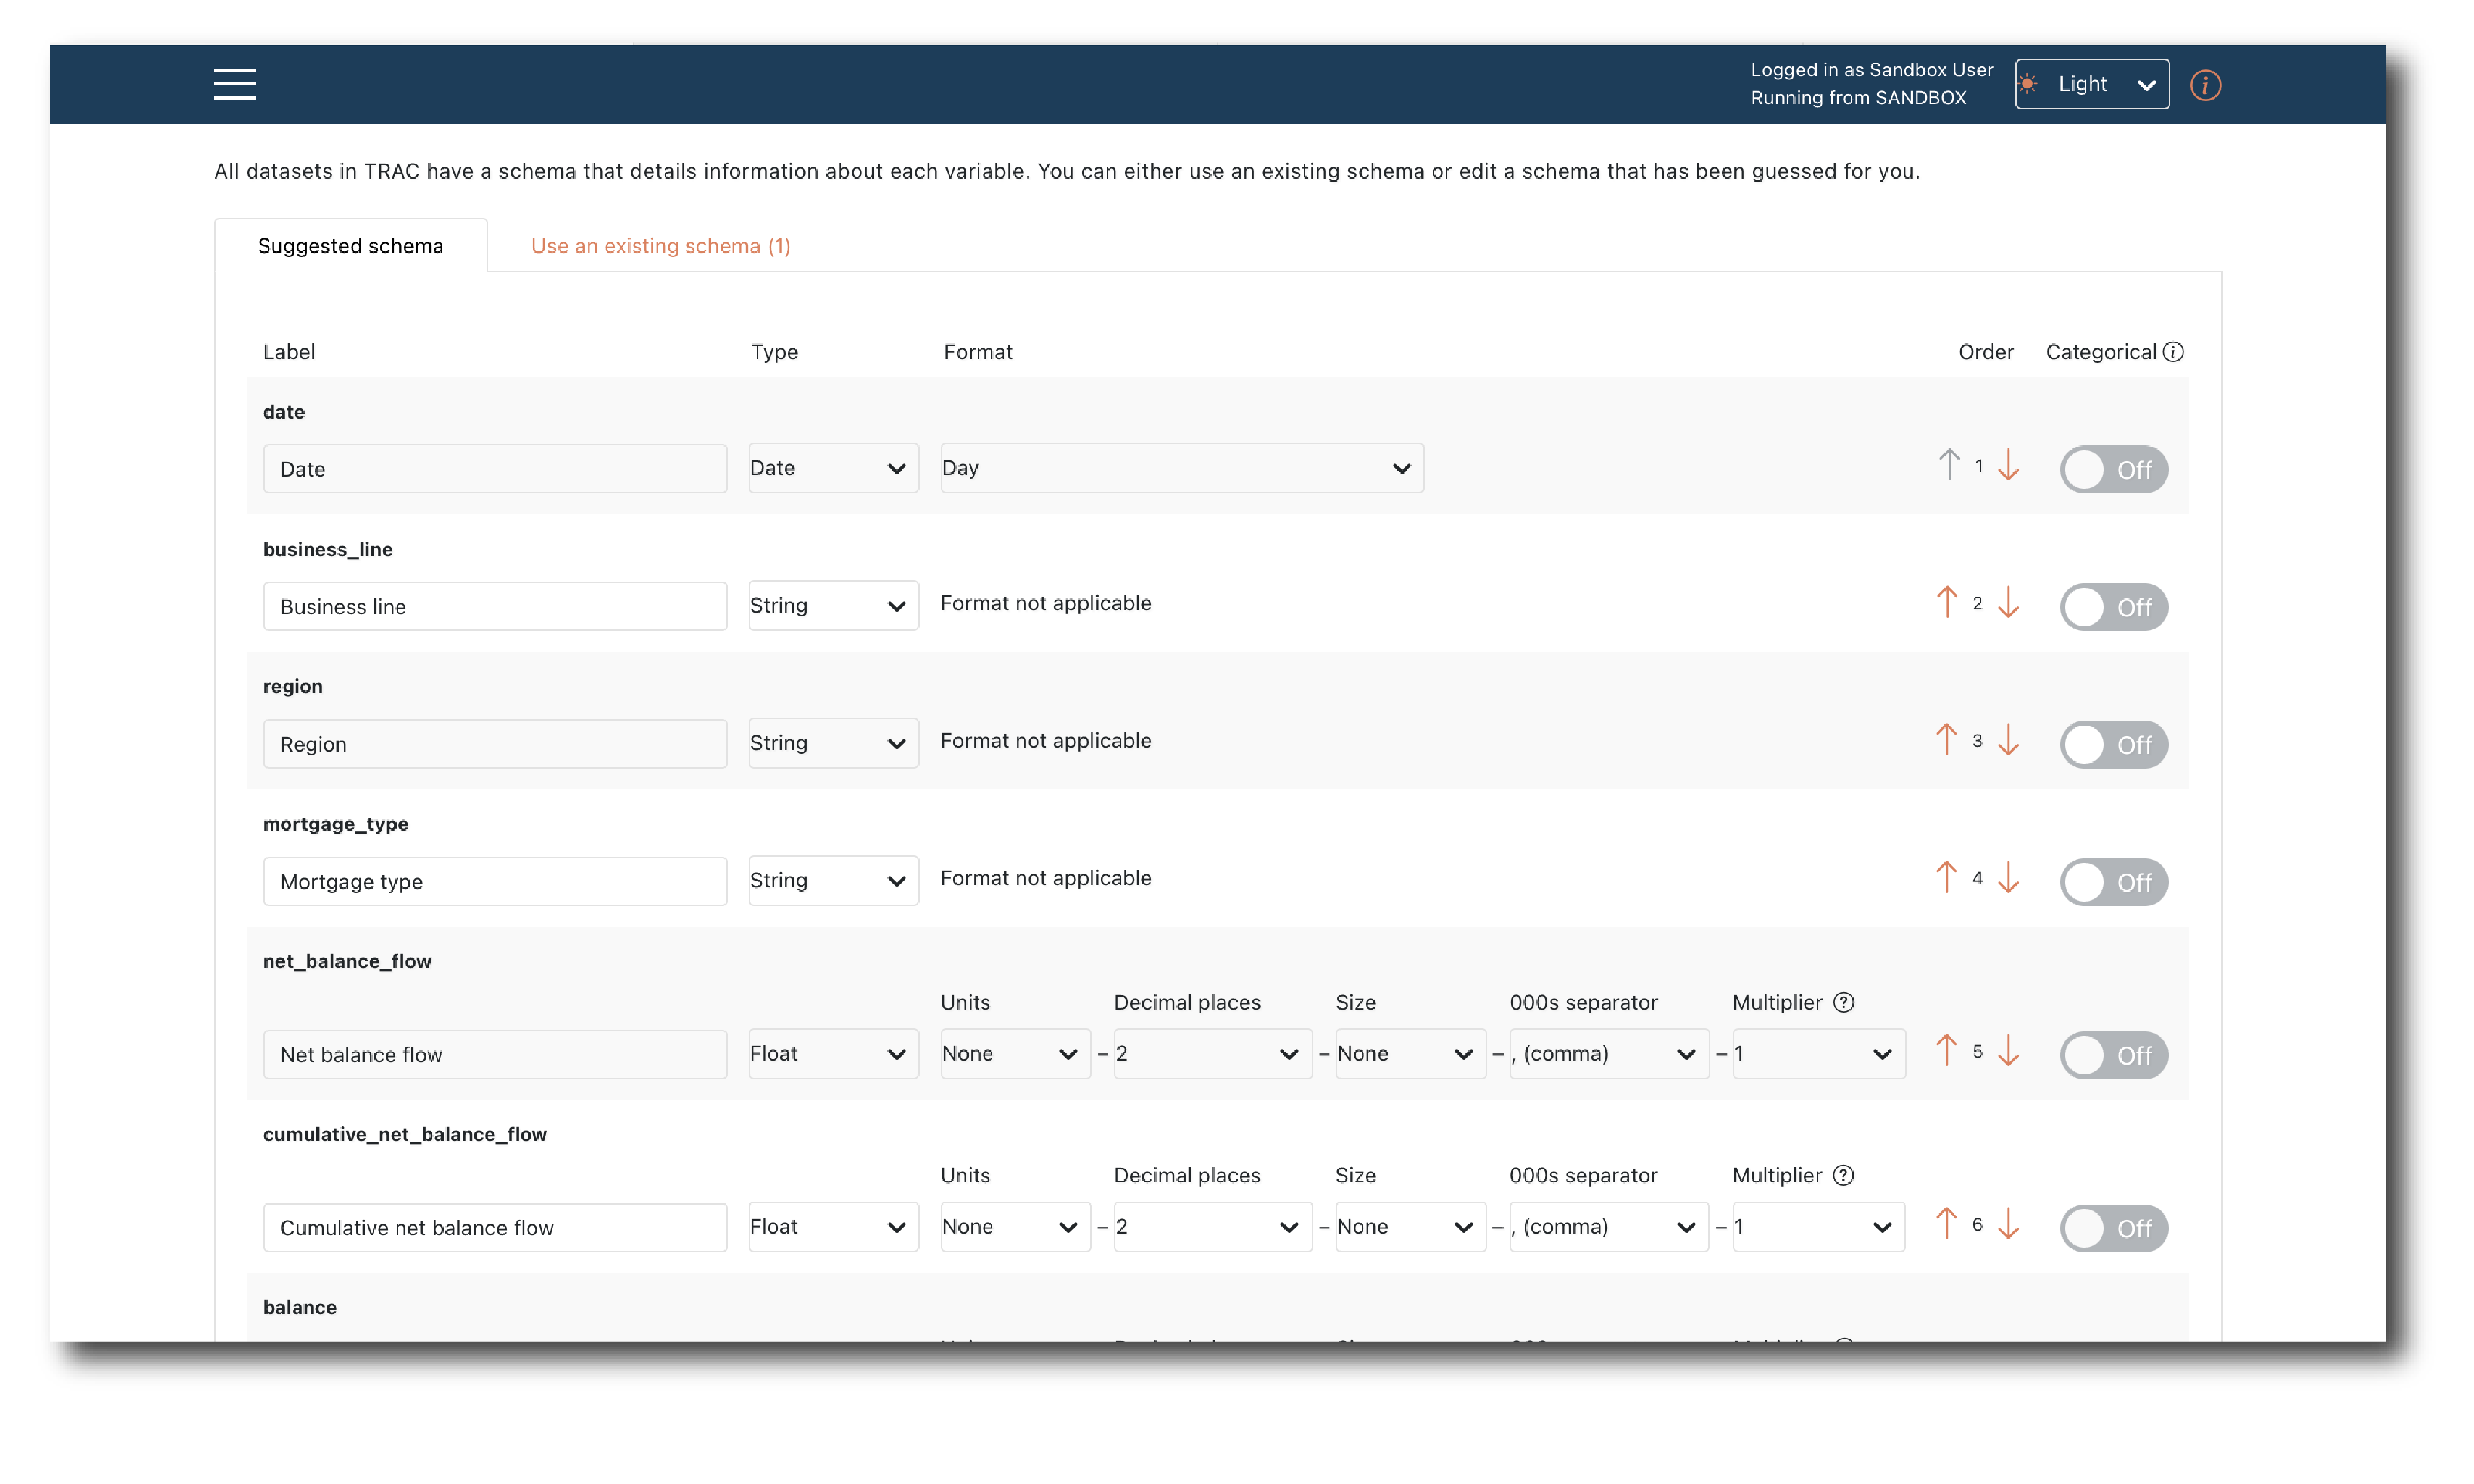
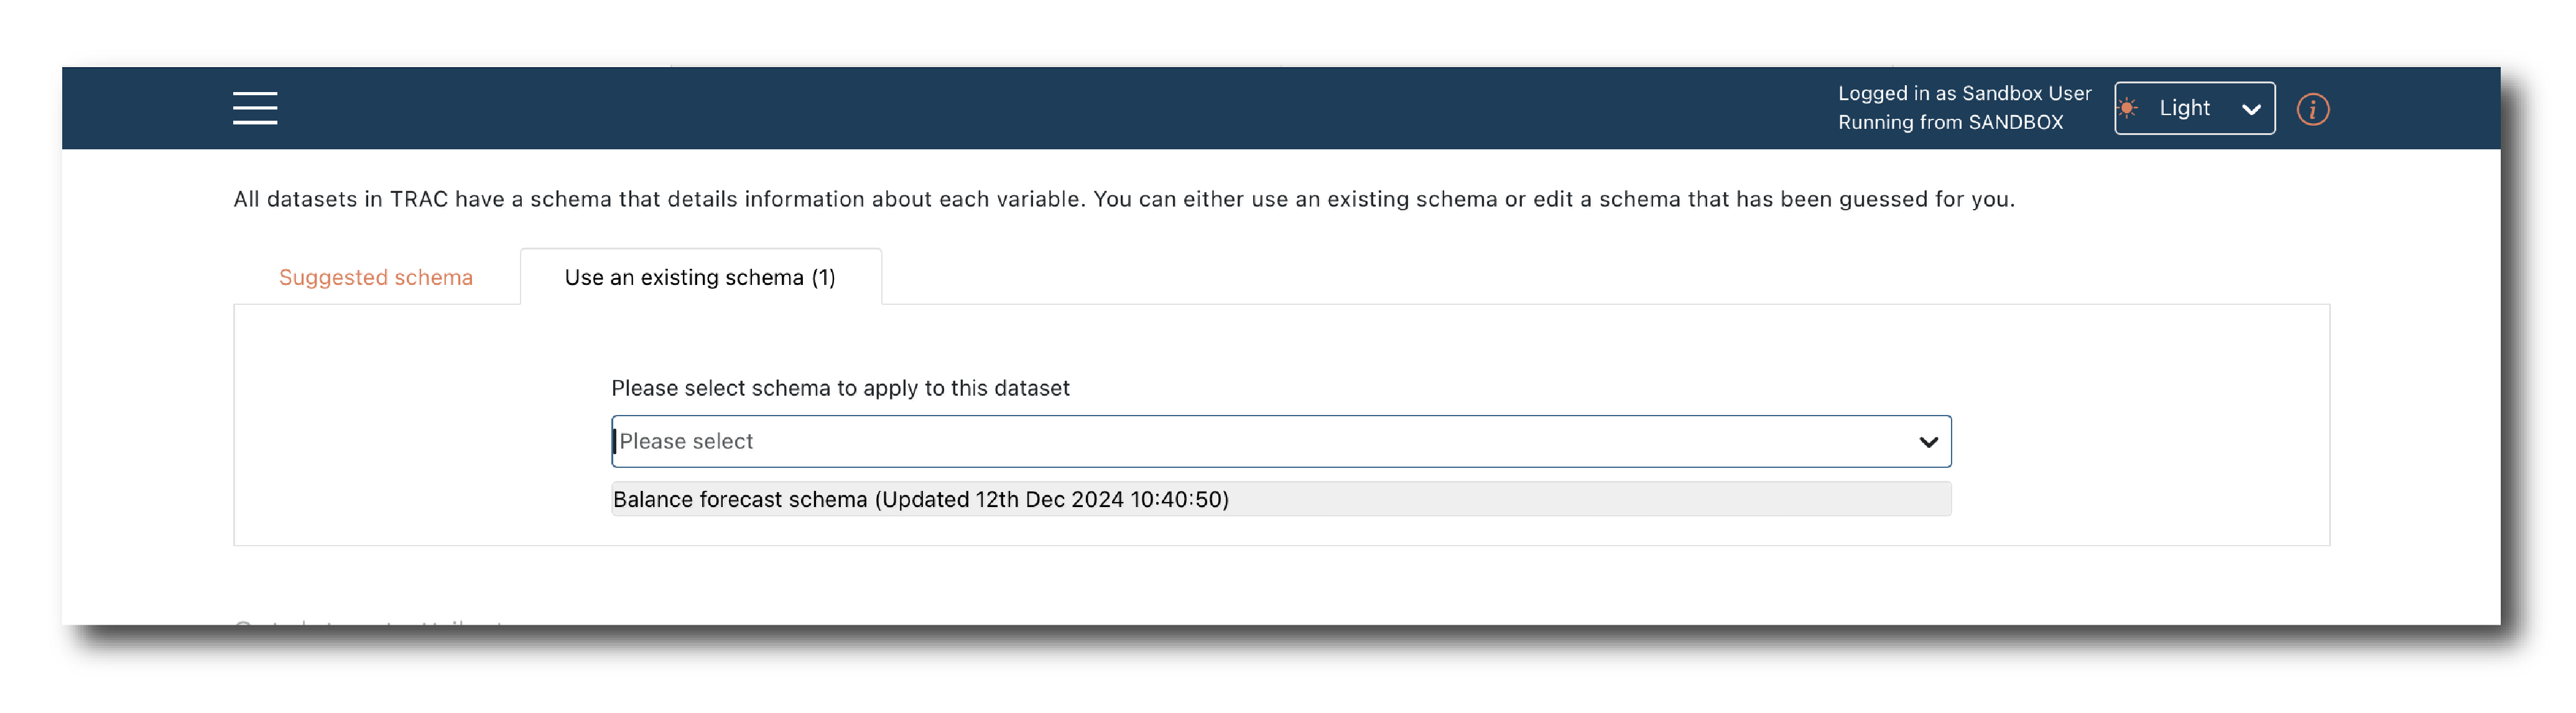
On the second tab you can apply a Schema object rather than using the inferred schema.
Note
For large, complex data sets, it’s better to use a Schema object because the inferred schema only considers the first 100 rows and the inference isn’t foolproof.
You tag the data (Name, Key, Description, Search Y/N) to complete the Upload.
Once complete, a message will appear showing the new object ID, which can be used to Search for an object.
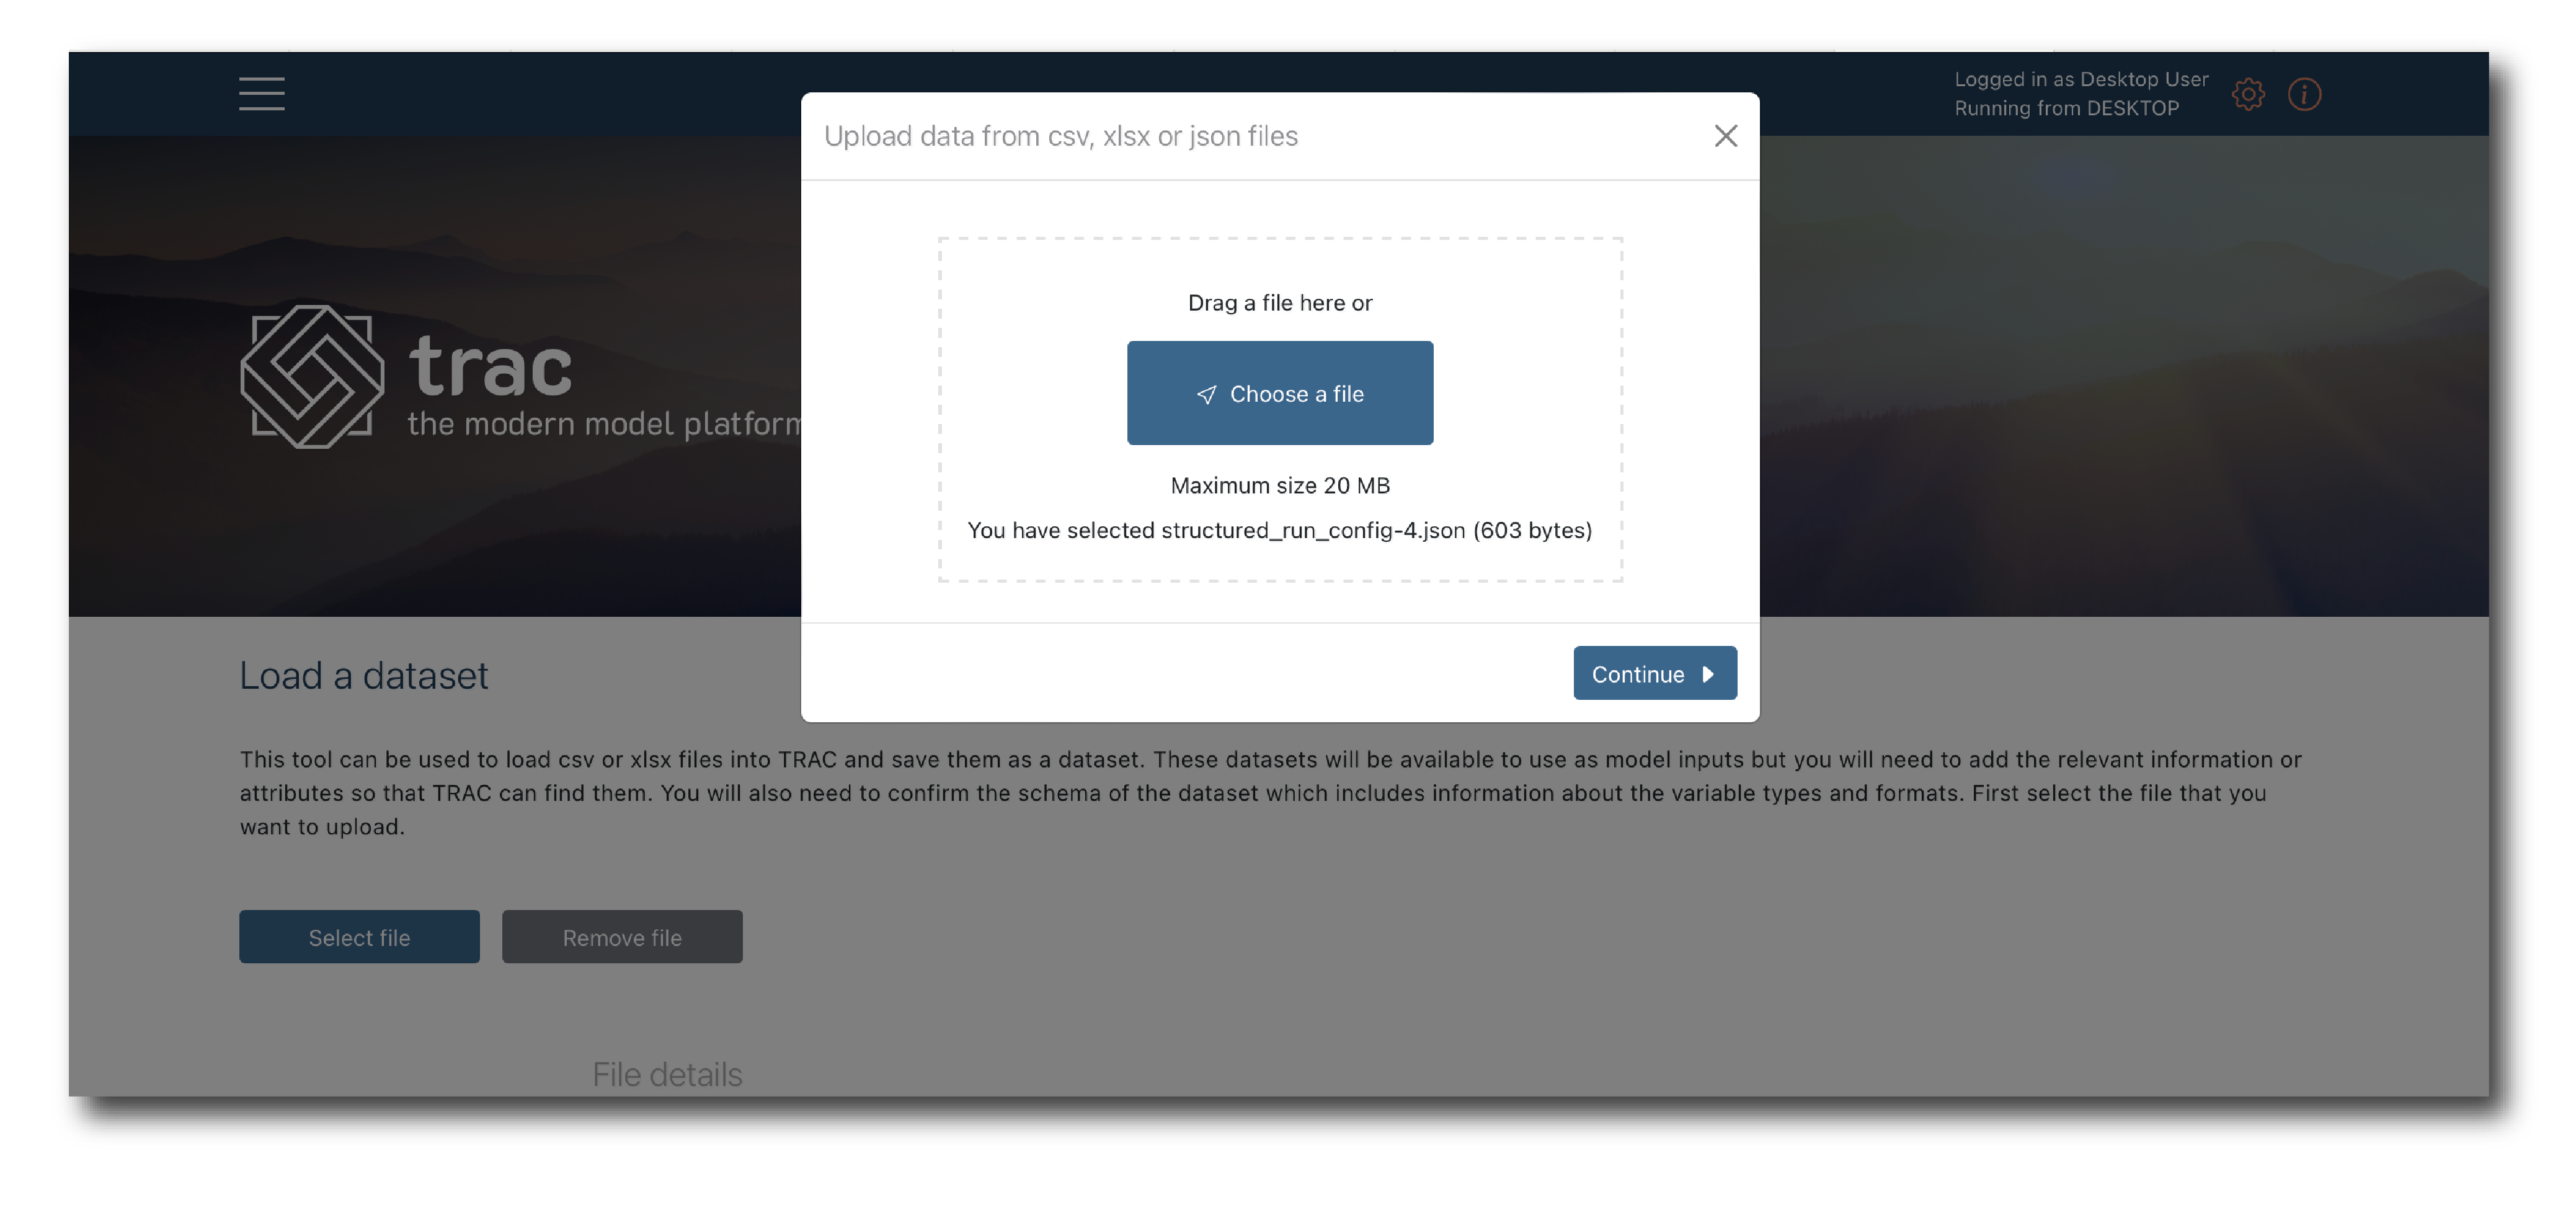
Upload data (structured)
Uploading structured data is similar to uploading tabular data, but trac cannot infer a schema from the imported file, so first create a schema.
Select the json file containing the structured data you want to import, then click continue.
Select the schema object which matches the data you want to upload.
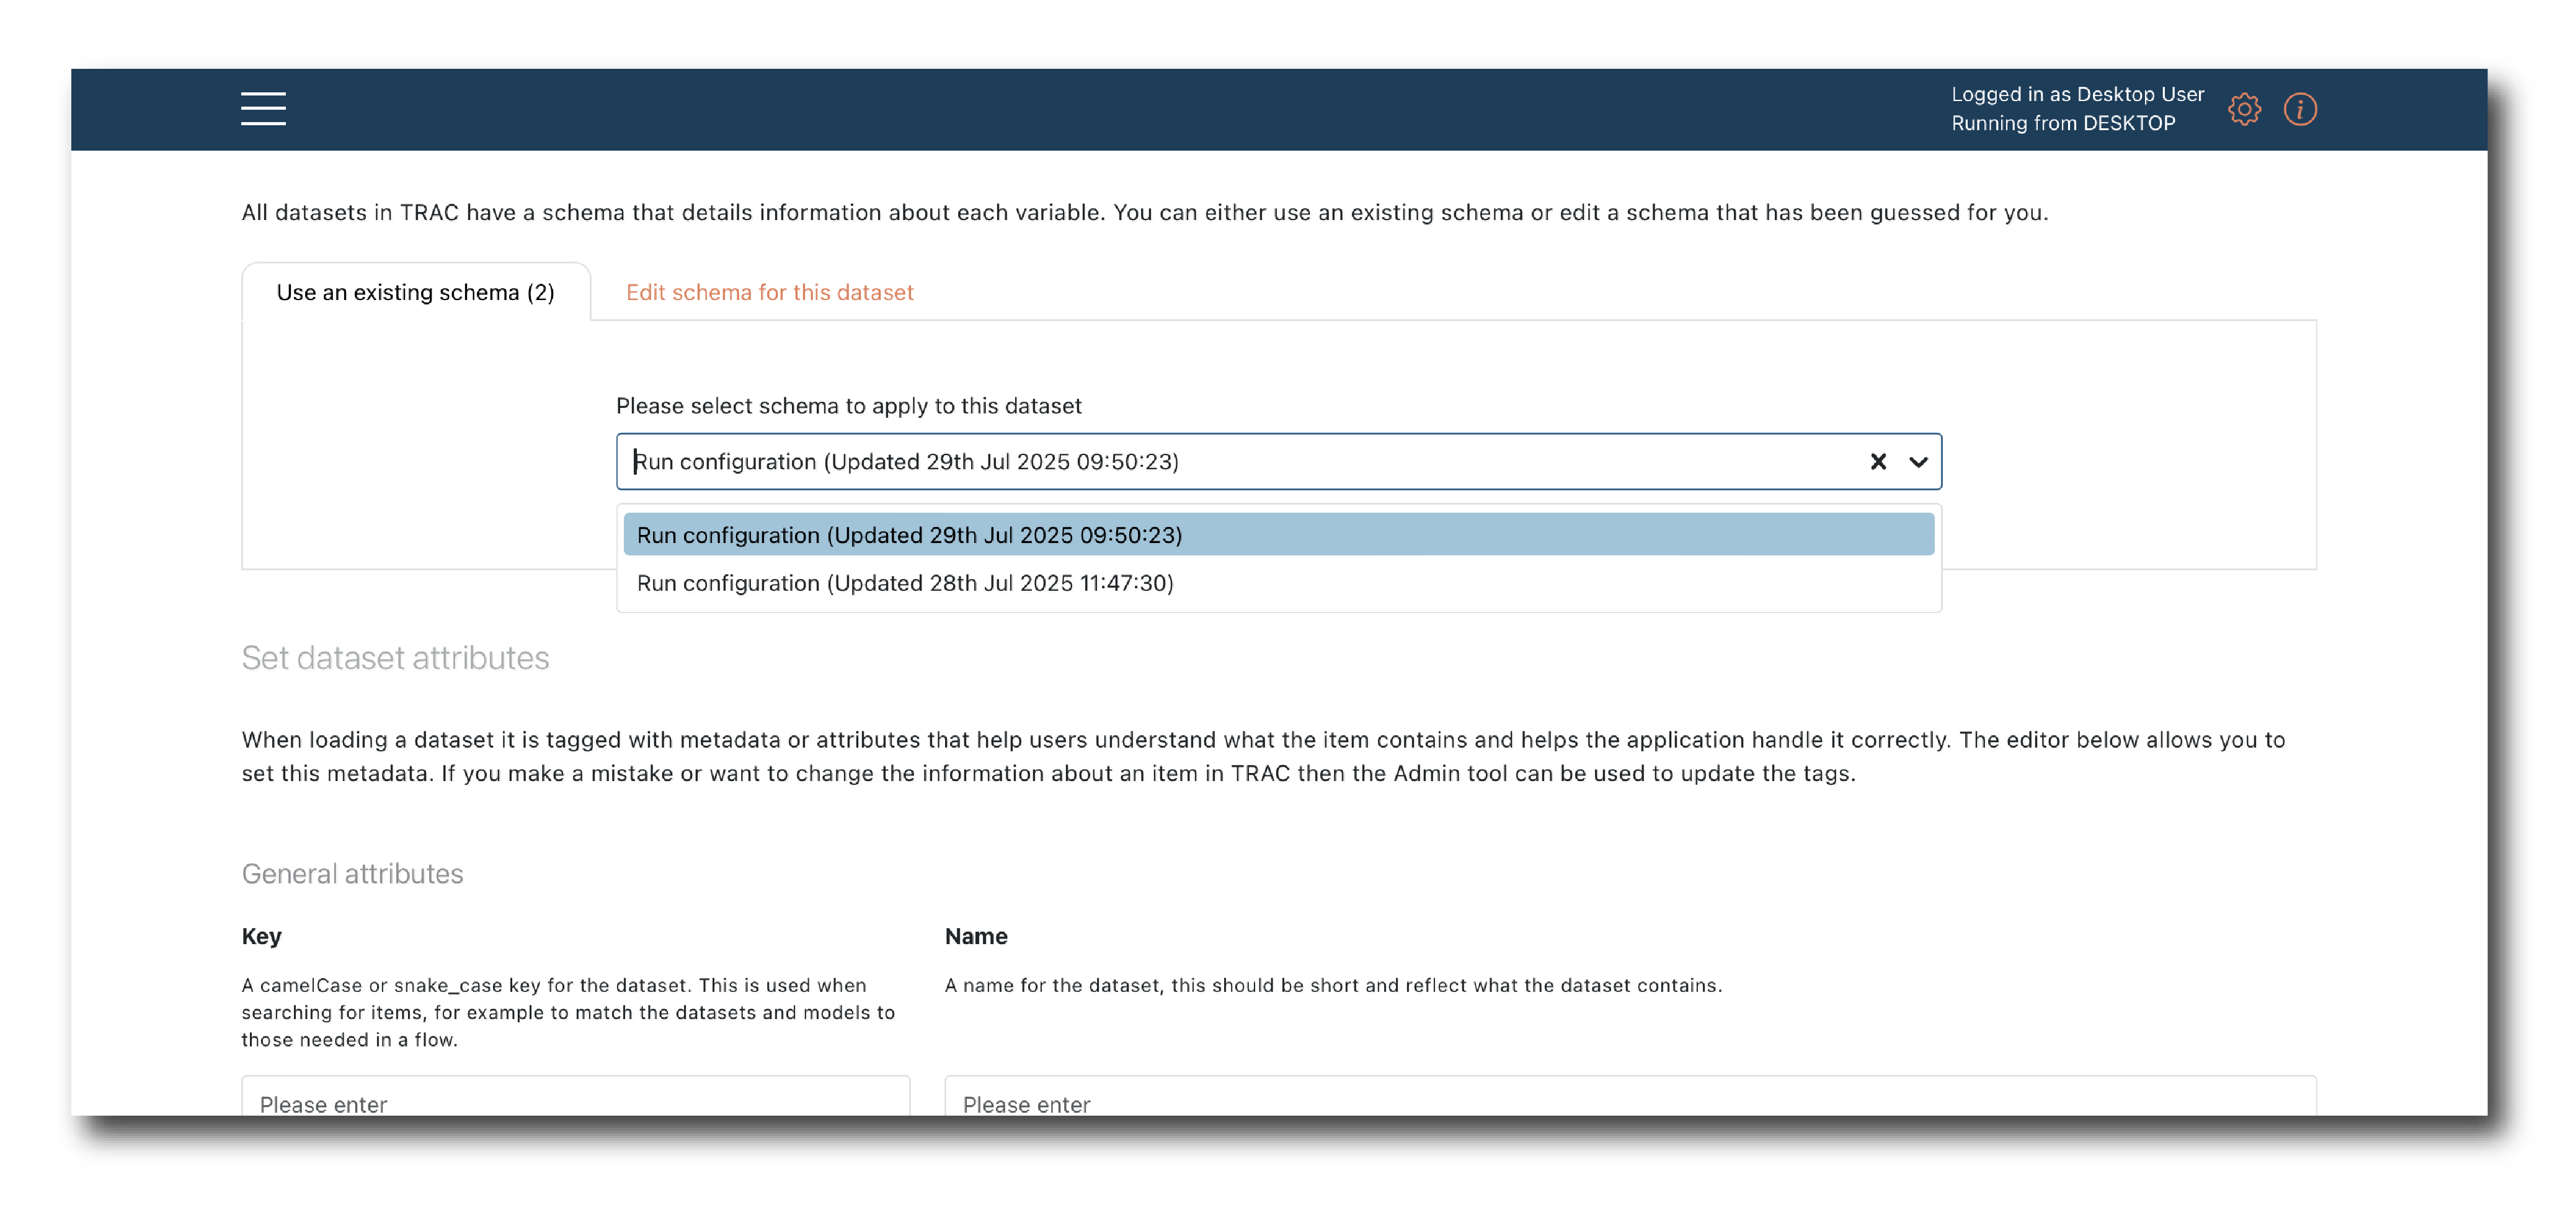
Now name and tag the object and click ‘Upload dataset’.
Upload a model
Models are imported from a repository.
First select the repository from the drop-down, then click ‘Authorize’. You will be asked to provide credentials (see View & manage tenant resources).
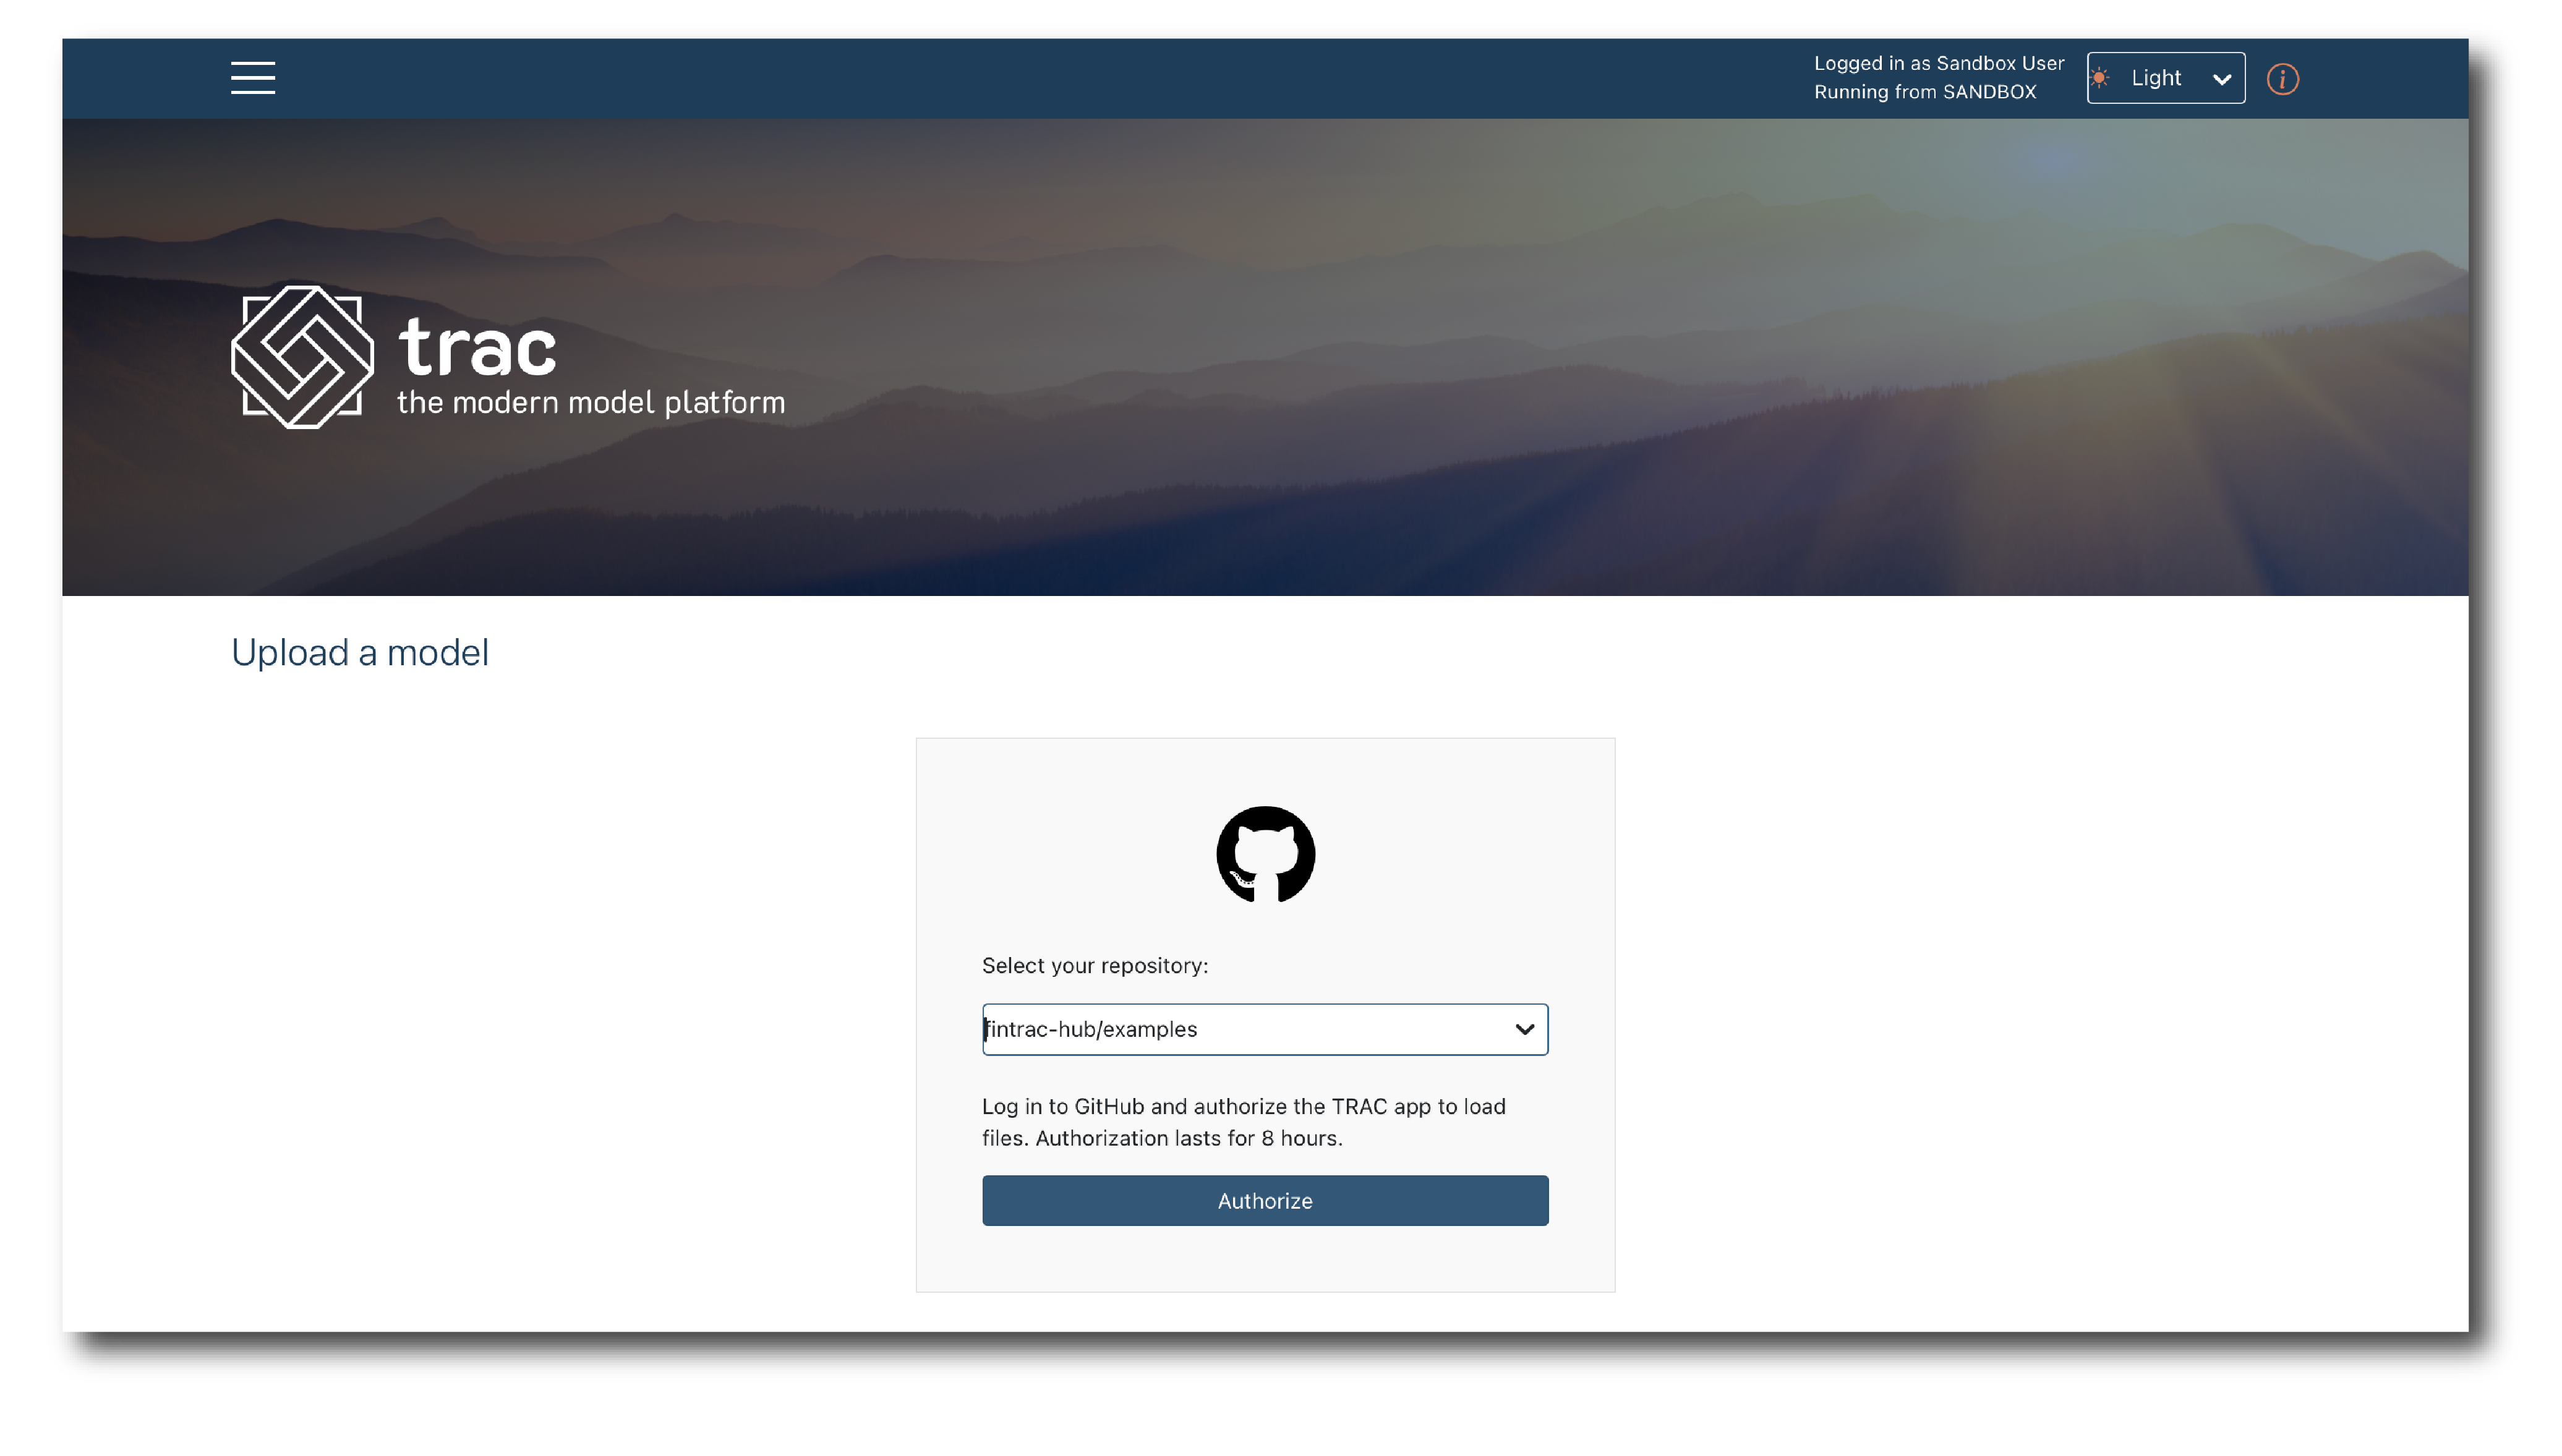
Note
If a repository is missing there may be an issue with resources set-up (View & manage tenant resources).
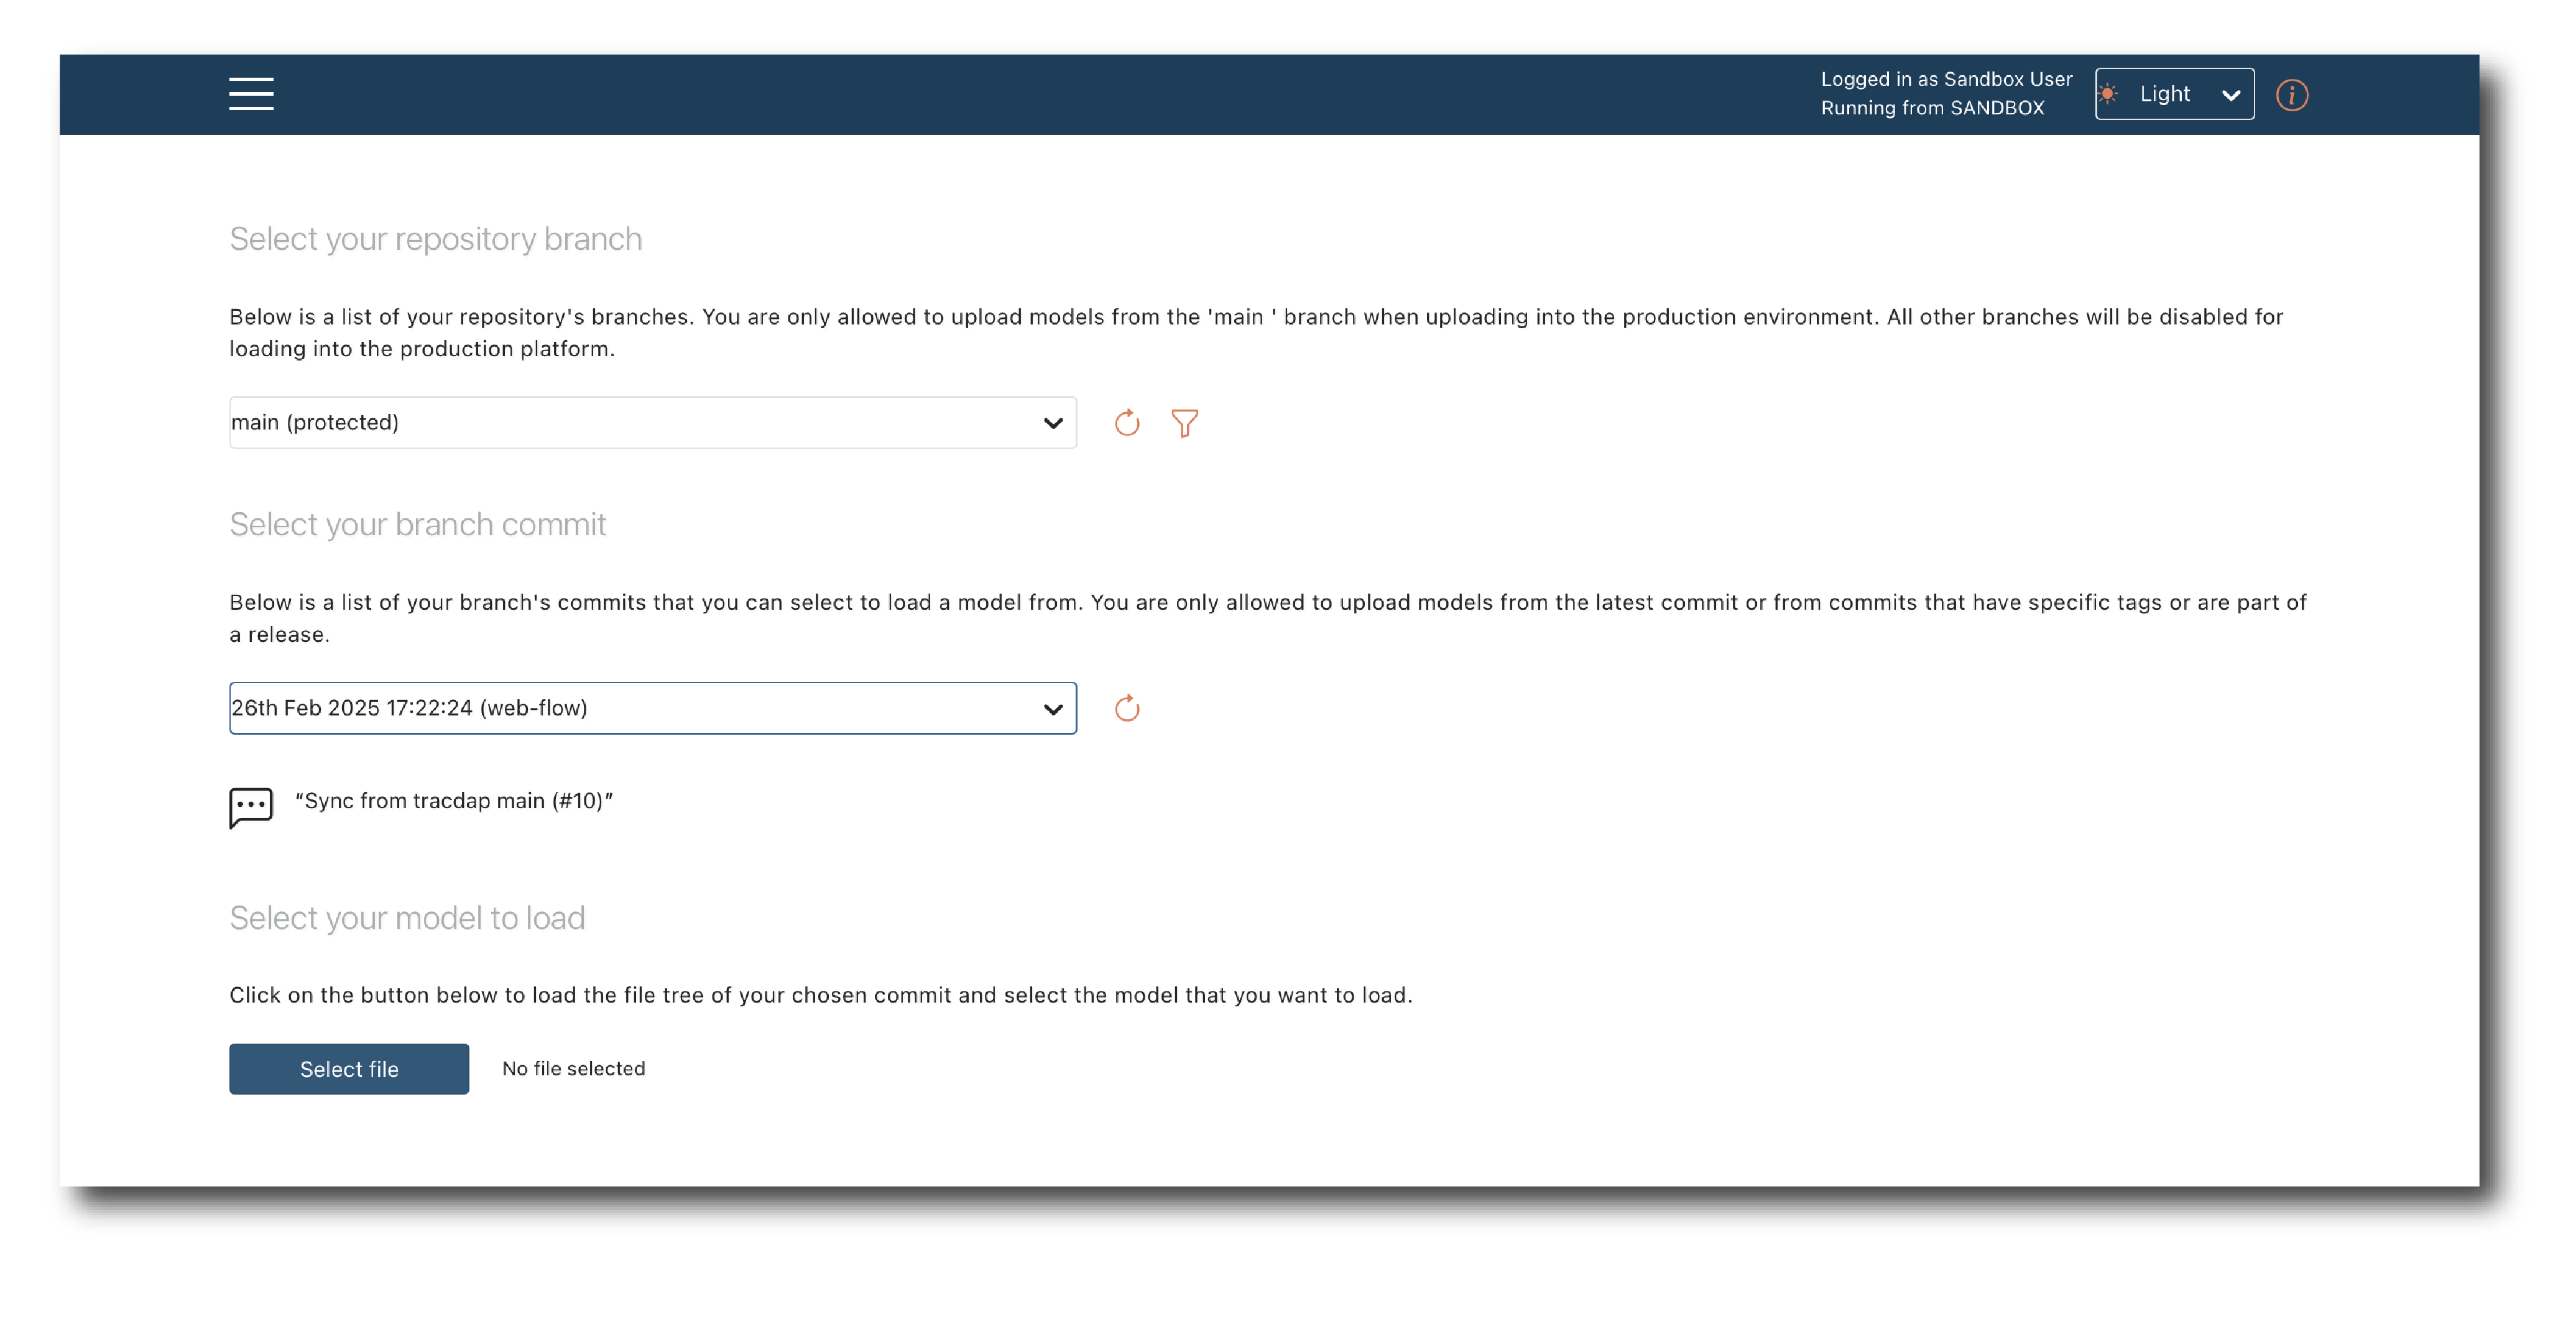
Once authorized, select the branch and commit and then click ‘Select file’, to open a pop-up showing the file structure and available models.
Models are uploaded one at a time. Pick a file and hit ‘Save’.
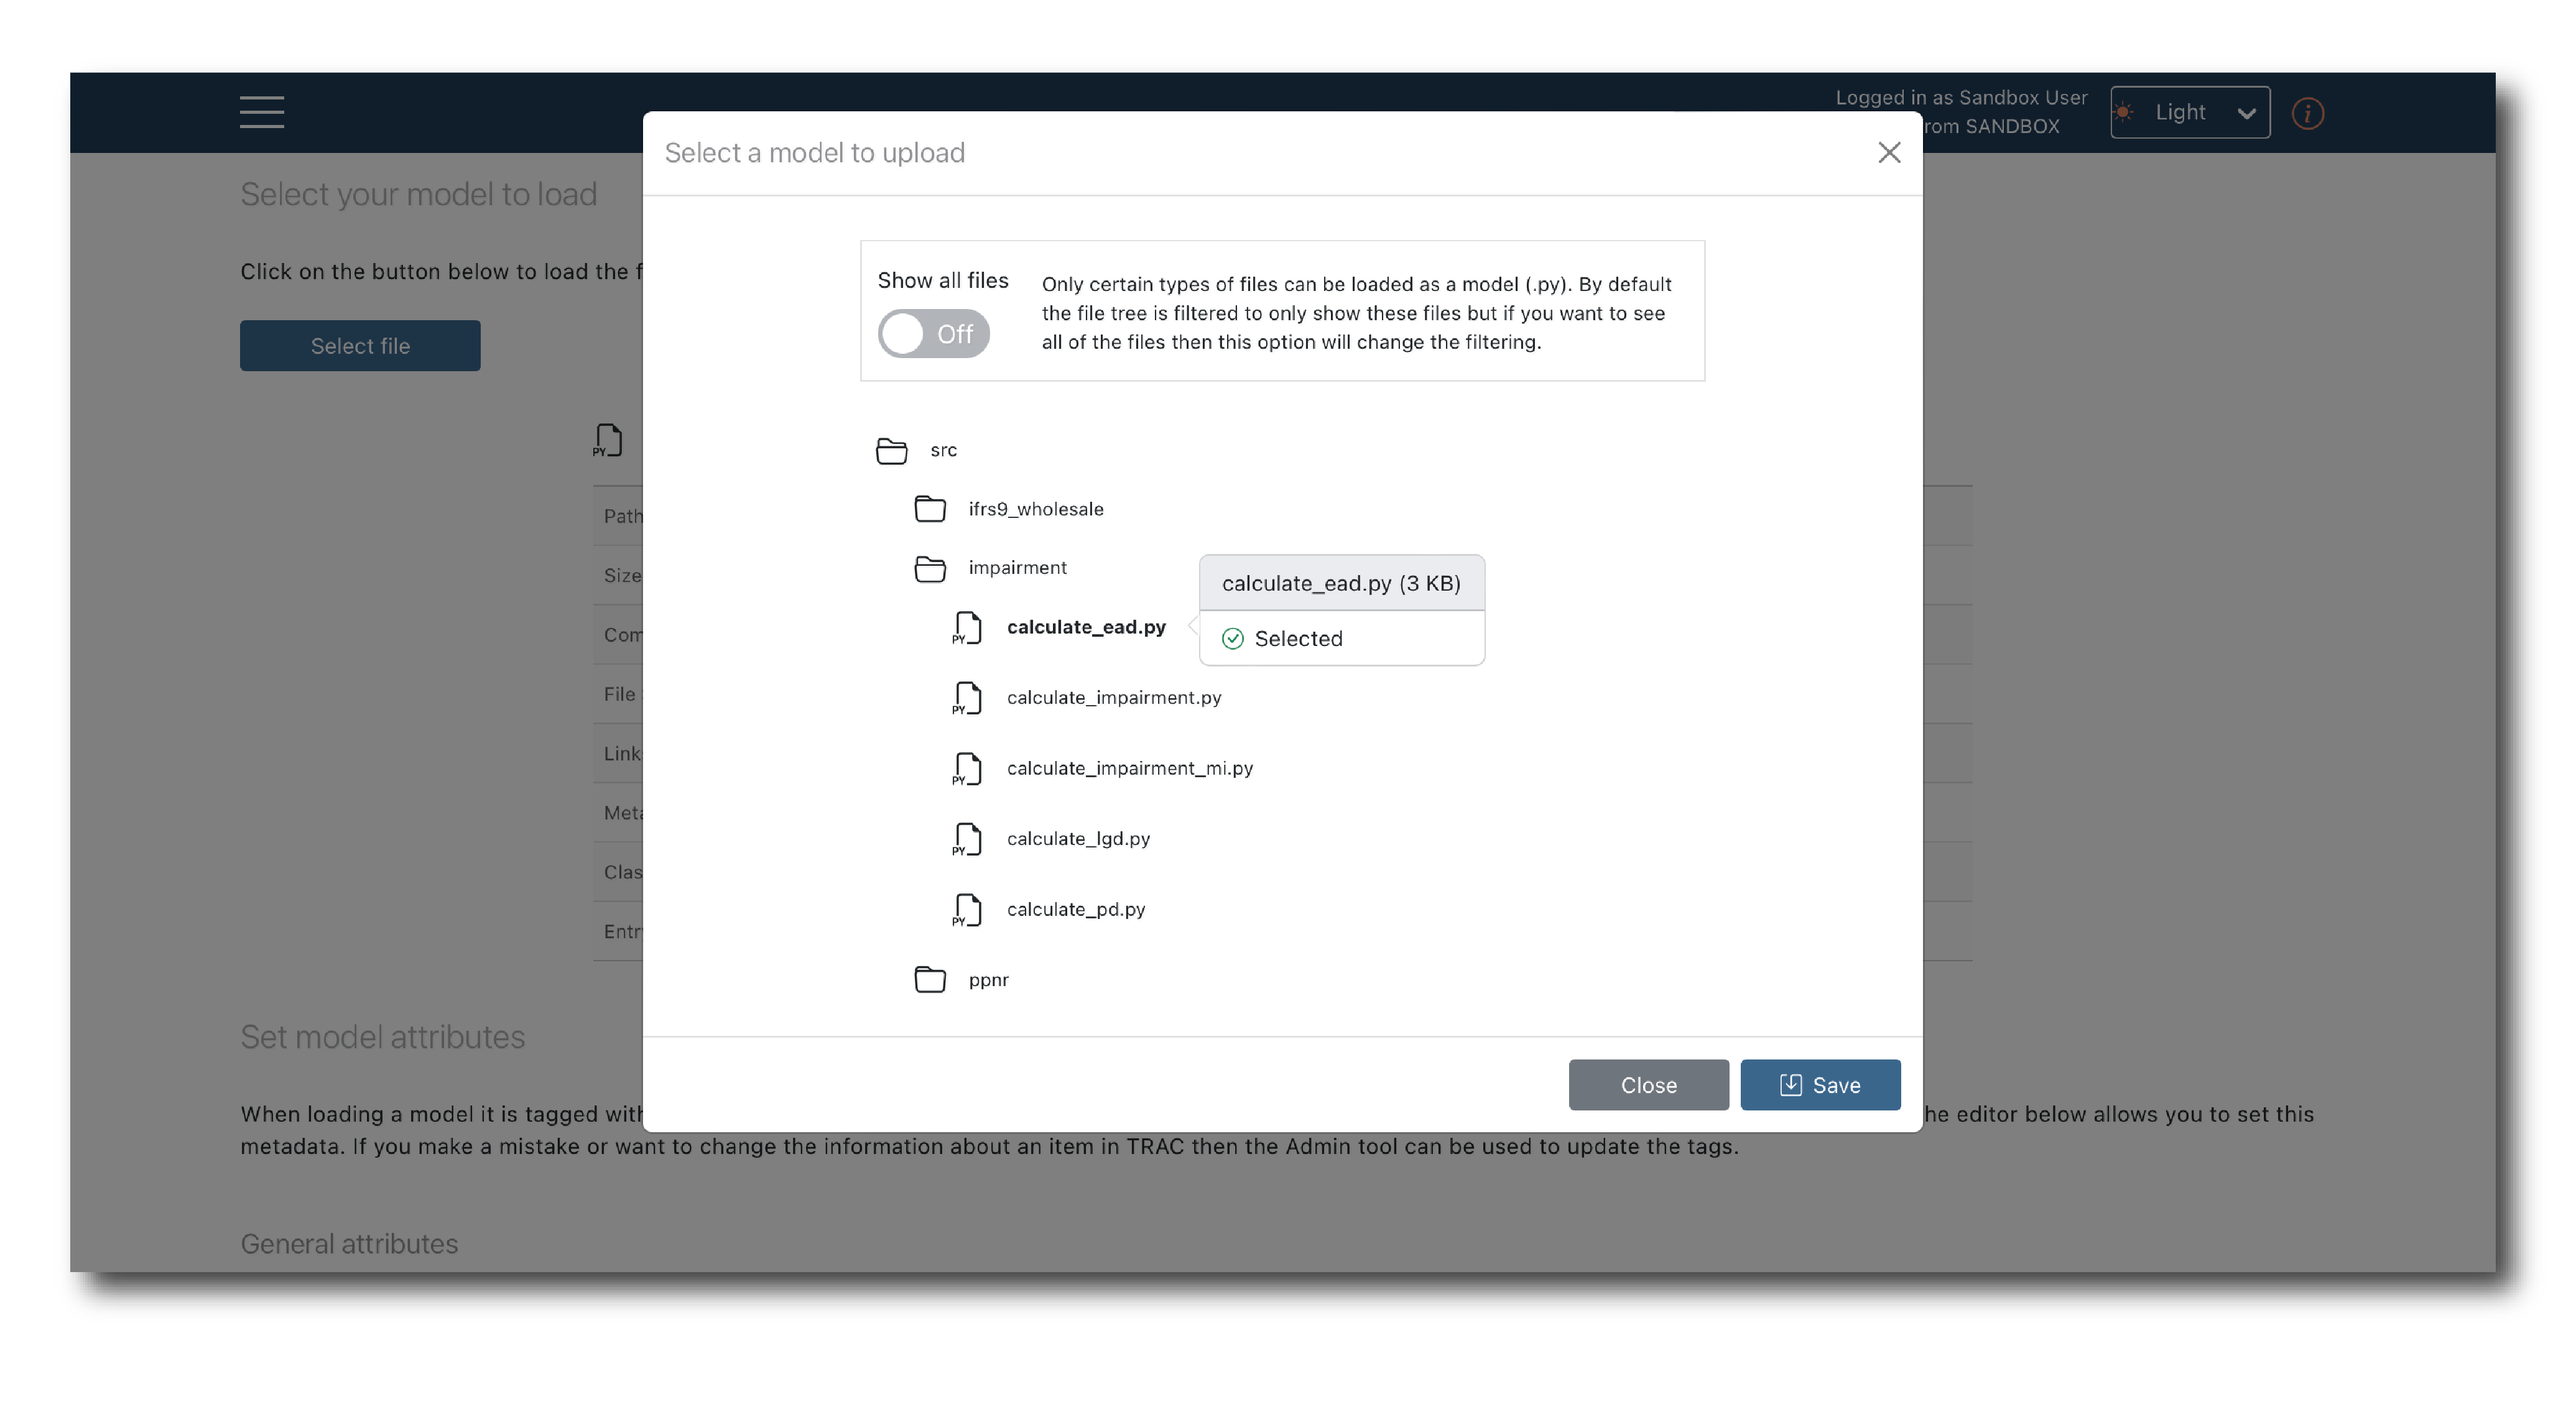
The pop-up should now close with your target model selected and some system generated tags displayed.
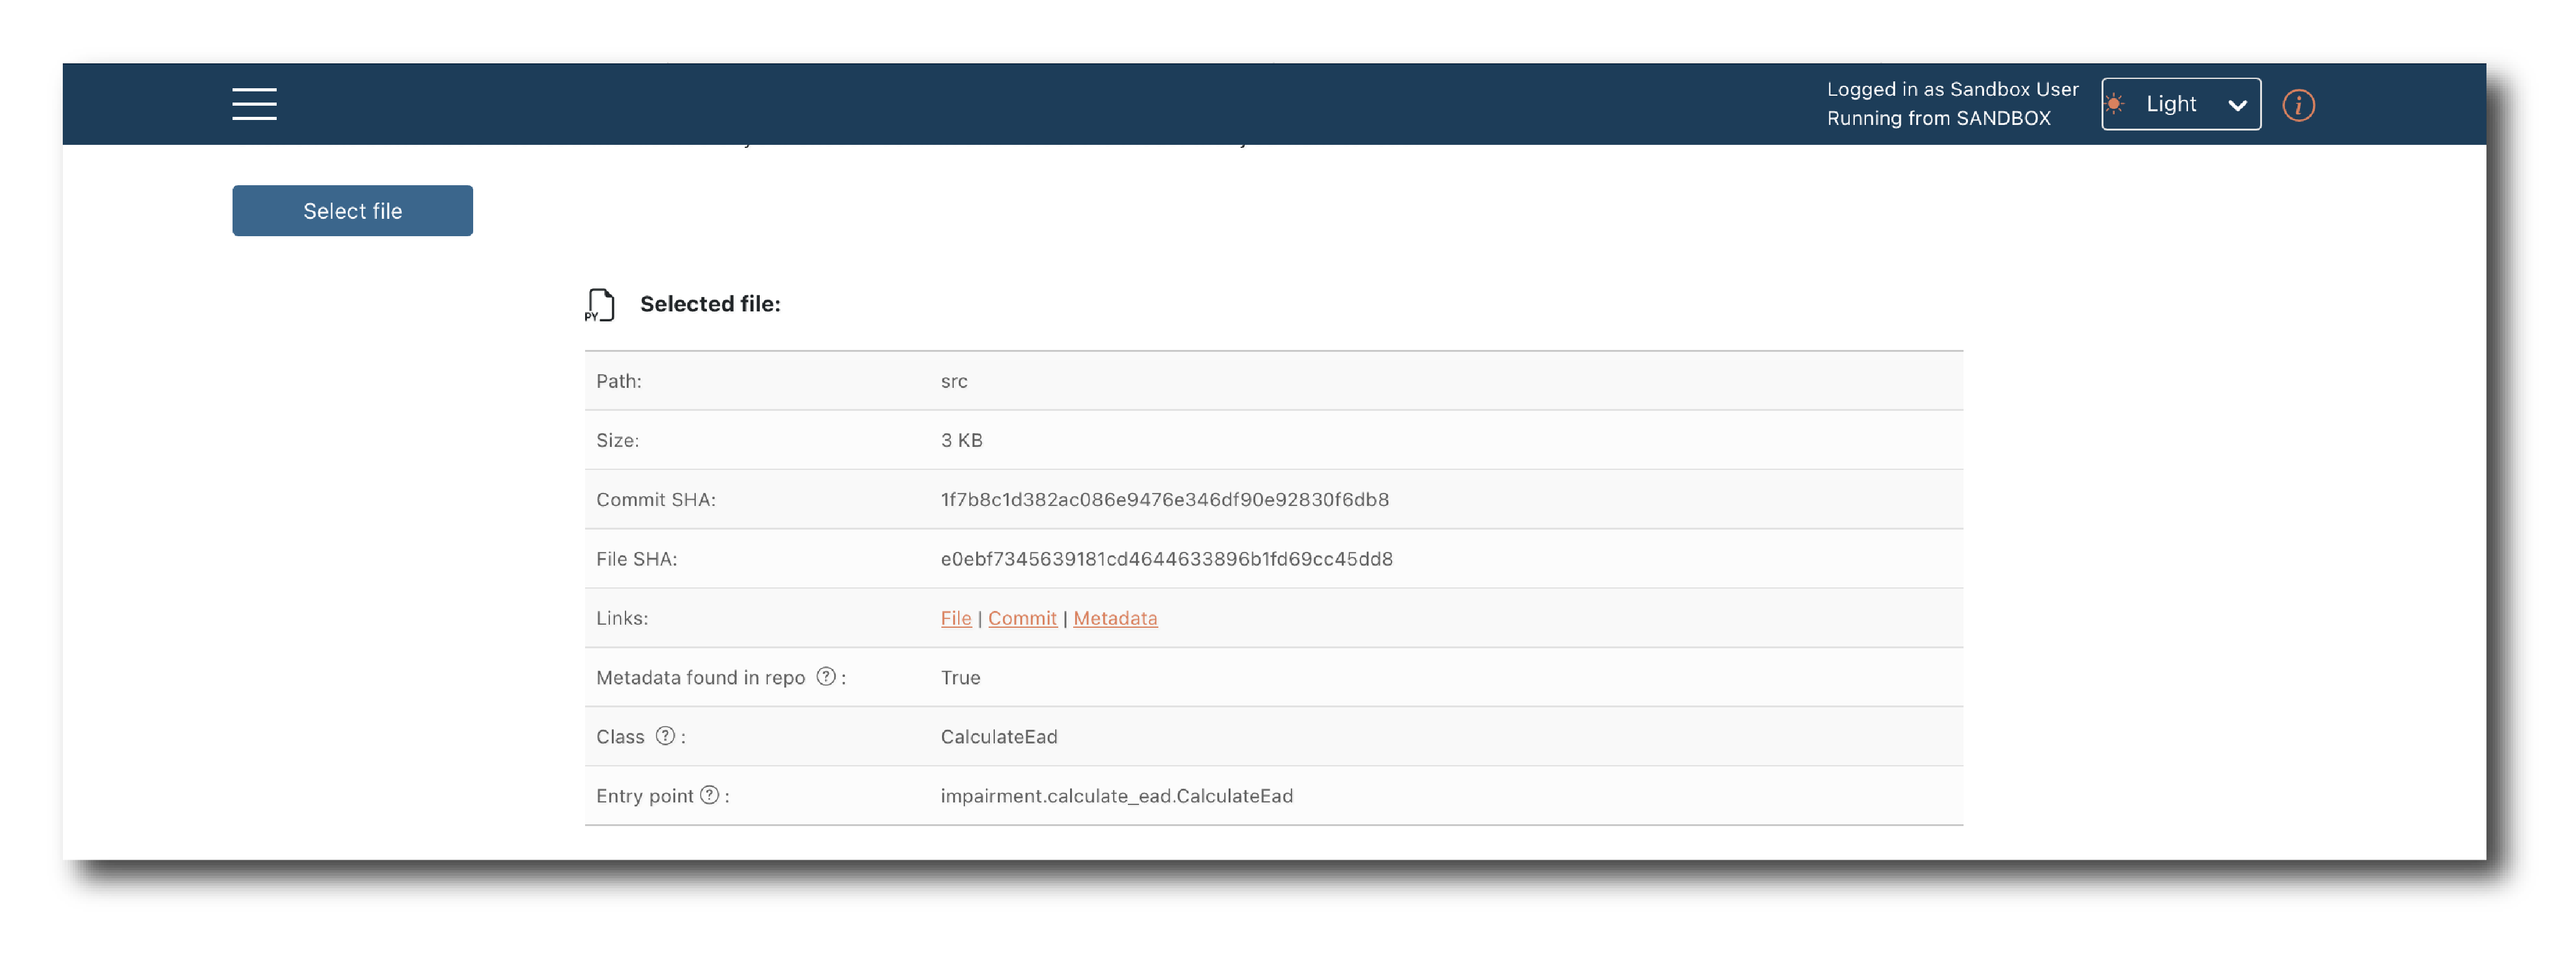
To complete the upload, confirm the general attributes and click ‘Upload model’
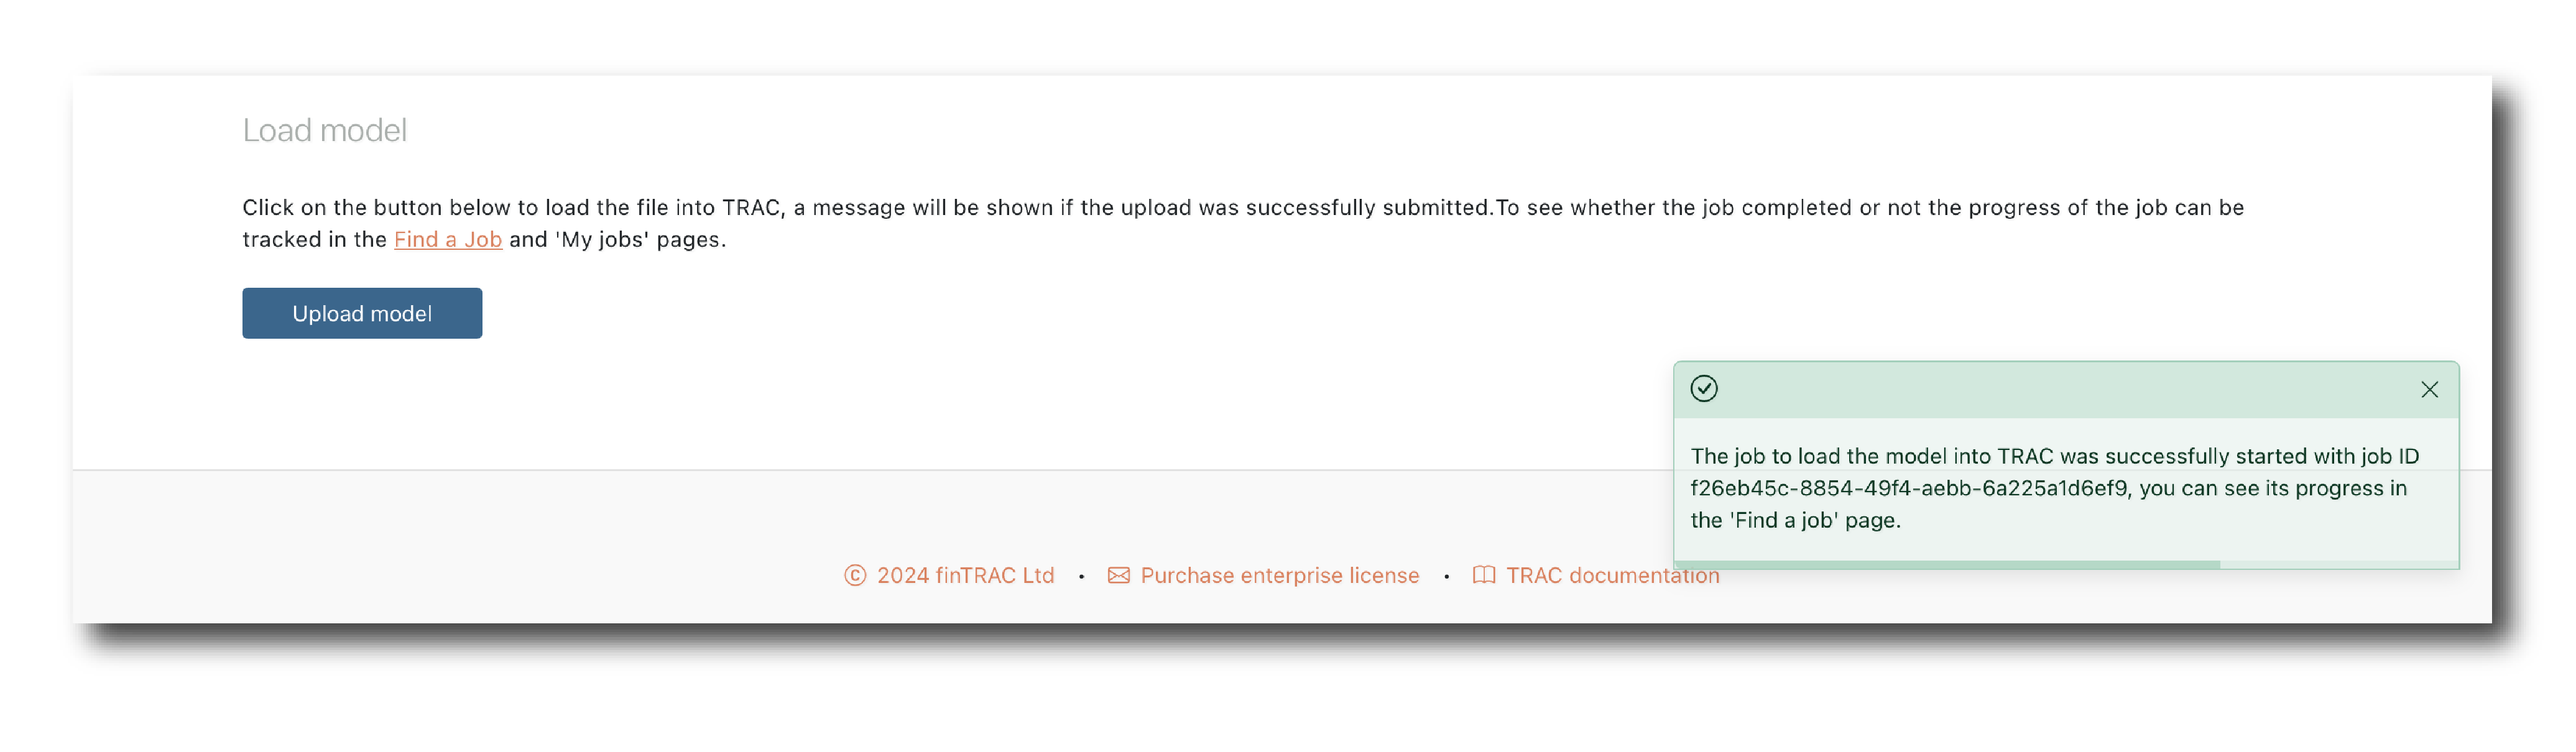
A pop-up should tell you that the ImportModel job has started but will not tell you it’s outcome, so navigate to (Find a job) page to check it’s status.
If the import is successful you will find the Model in (Object search).
To immediately import another model from the same branch and commit just click ‘Select file’ again.
Note
Model imports is restricted to Manager and Admin users.