Search & view objects
Object search
The search page is split into two sections. The top portion allows you to specify search criteria and the bottom portion lists the objects which meet that criteria.
In the top portion you must select an object type to search for (A).
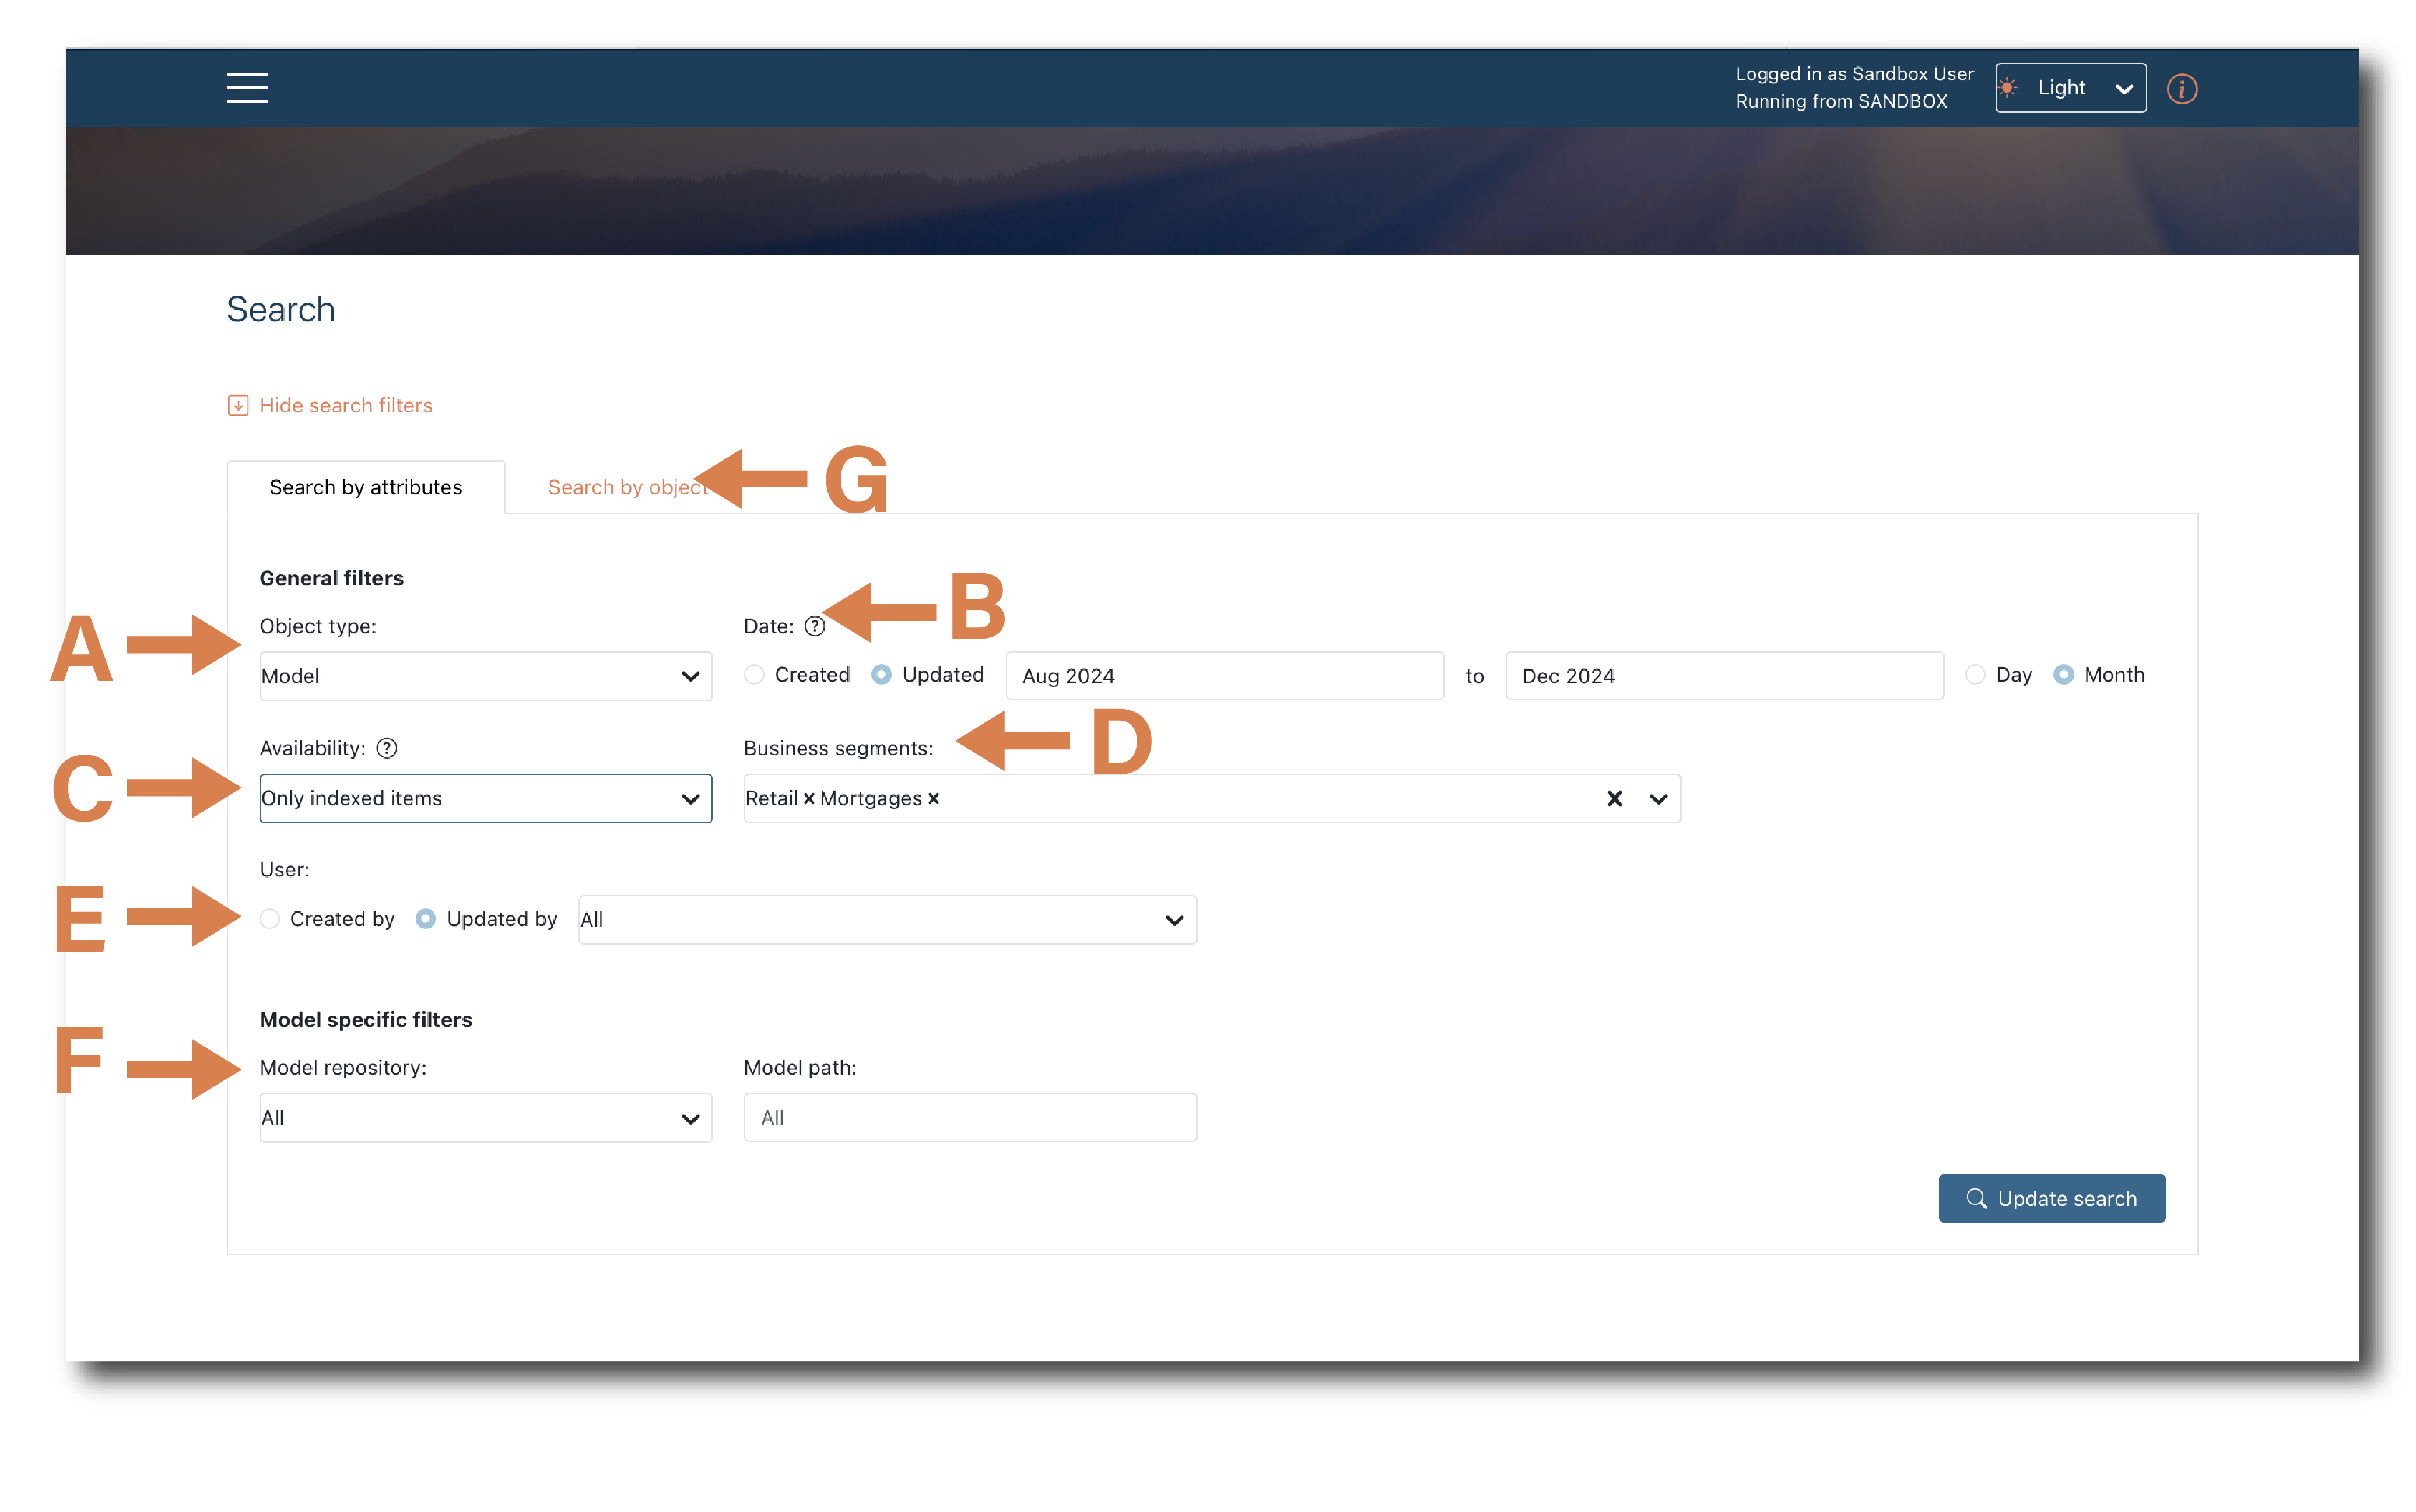
You also have optional criteria to narrow the pool of search results
B = date filters
C = objects tagged to automatically appear in search results (‘indexed items’)
D = optional business segment tags
E = created by a specific user (not relevant for Desktop version)
F = object specific filters - e.g. repo and model path for Models or type and status for Jobs
You can also find a single object if you know it’s unique ID (G).
At the bottom is the list of objects which meet the search criteria. You must click ‘Update search’ to refresh the results each time you change the criteria.
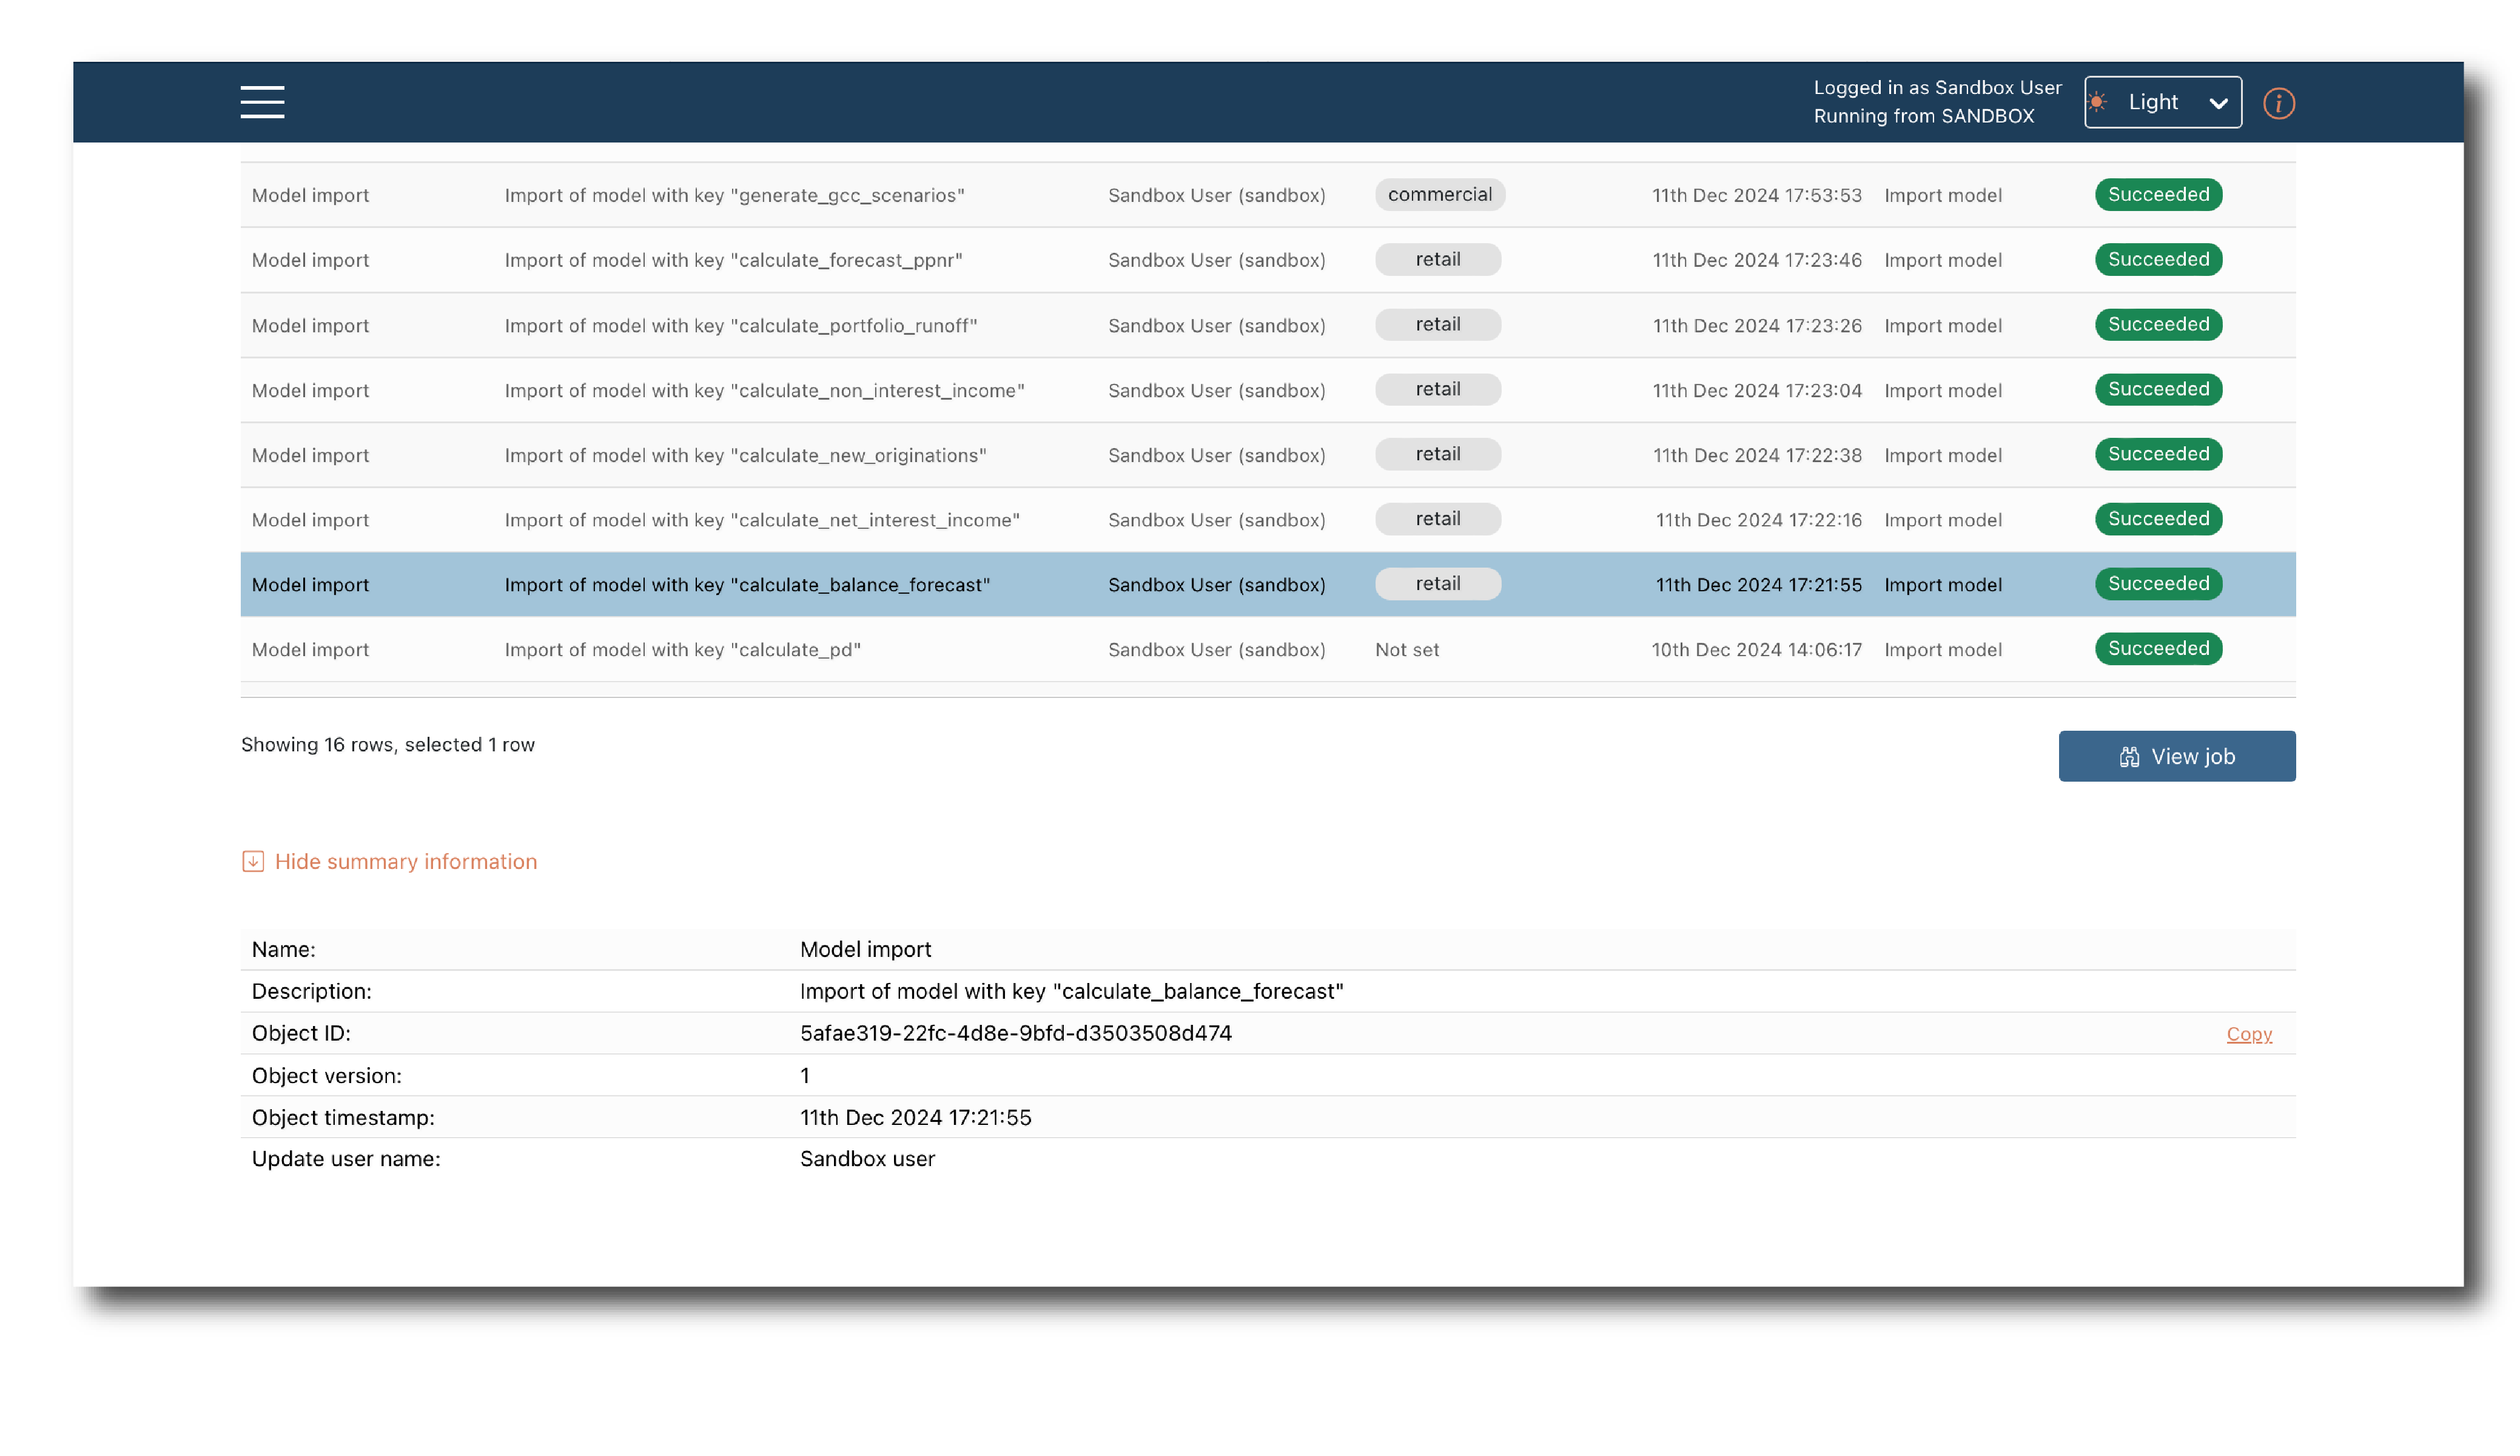
Selecting one row brings up the objects general attributes and the option to ‘View’ the object by navigating to the relevant (Object summary pages).
Object summaries
All the information trac holds for an object can be viewed on the it’s summary page, found via the Search results.
Layout
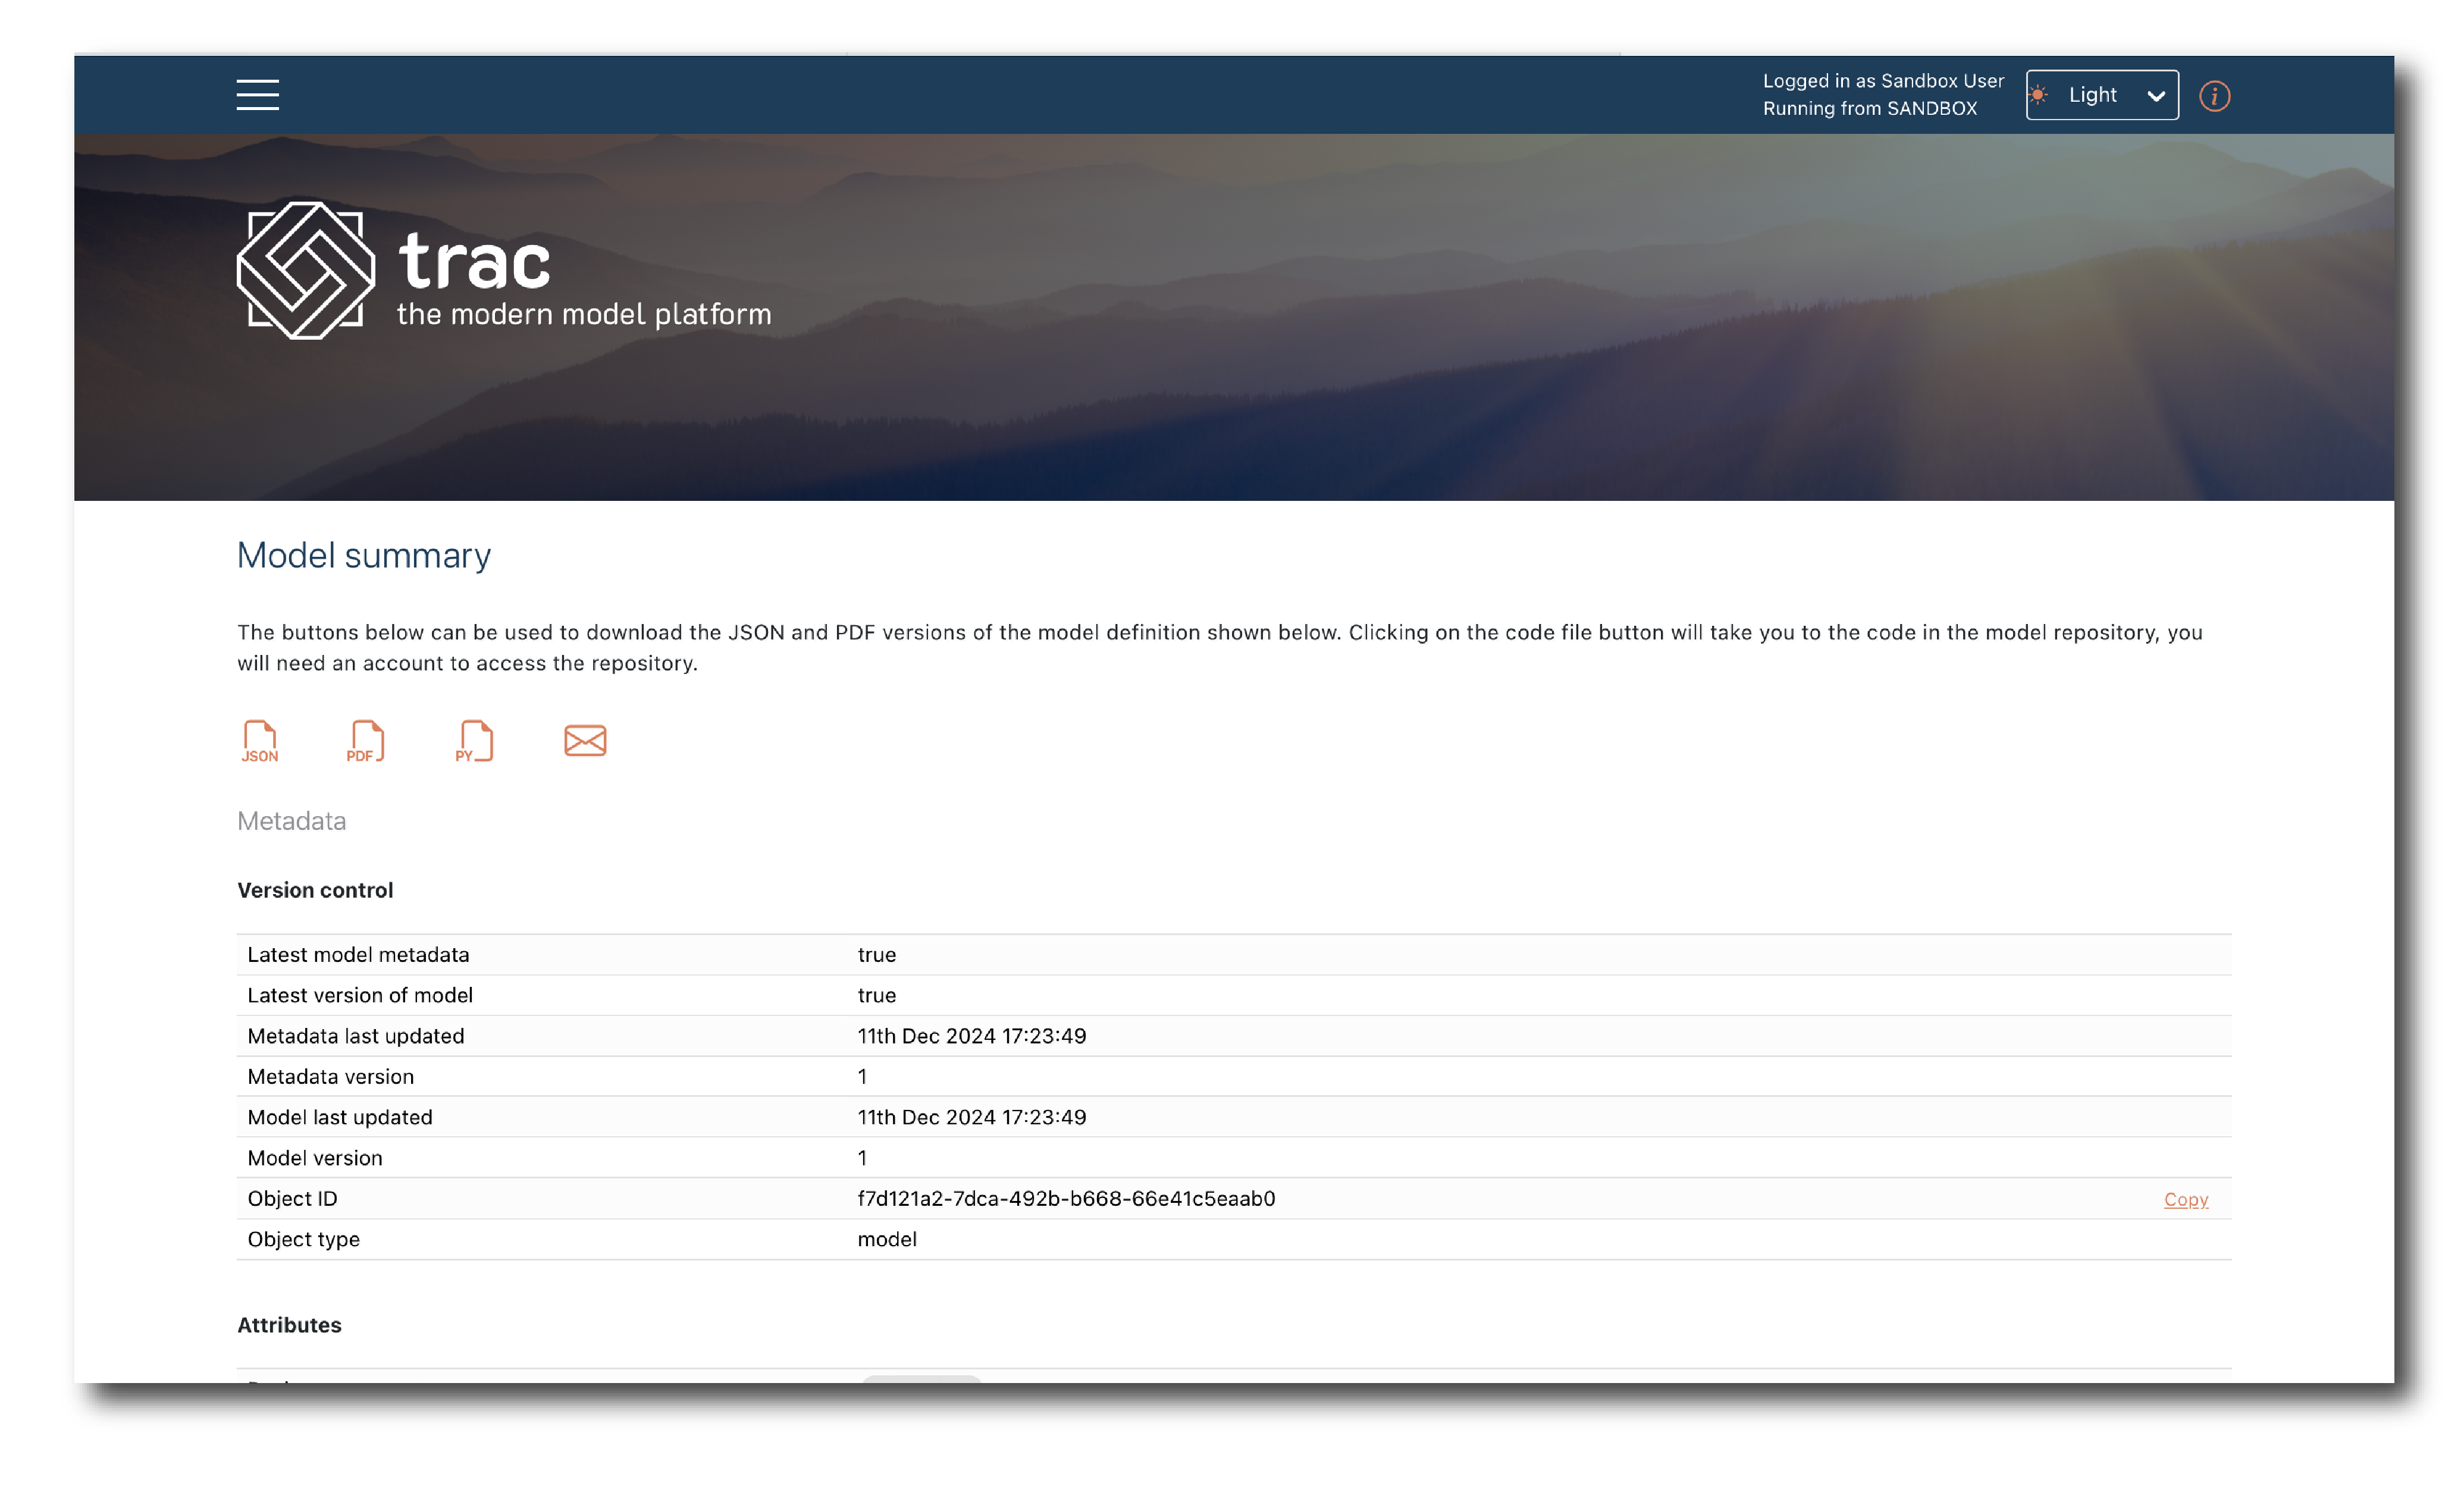
Object summary pages differ slightly per object type but follow a similar pattern.
At the top of the page are 3-4 action icons. Below, the object’s metadata is displayed. The ‘Version control’ information is the same for all objects. The ‘Attributes’ vary by object type and contains the user-defined attributes.
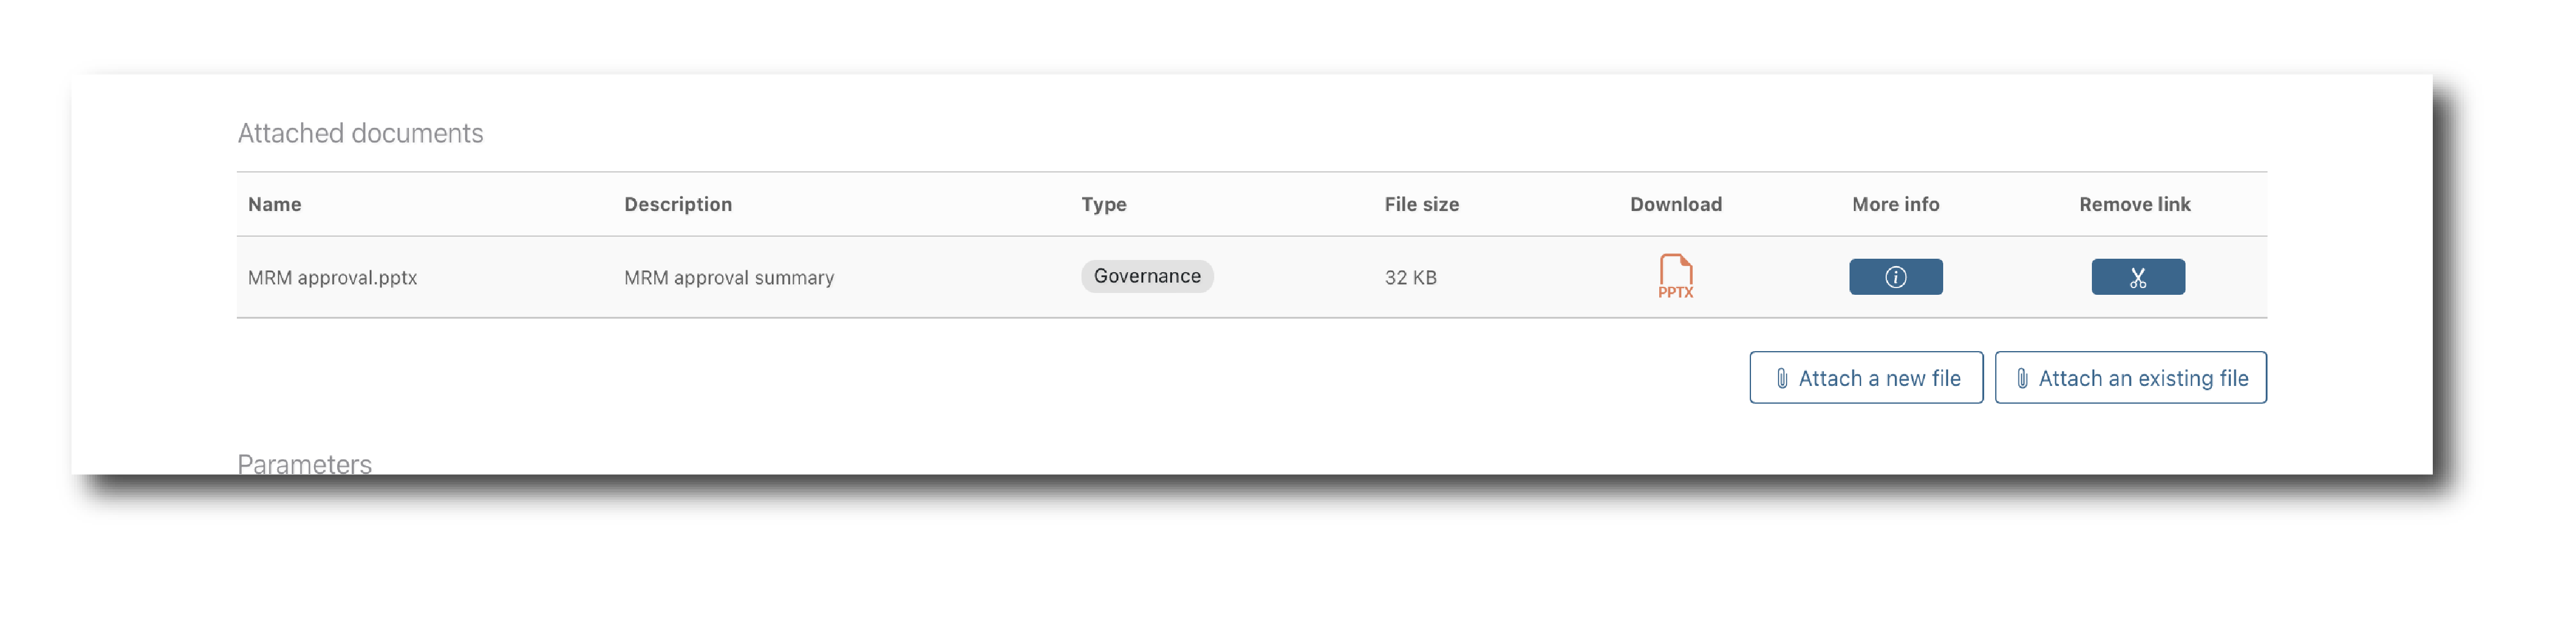
Further down you will see information relating to any Files that have been appended. If none have, you just see the option to upload a File or link to an existing one.
Files can be appended for a variety of reasons - e.g. you could attach the model development documentation to a model, or a data quality report to a data object.
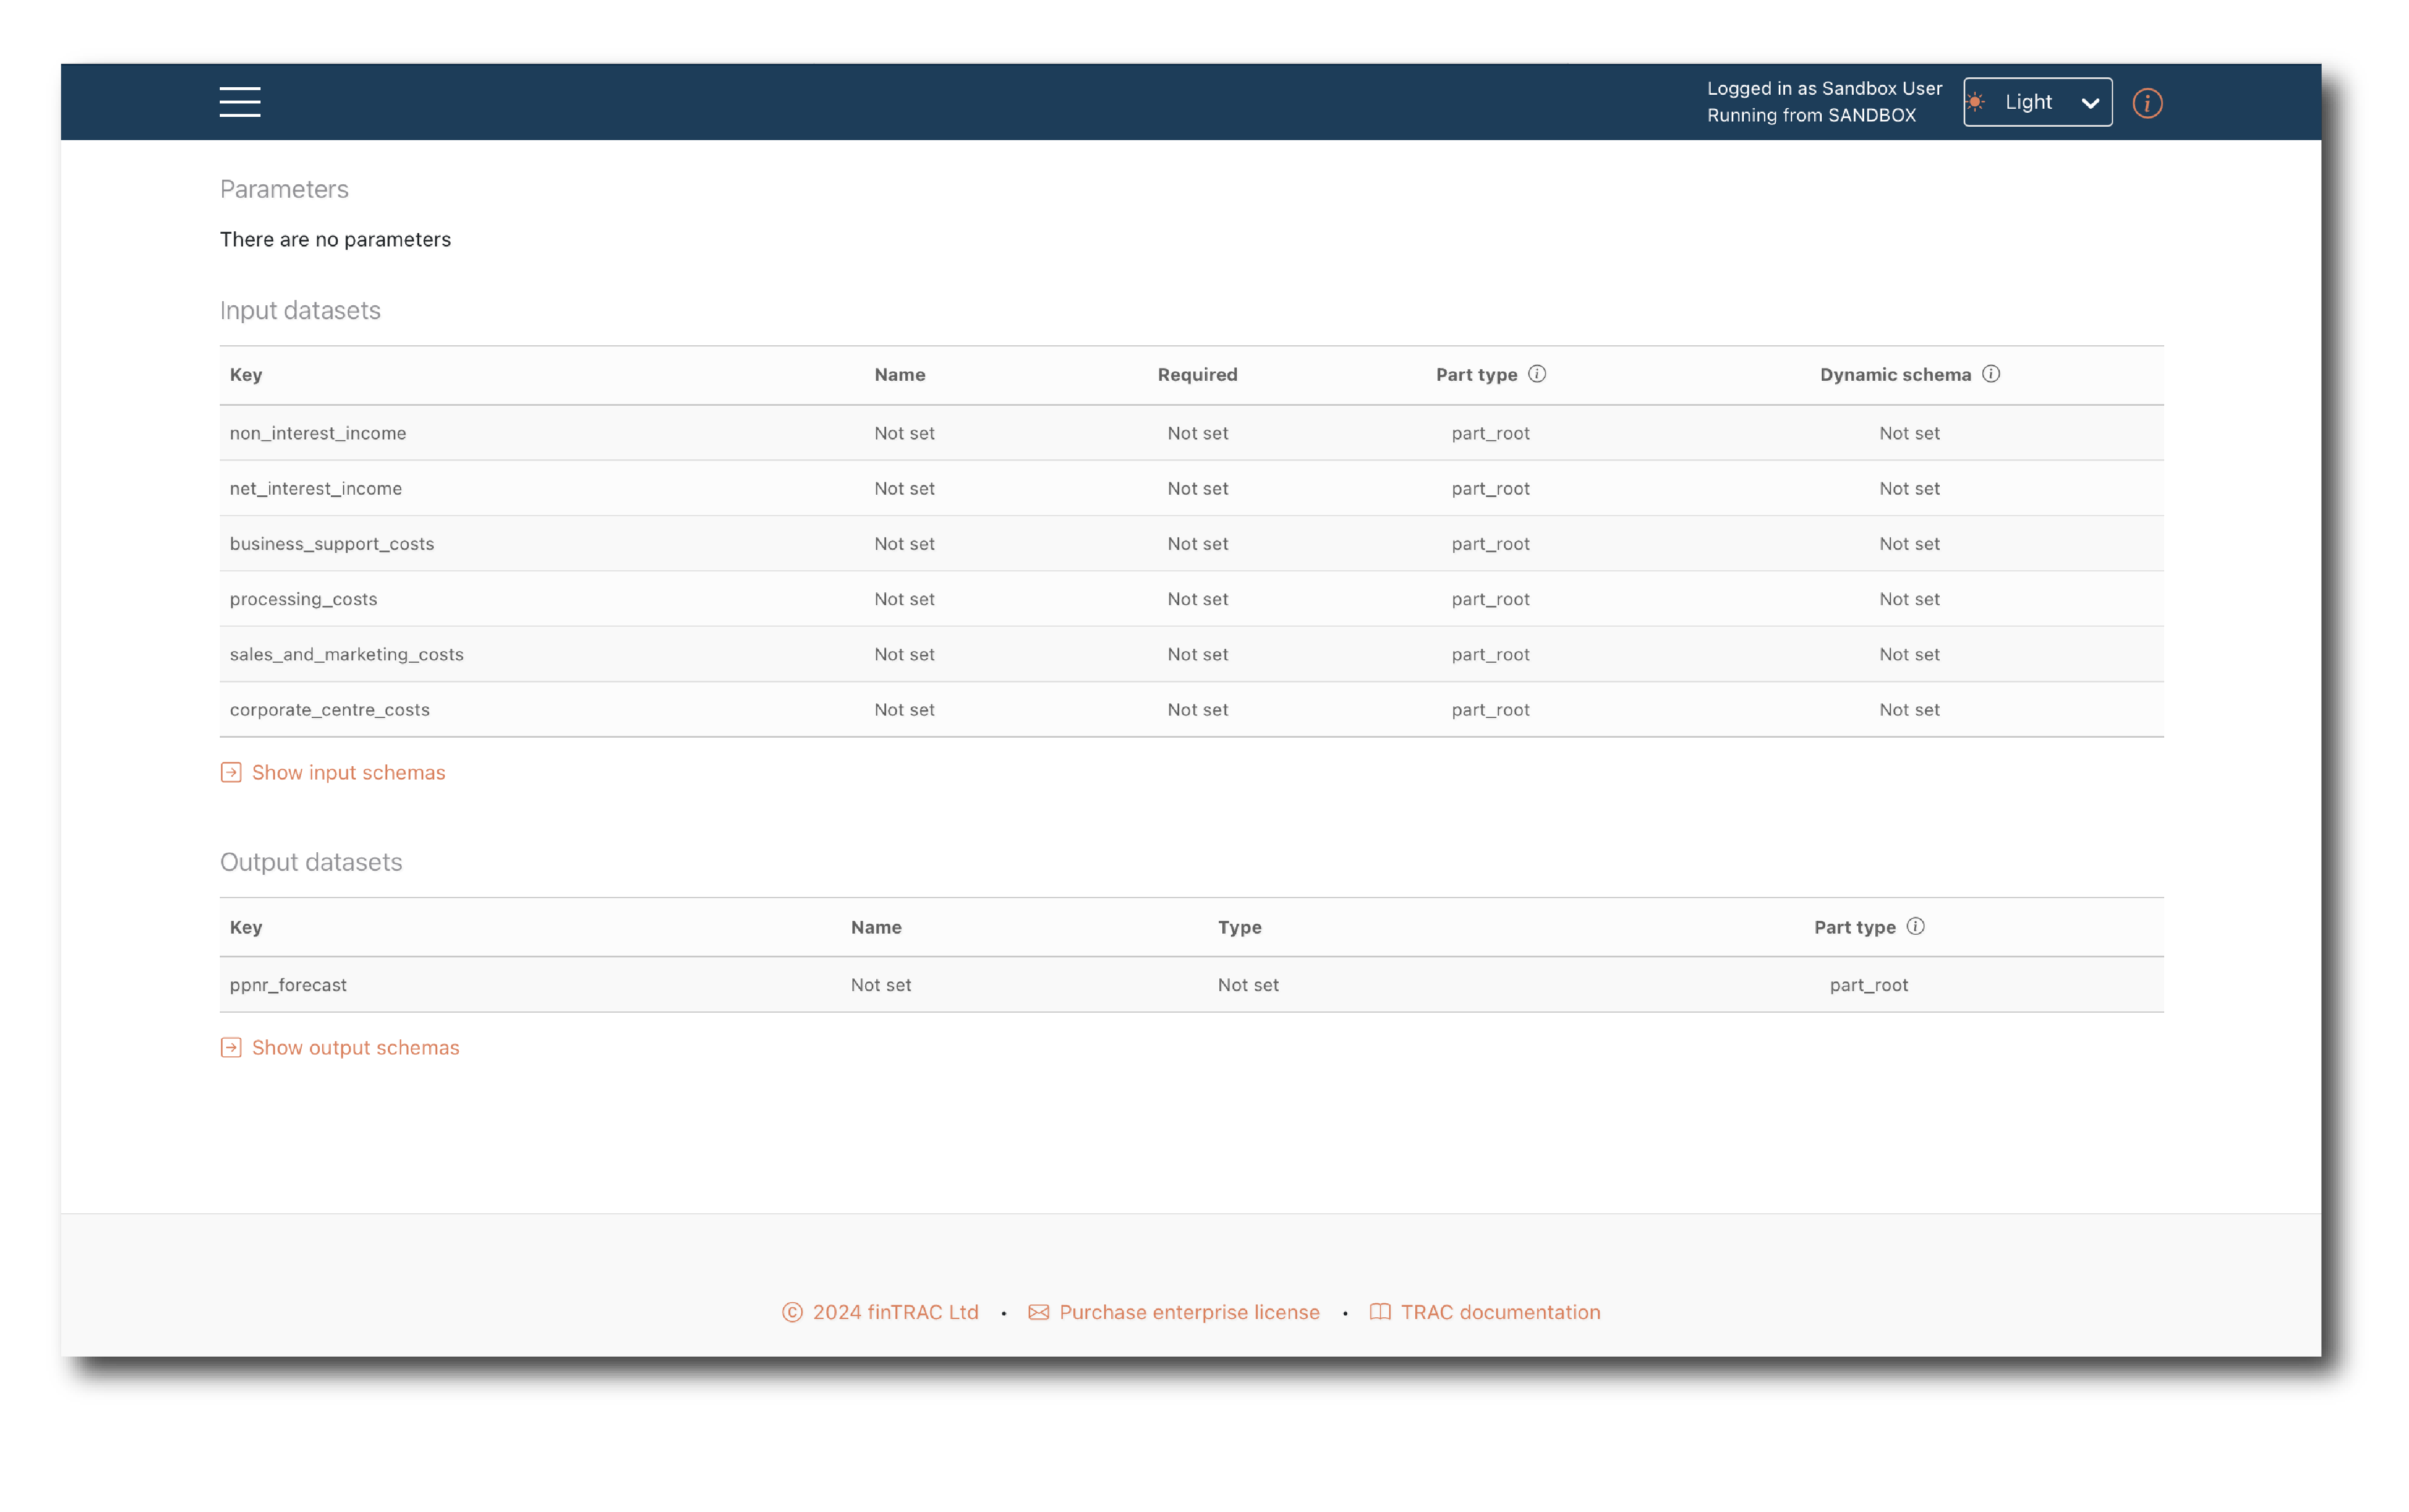
The final section describes the object and varies by object type.
For Data and Models, this will describe their schemas
For Flows this will include a visual representation of the graph
Job’s will have all the components found on the Flow, Job and Model summaries
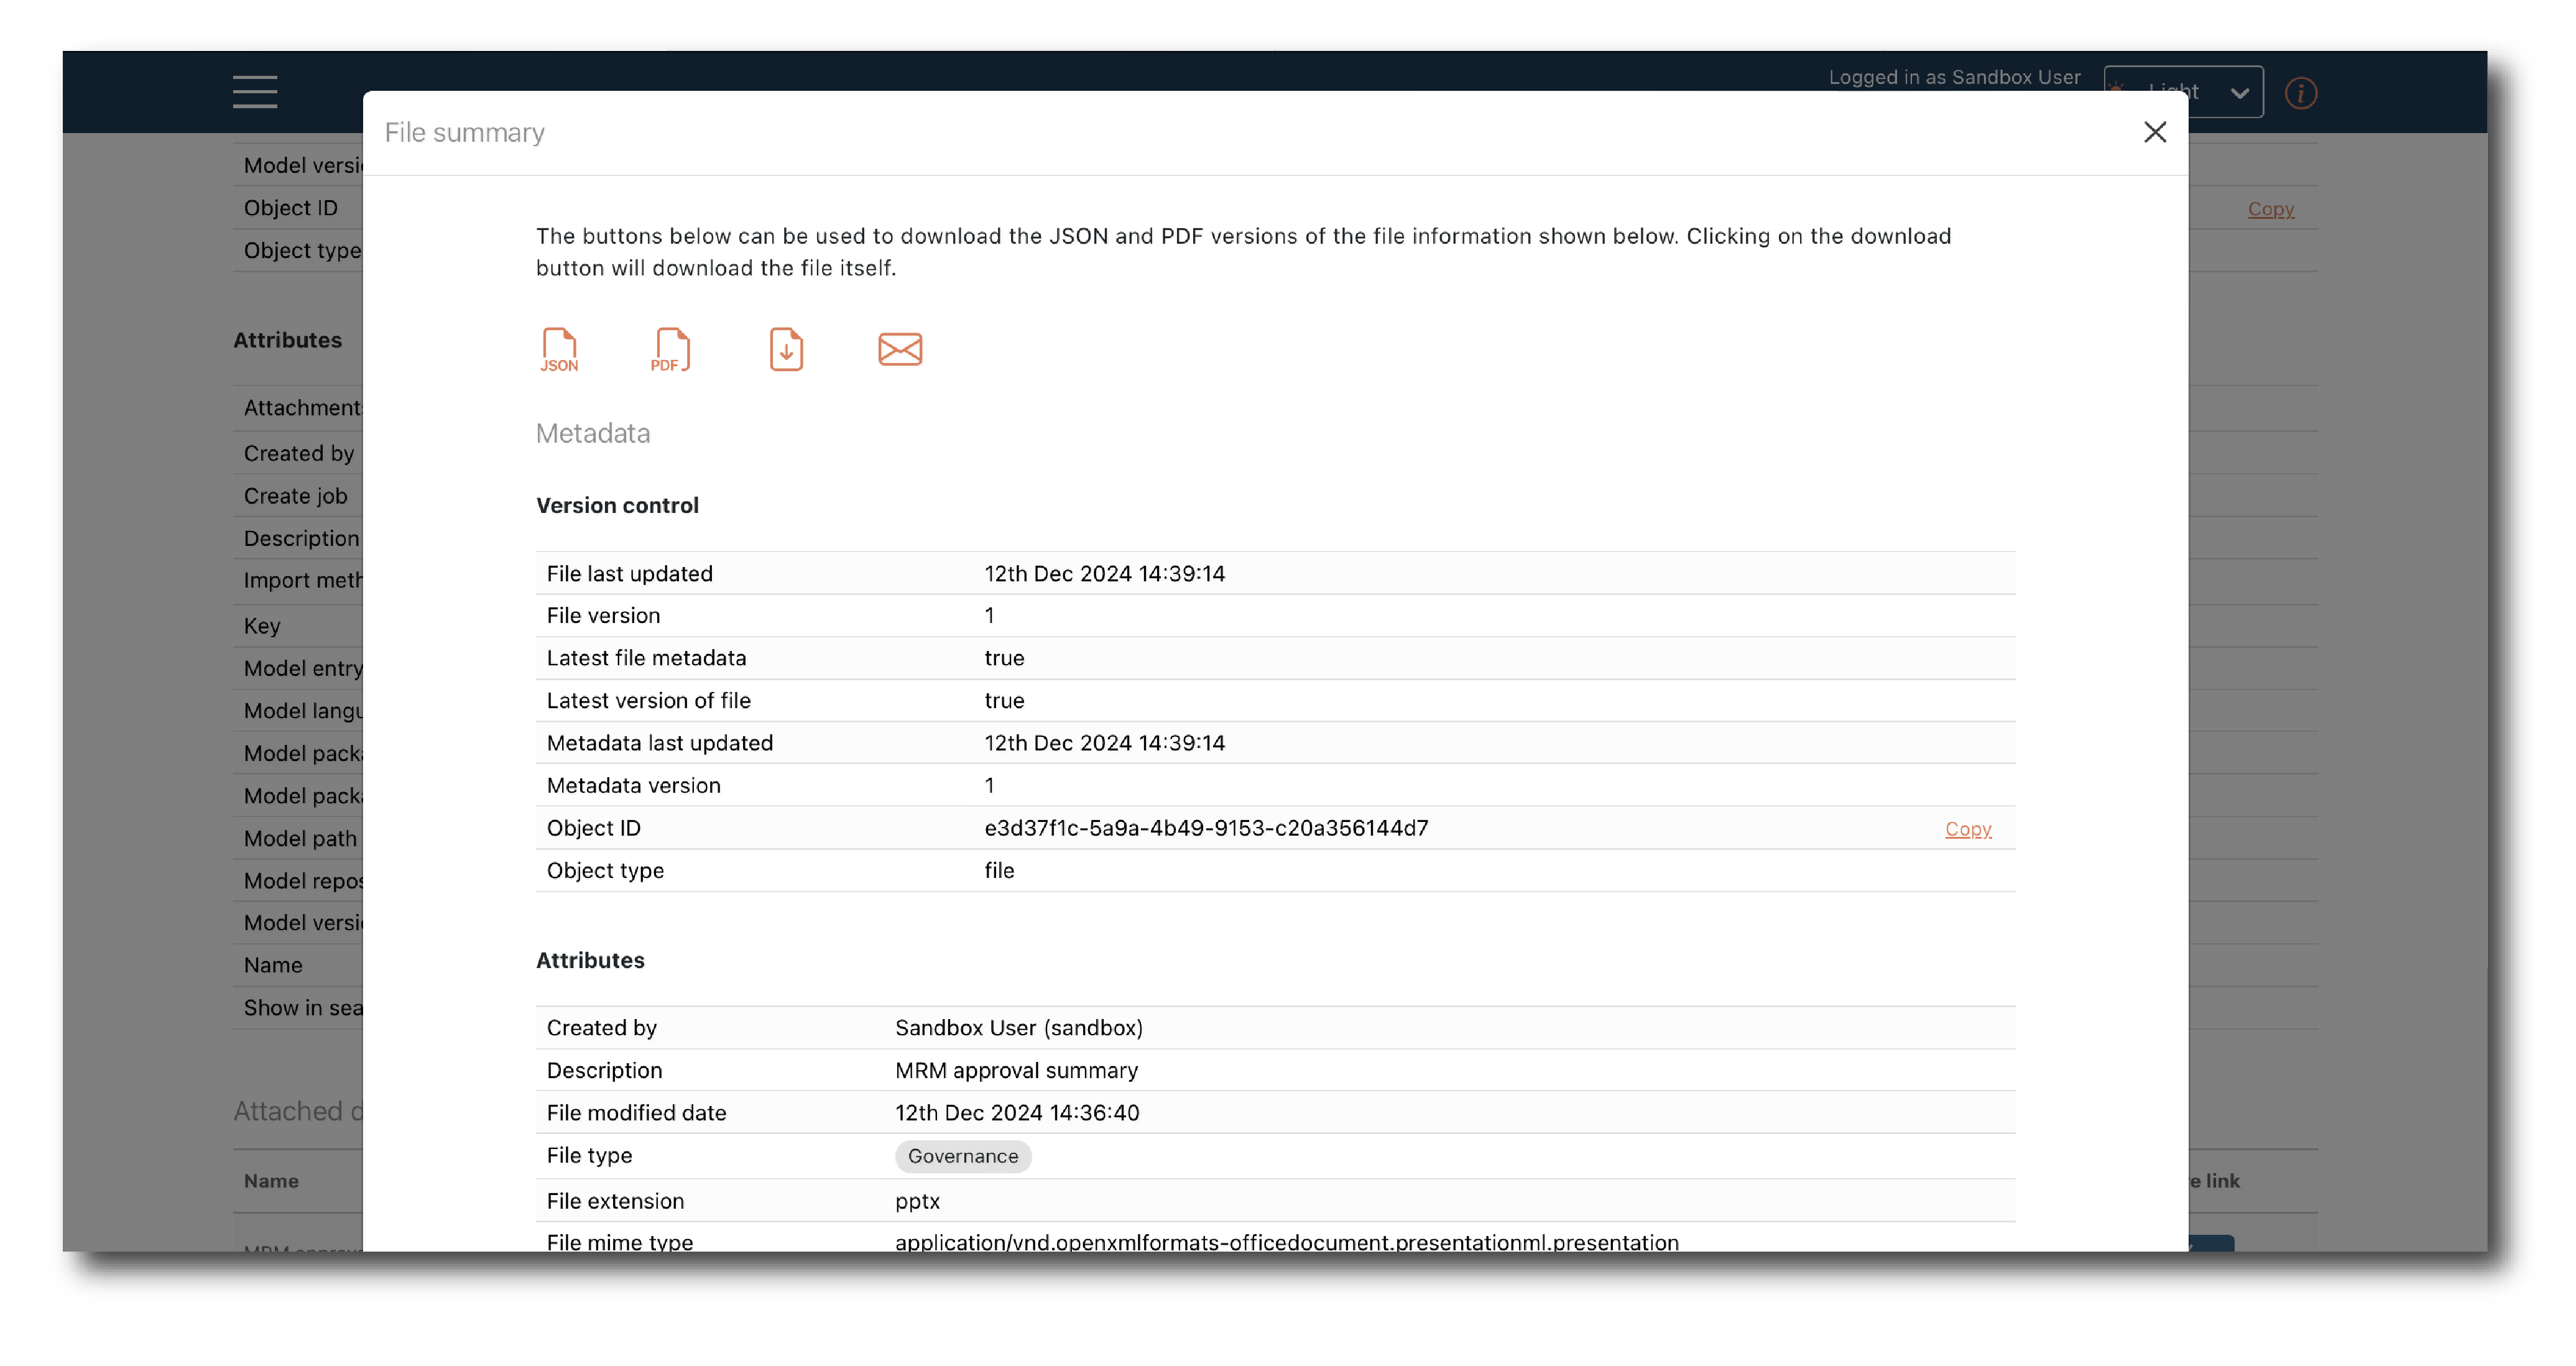
Export
The JSON and PDF action icons allow you to download the object summary information. The PDF downloads are formatted to be used in formal governance processes.

For a data object, the CSV action icon allows you to download a copy of the data.

Note
Large dataset can be downloaded but in enterprise deployments you can also export data via an ExportData job.
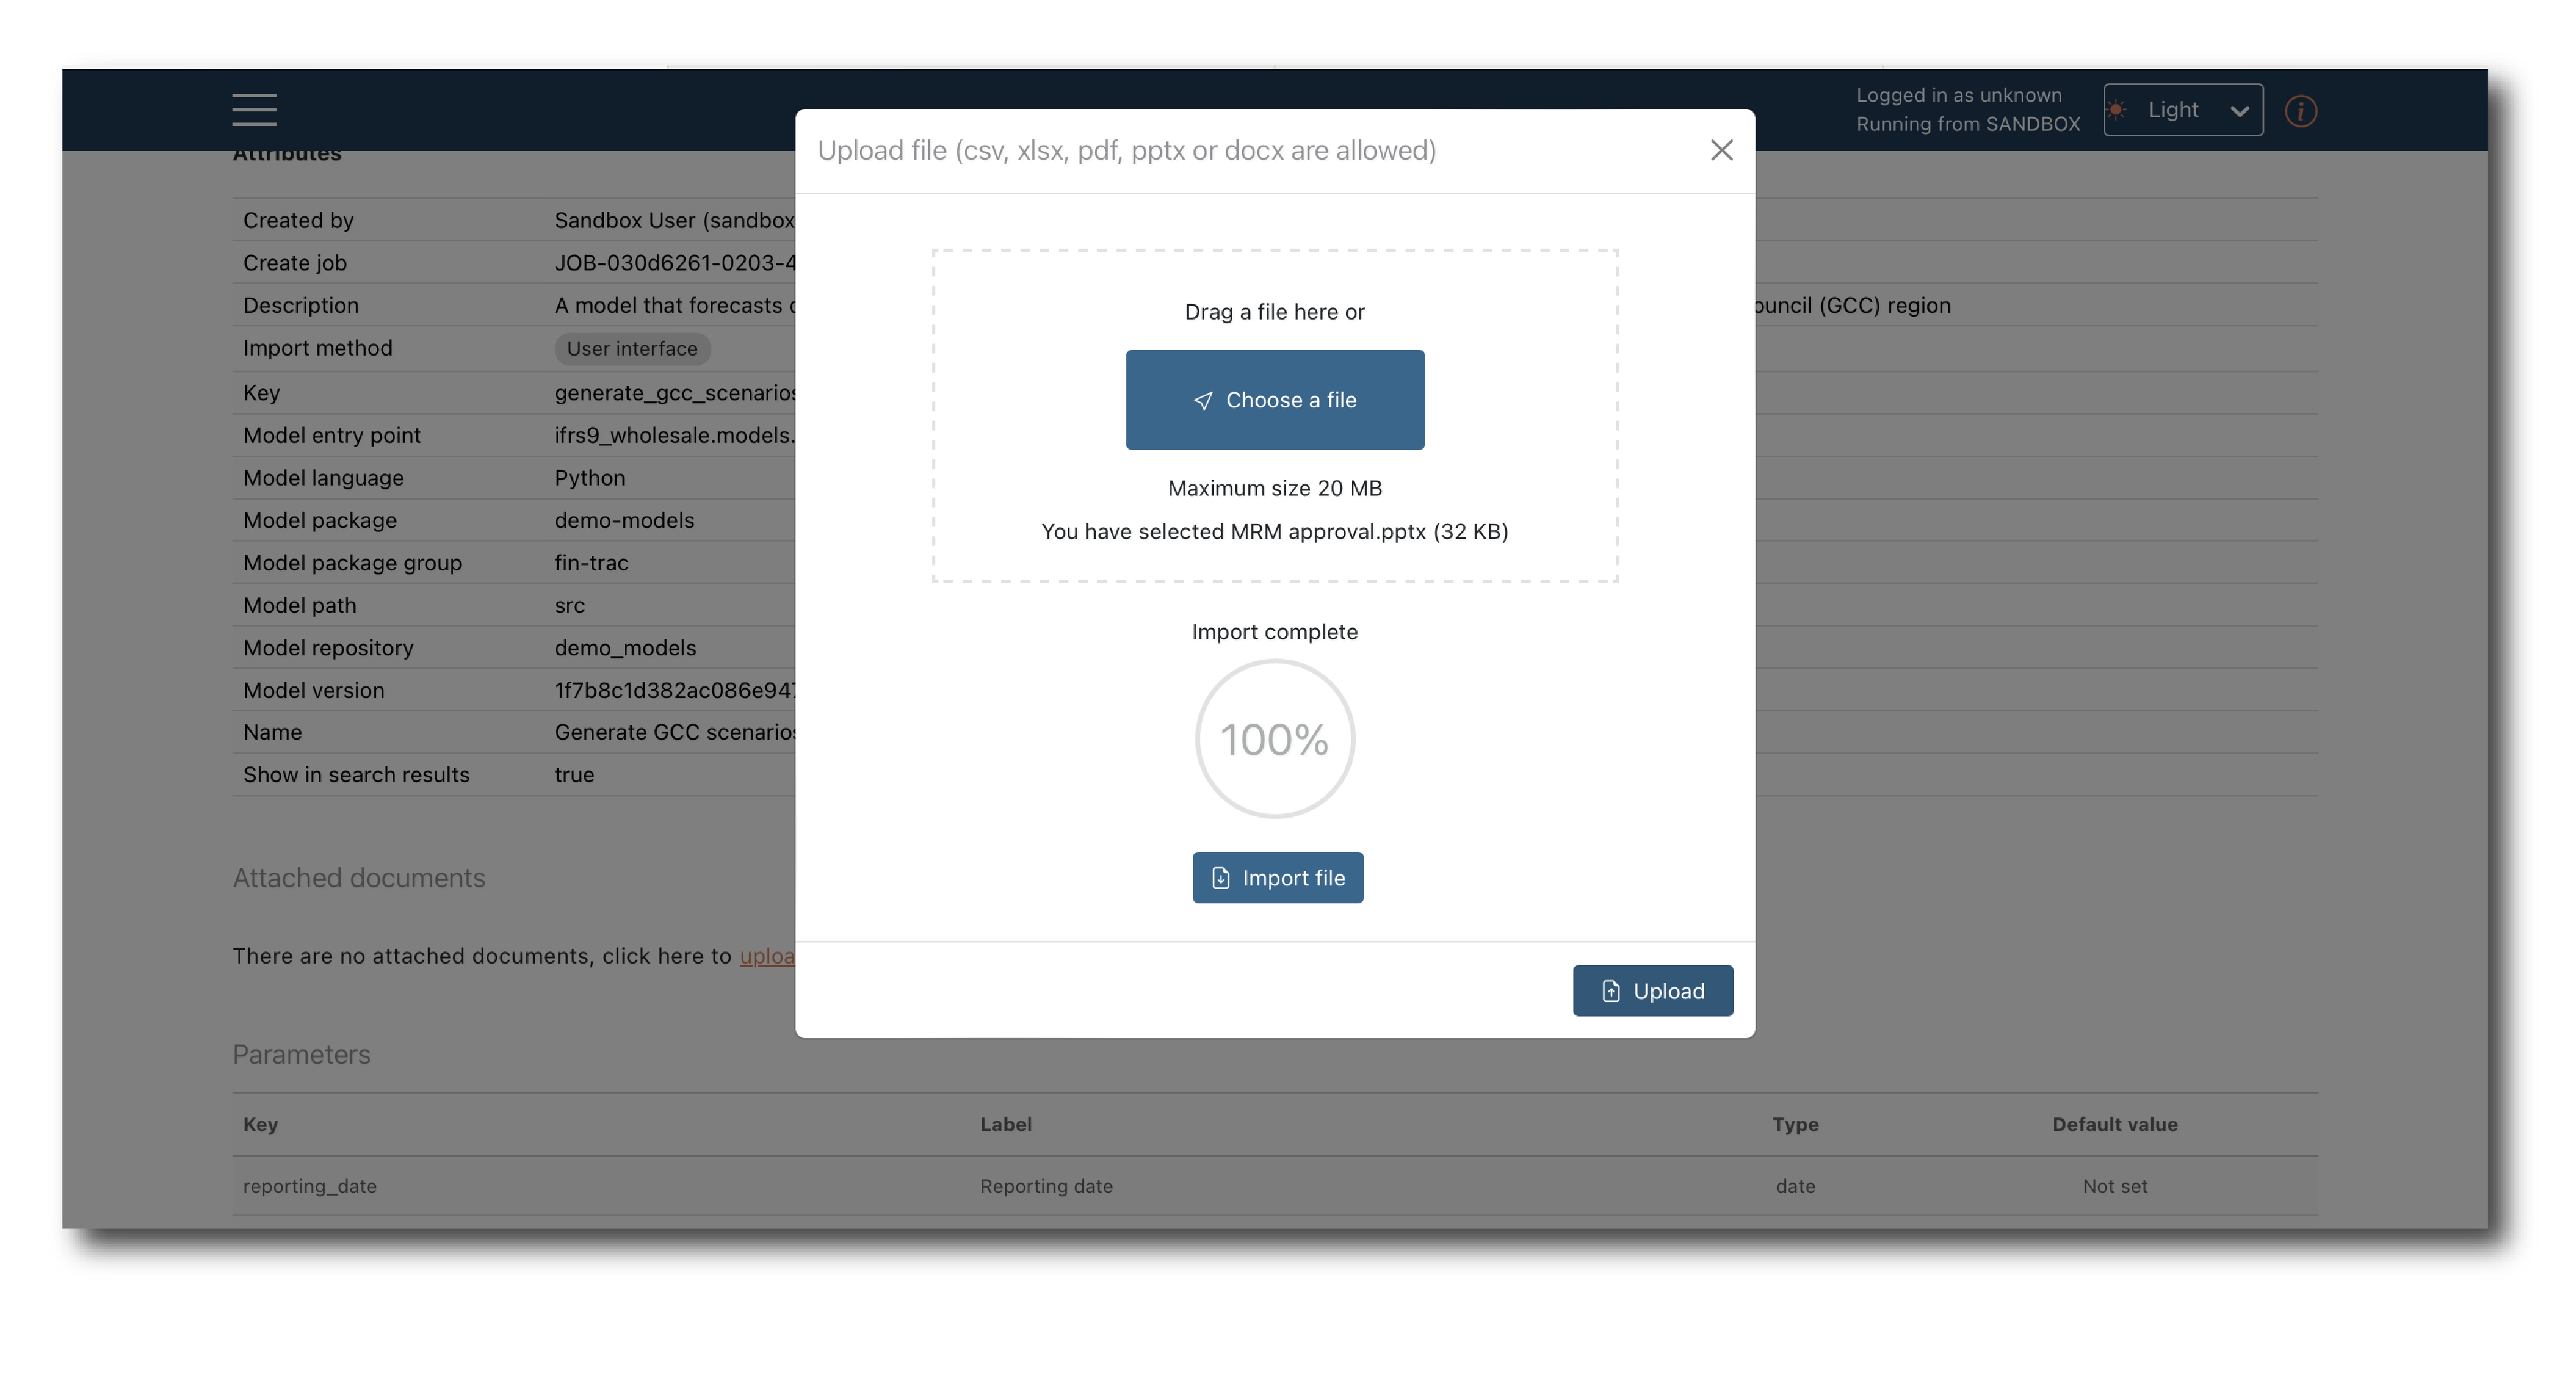
Append
Files can be added to objects. To upload a new File, simply find and select it, then click ‘Import’ and ‘Upload’.
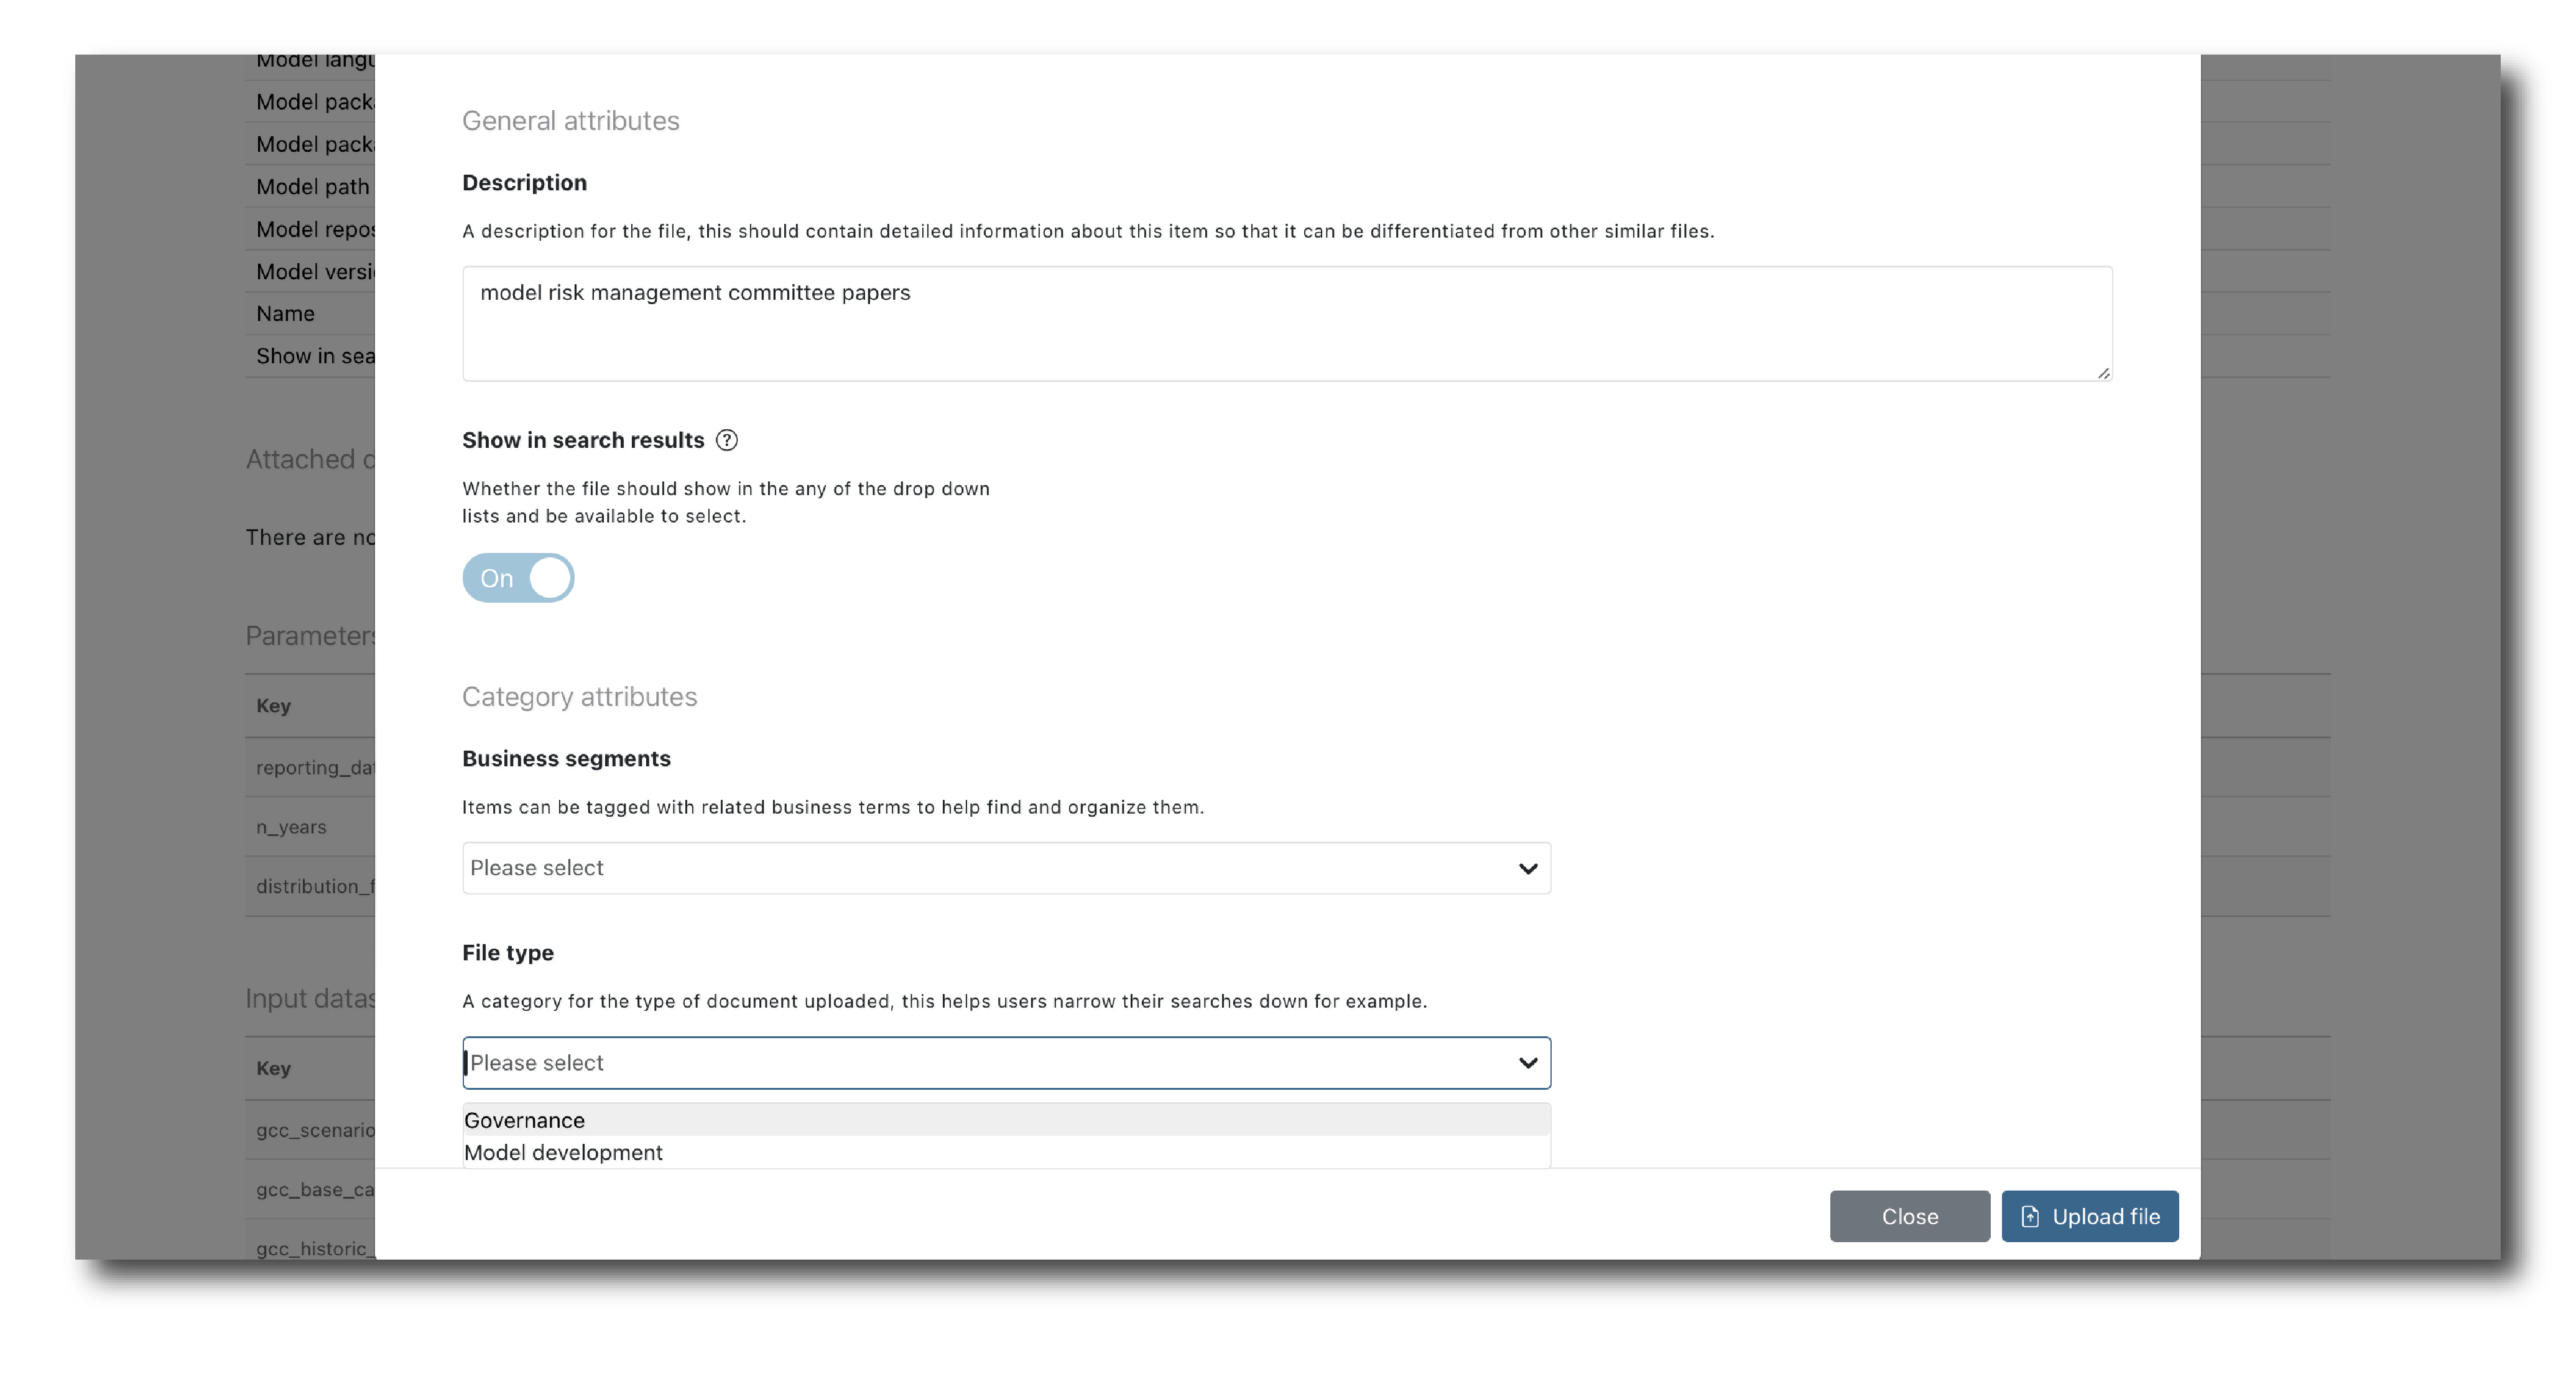
As usual you must define the general attributes, except Name which is fixed.
You can also link to an existing File object, using the standard filter and select process.
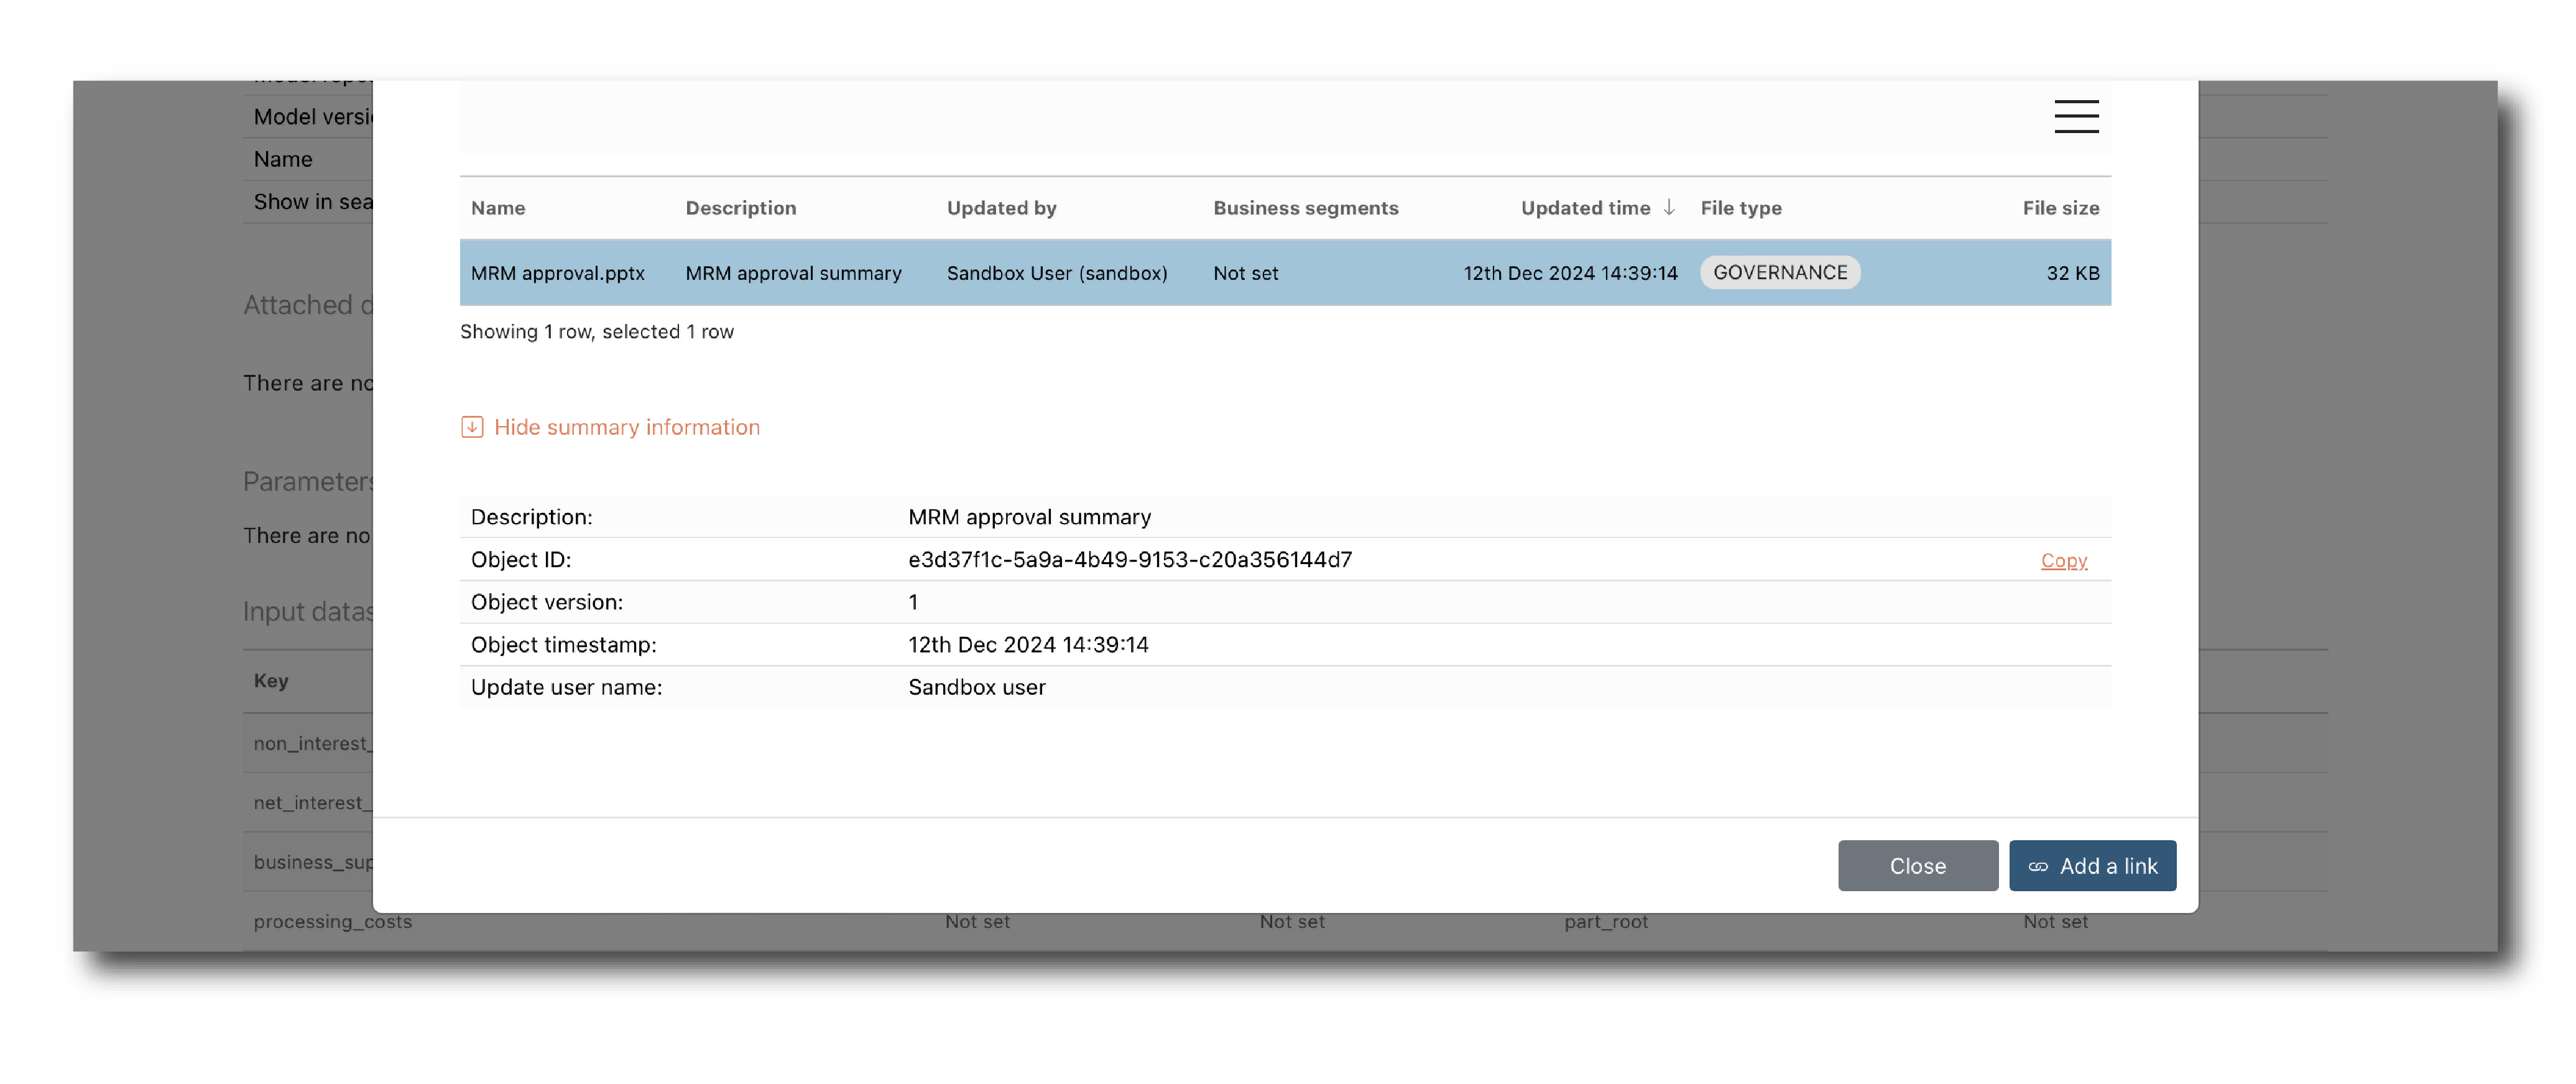
Once a link to a File has been added you will see it on the object summary.

Clicking ‘Remove link’ does not remove the File object from trac, it just breaks the association with this object.
Clicking ‘More info’ allows you to explore the lineage of the linked File.
Generate schema
On a model summary page, data inputs and outputs have a ‘Generate schema’ button next to them, which is used to generate a Schema object from the model definition.
Model Code
For Models, the PY icon links through to the underlying code in the repository.
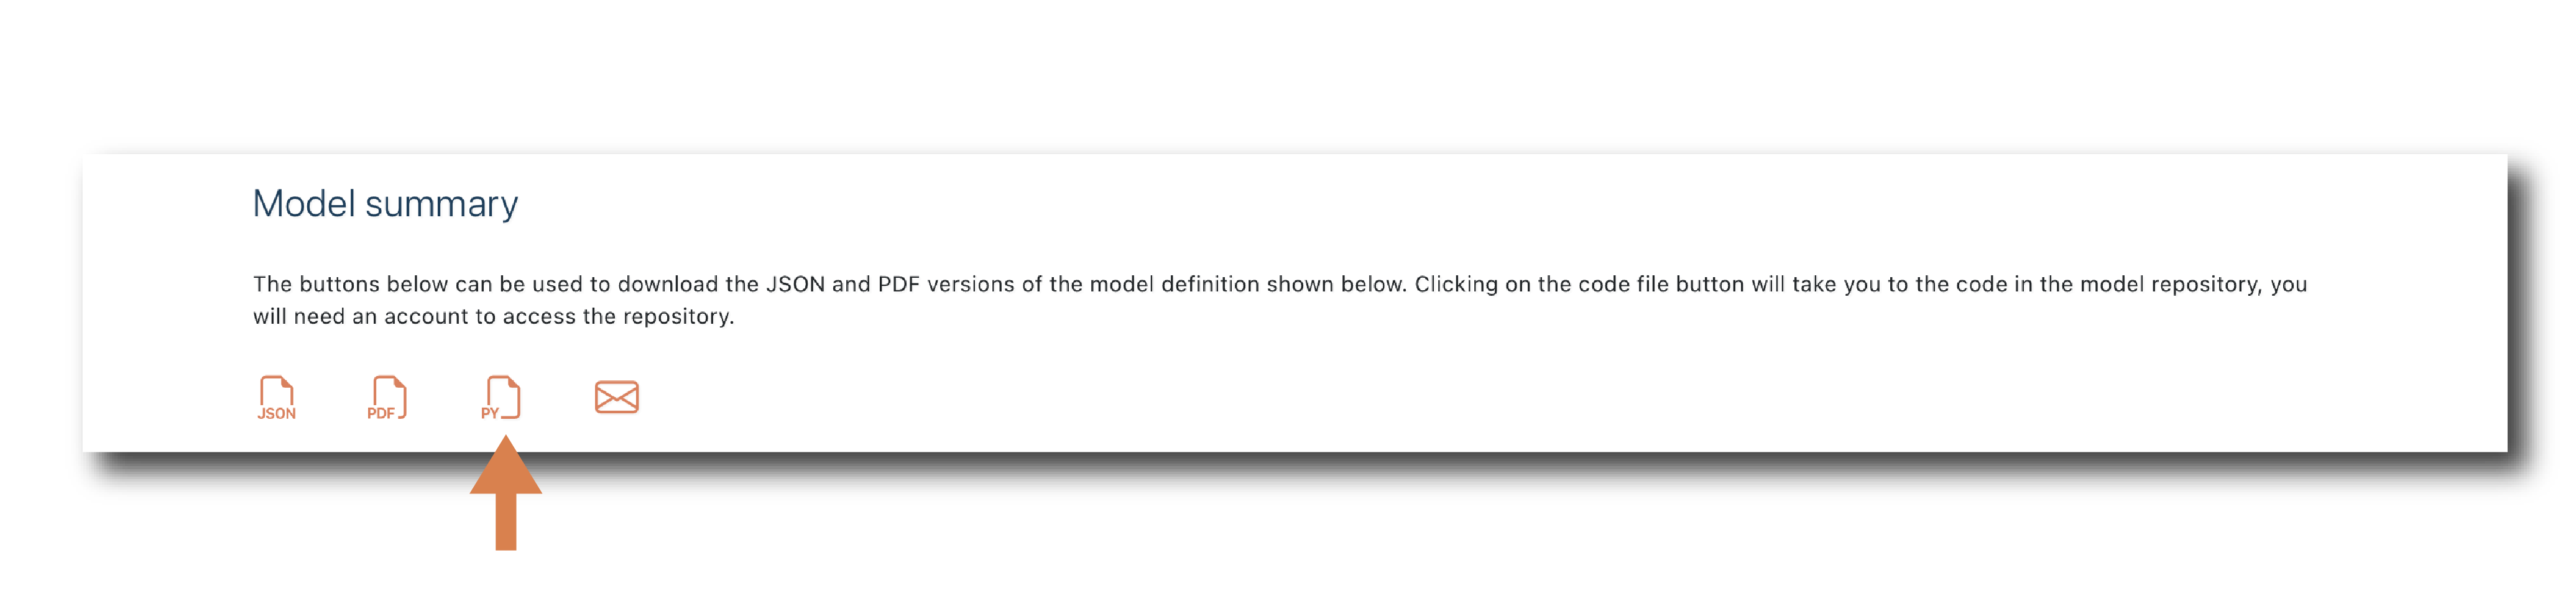
Because the model object corresponds to a specific commit, the code associated with this object will never change. For more information see Upload a model.
Note
Access to the code in the repository is also constrained by users permissions in the repository - link will not expose model code someone who doesn’t have permission.
Find a Job
Find a Job is simply filtered version of the general search page (object type = job).
By default all your jobs will be shown in chronological order. Once the list gets too long, you can filter and search as necessary.