Run a simple model
Load a model
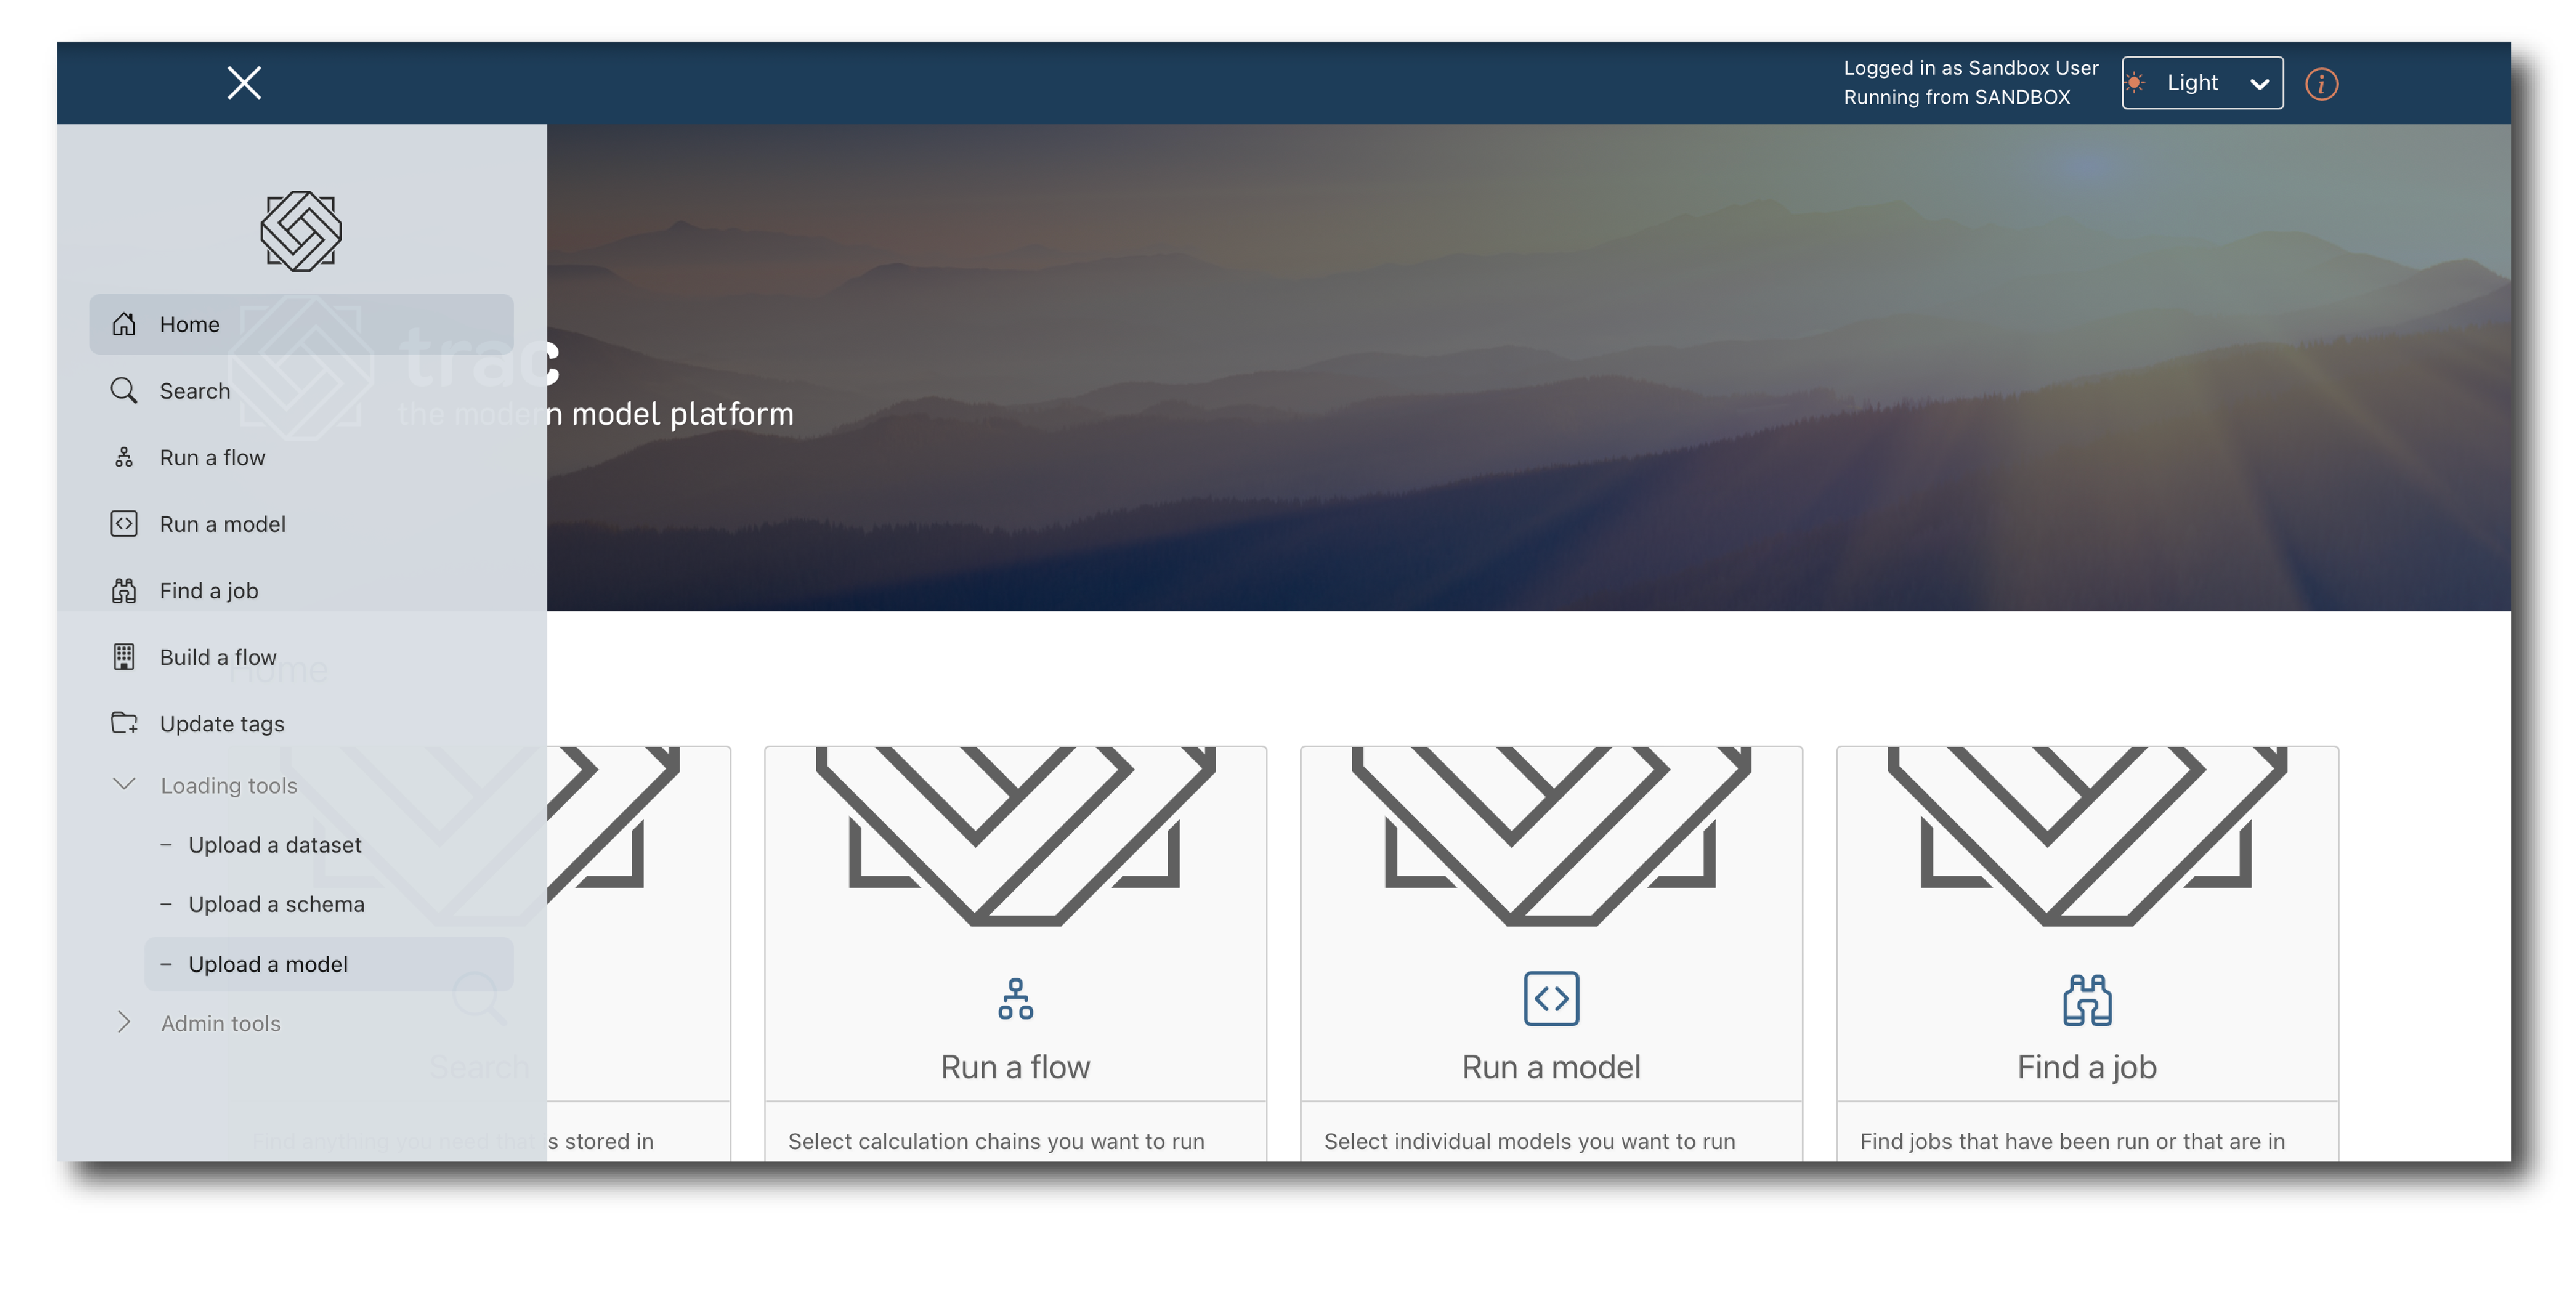
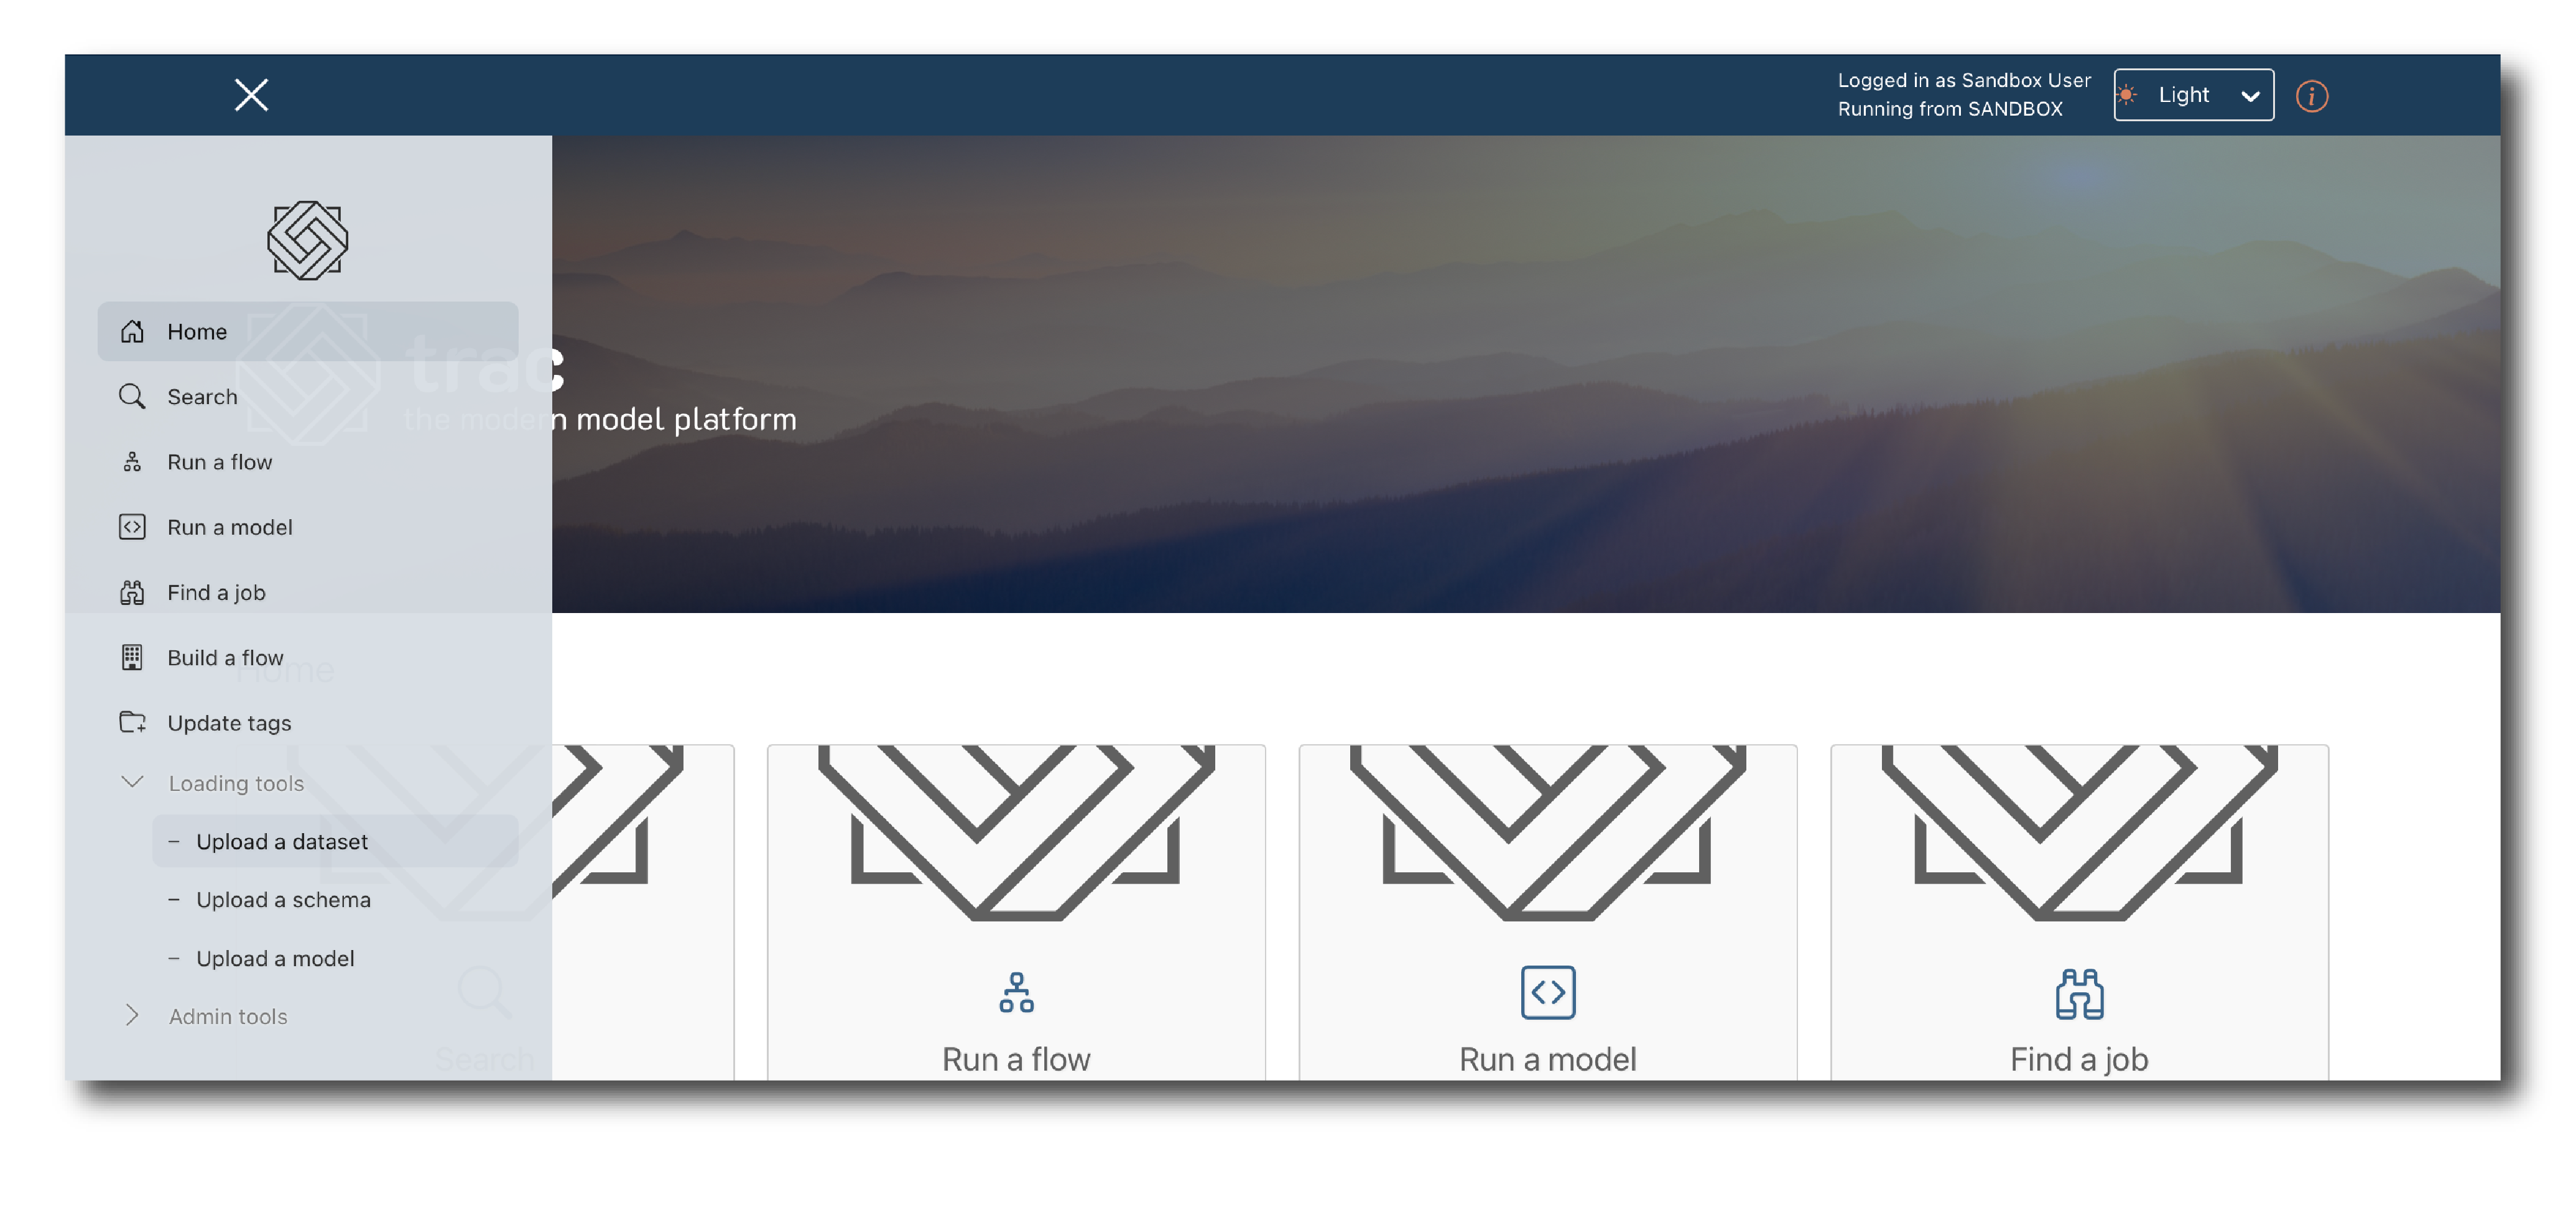
On the home page or the drop-down menu find ‘Loading tools > Upload a model’.
We will be importing models from GitHub.
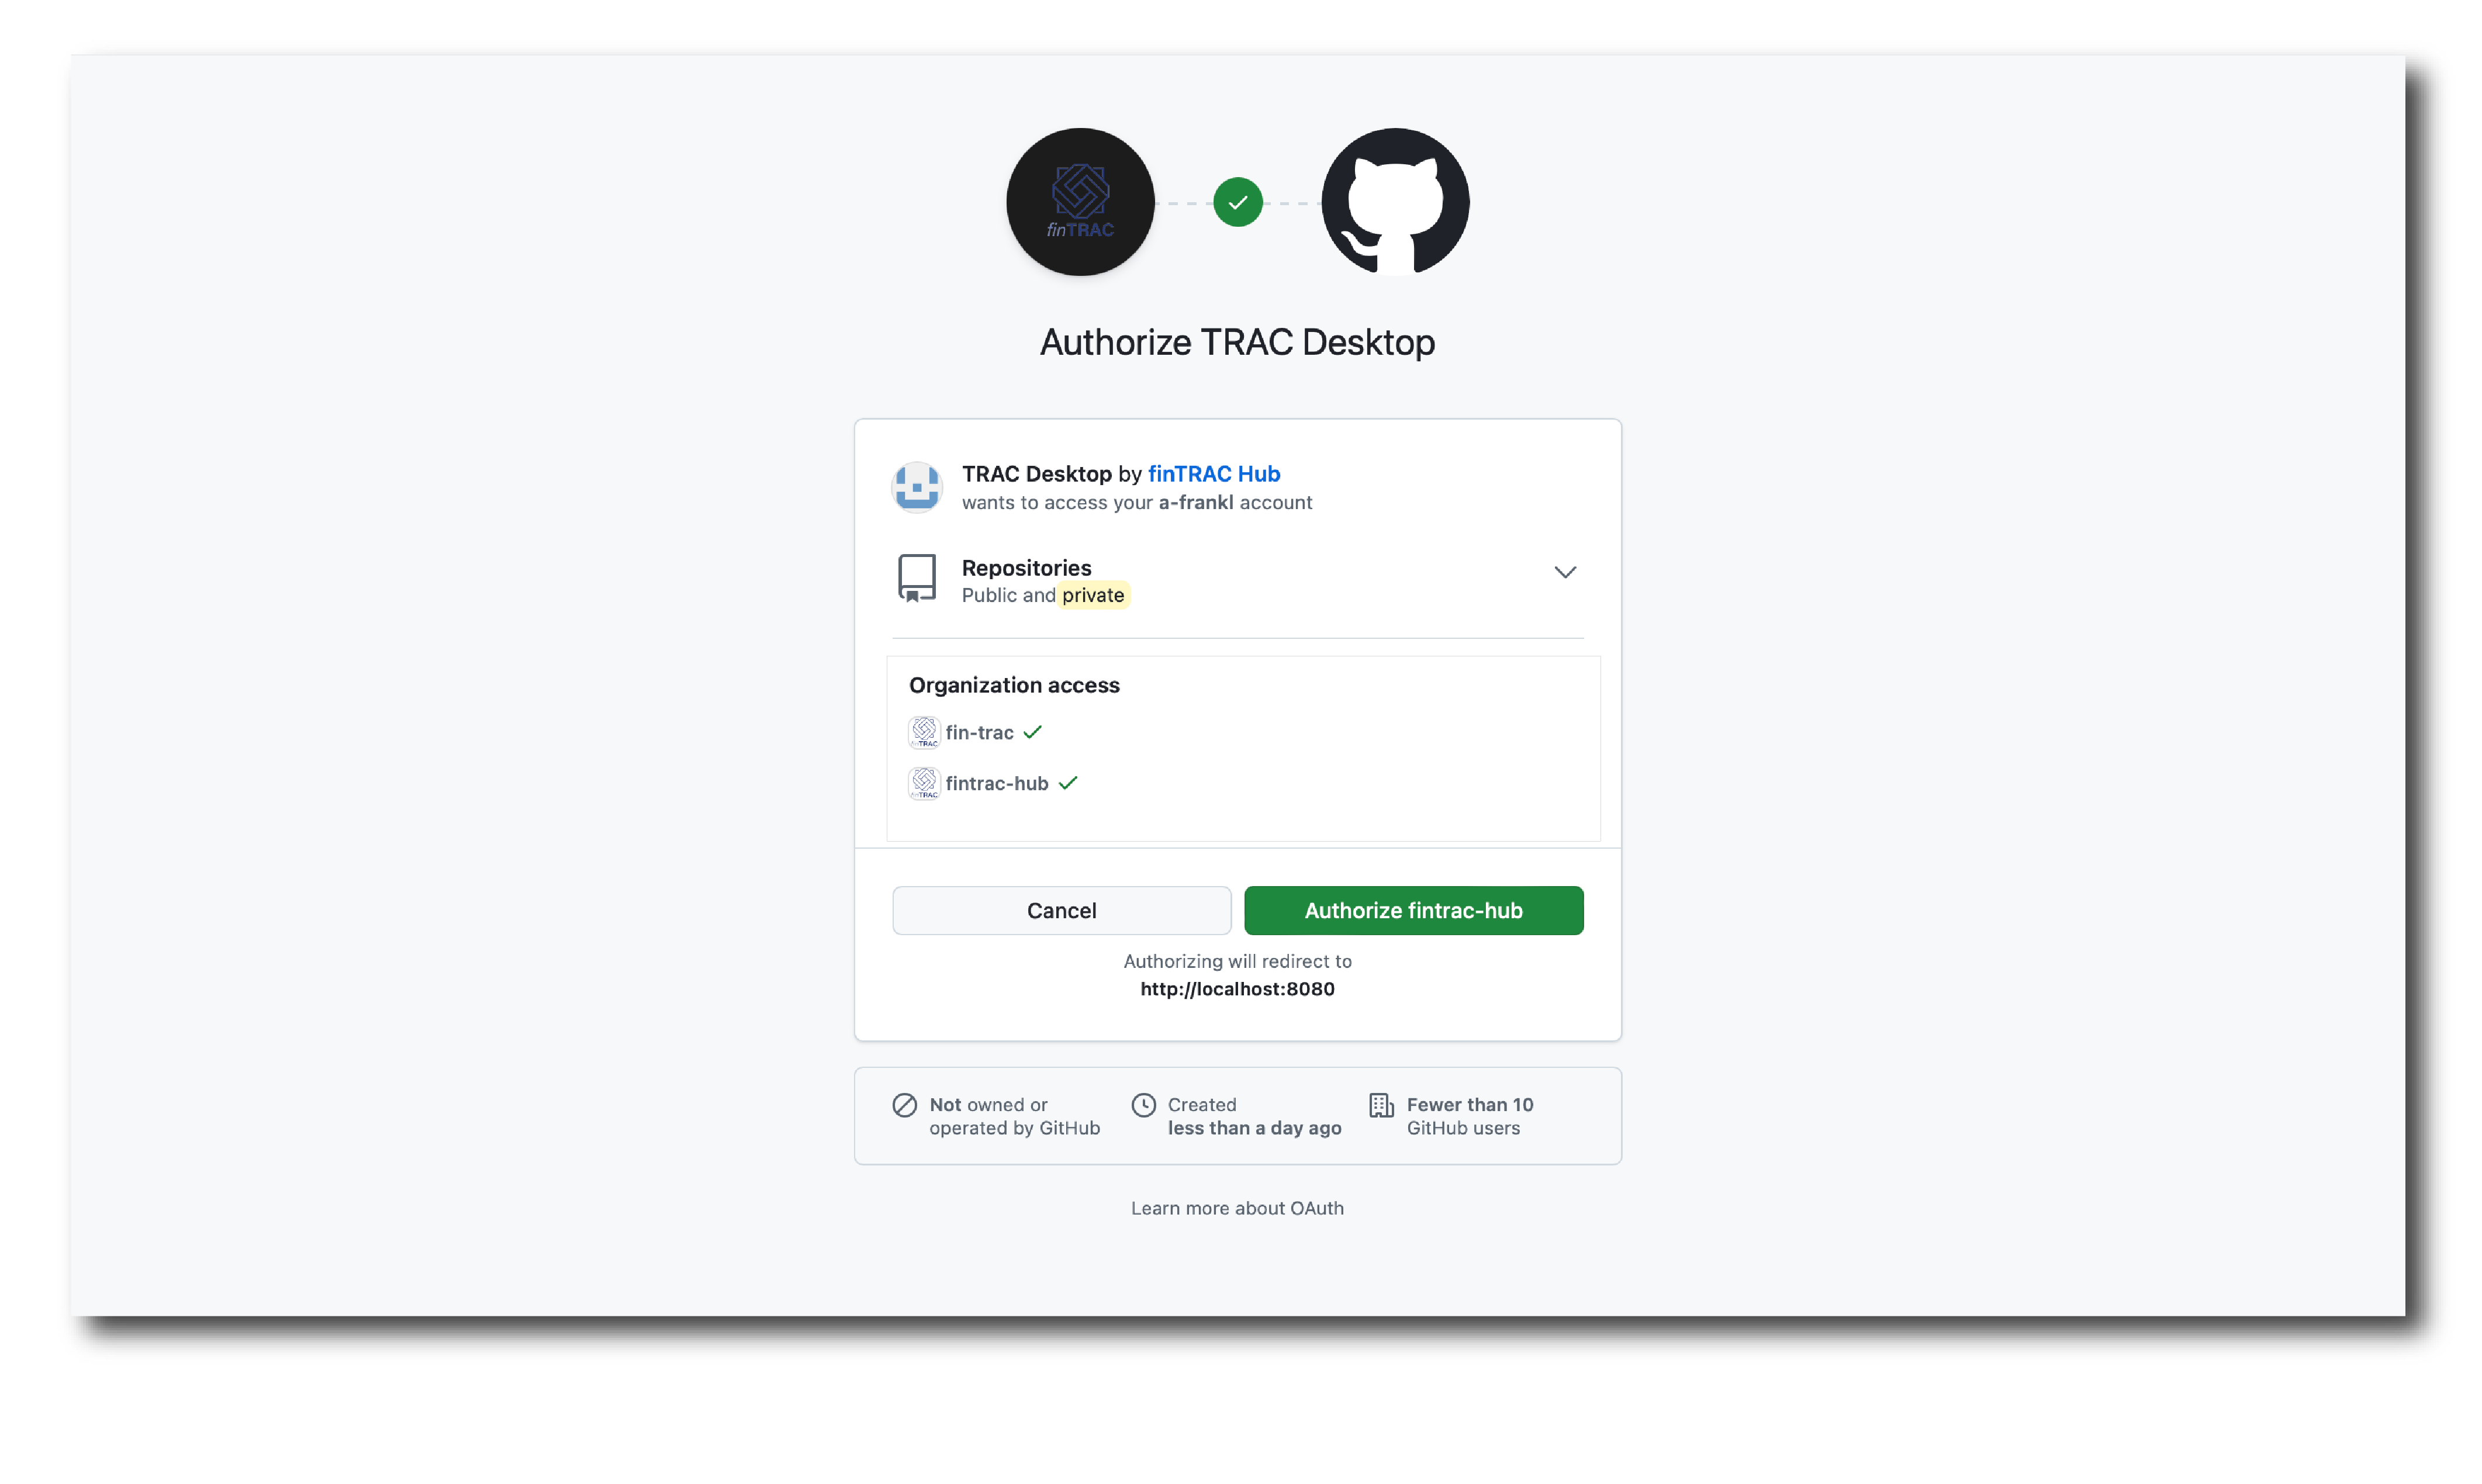
Click ‘Authorise’ and you’re prompted to authorise the TRAC Desktop application to access your GitHub account and the repos you have access to, via the GitHub OAuth application.
You might see buttons next to each organisation to ‘Grant’ or ‘Request’ access - if you mean to use trac with organisation-owned repo’s, it’s a good idea to set that up now.
Note
If miss an organisation it can be added later. Find the TRAC Desktop application in the Authorized OAuth apps tab of the Applications section of your GitHub settings and edit the permissions there.
Now we need to find a model to upload.
You automatically have access to a fintrac-hub/examples repo, so select that then pick ‘main branch’ and ‘latest commit’ from the next two drop-downs.
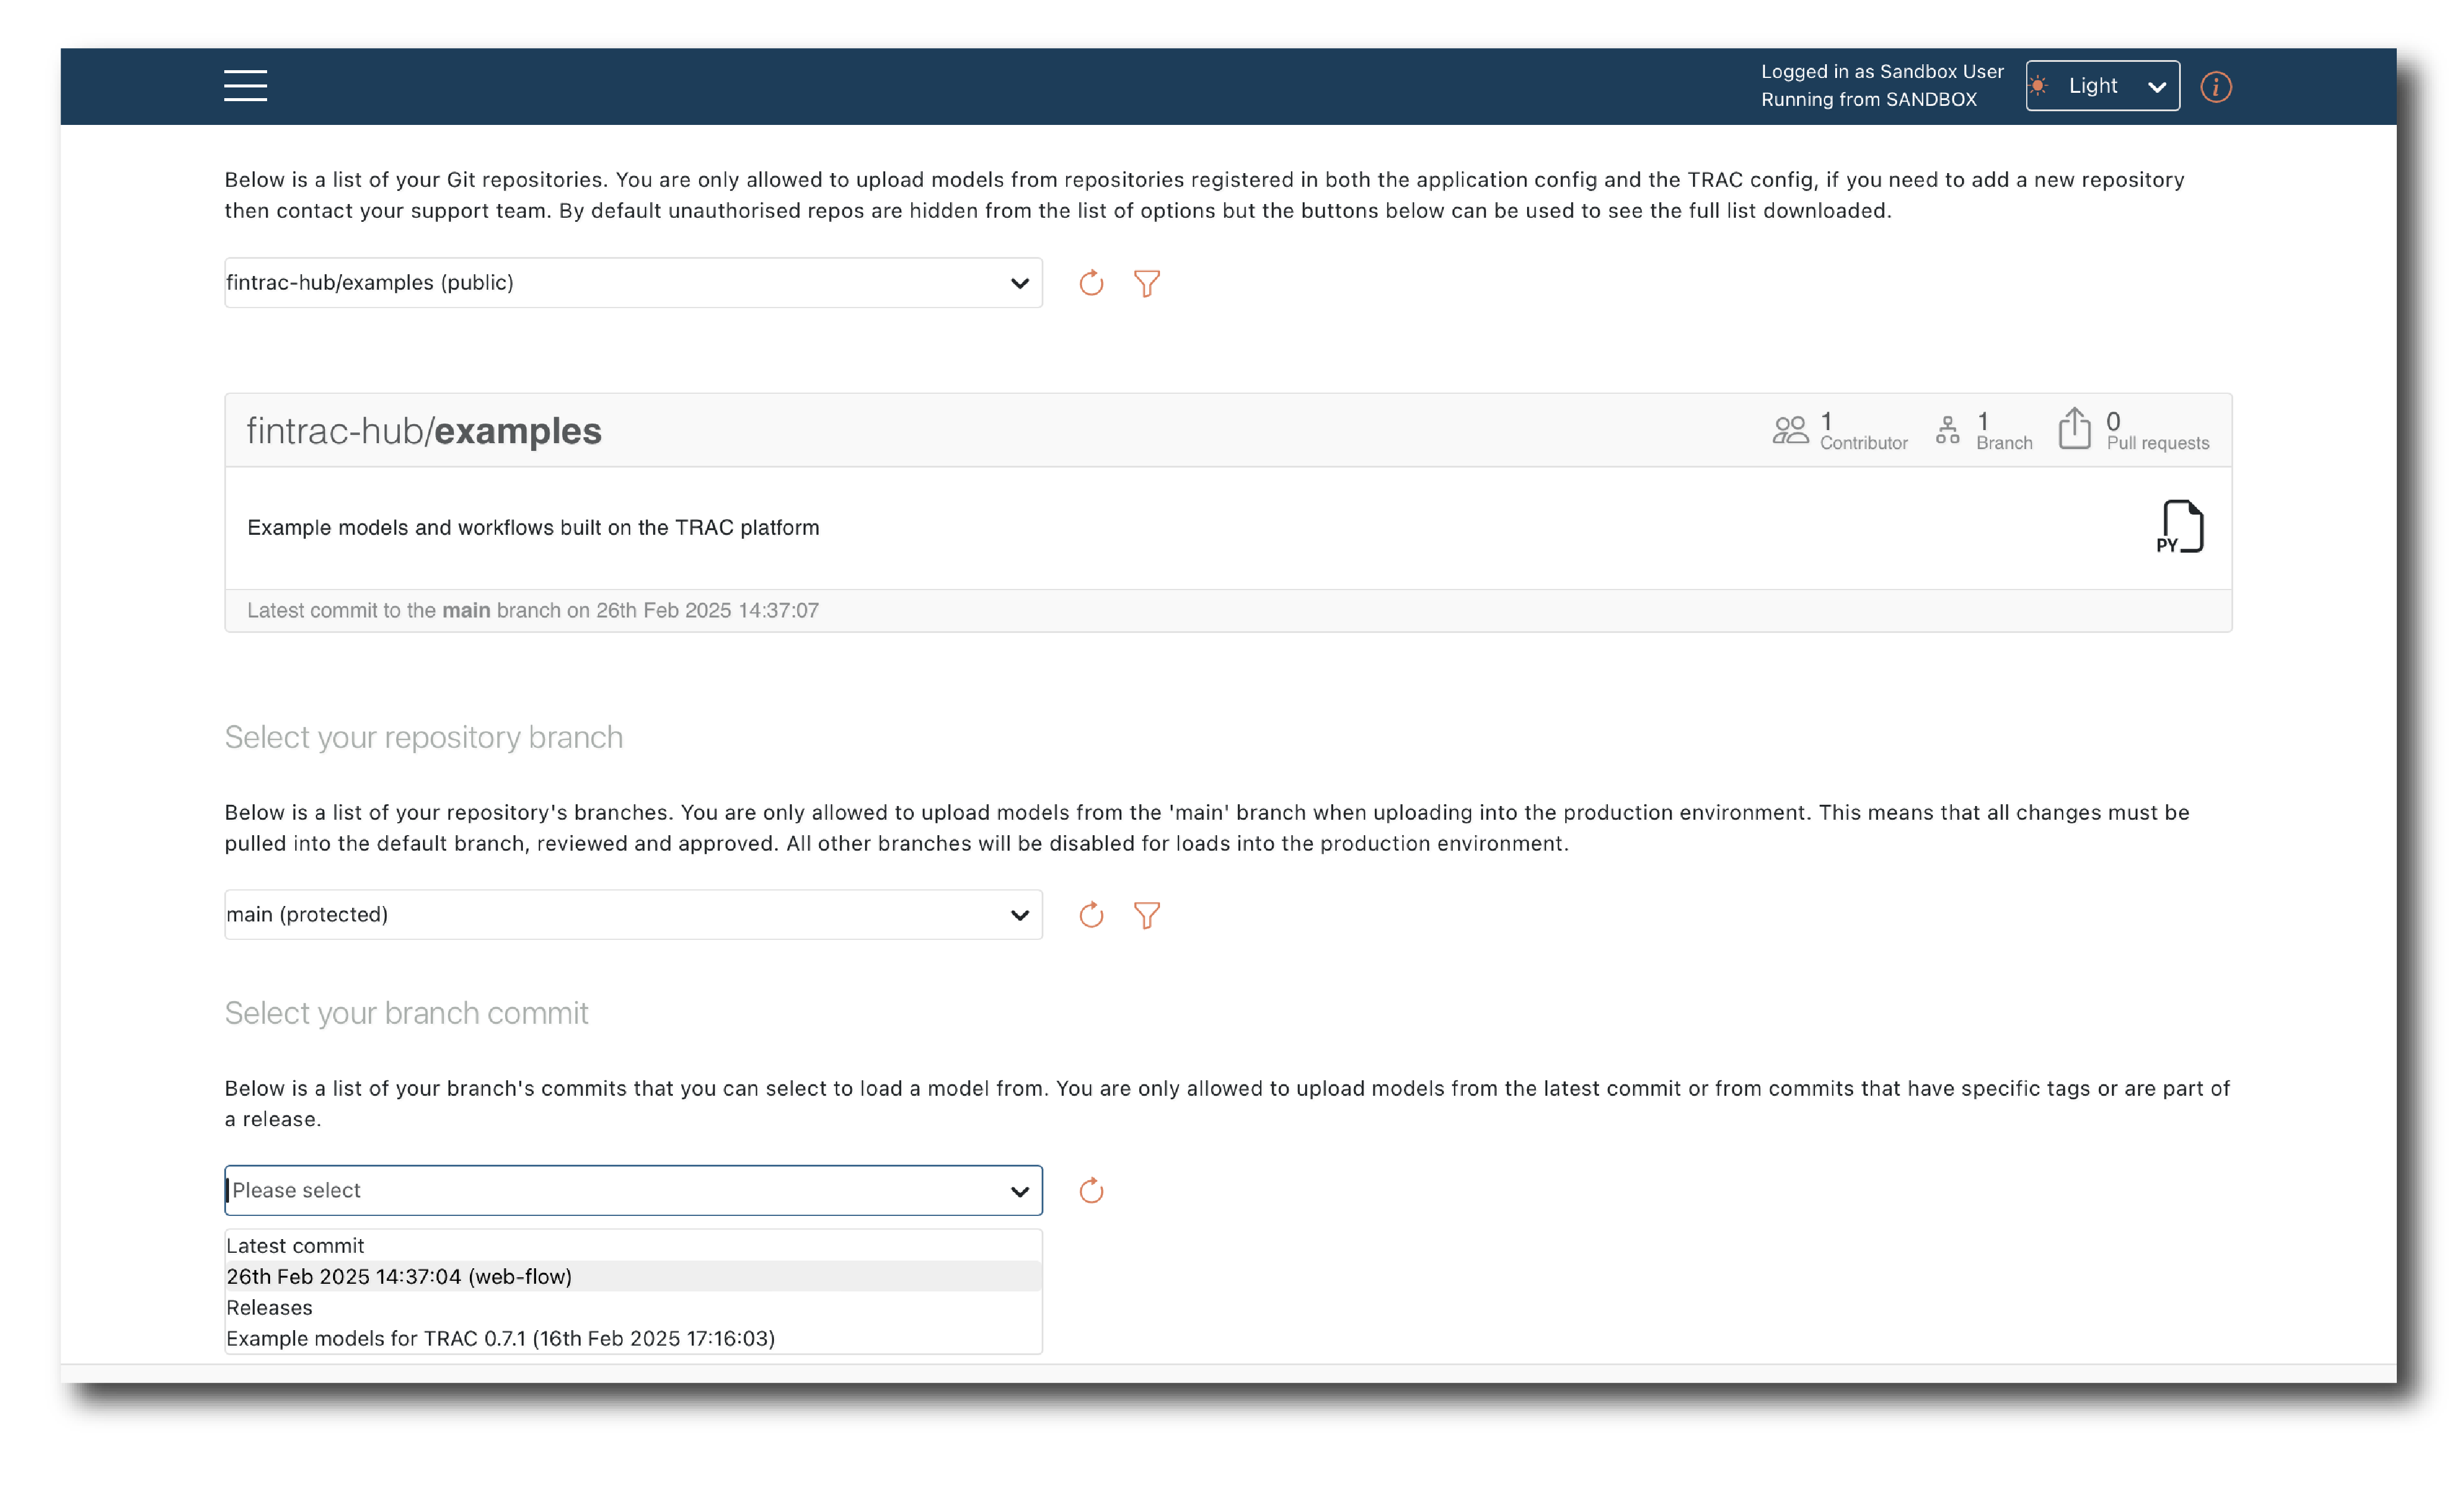
Click ‘Select file’ and expand the folder structure.
For this example, select the ‘quick_start’ model and hit ‘Save’.

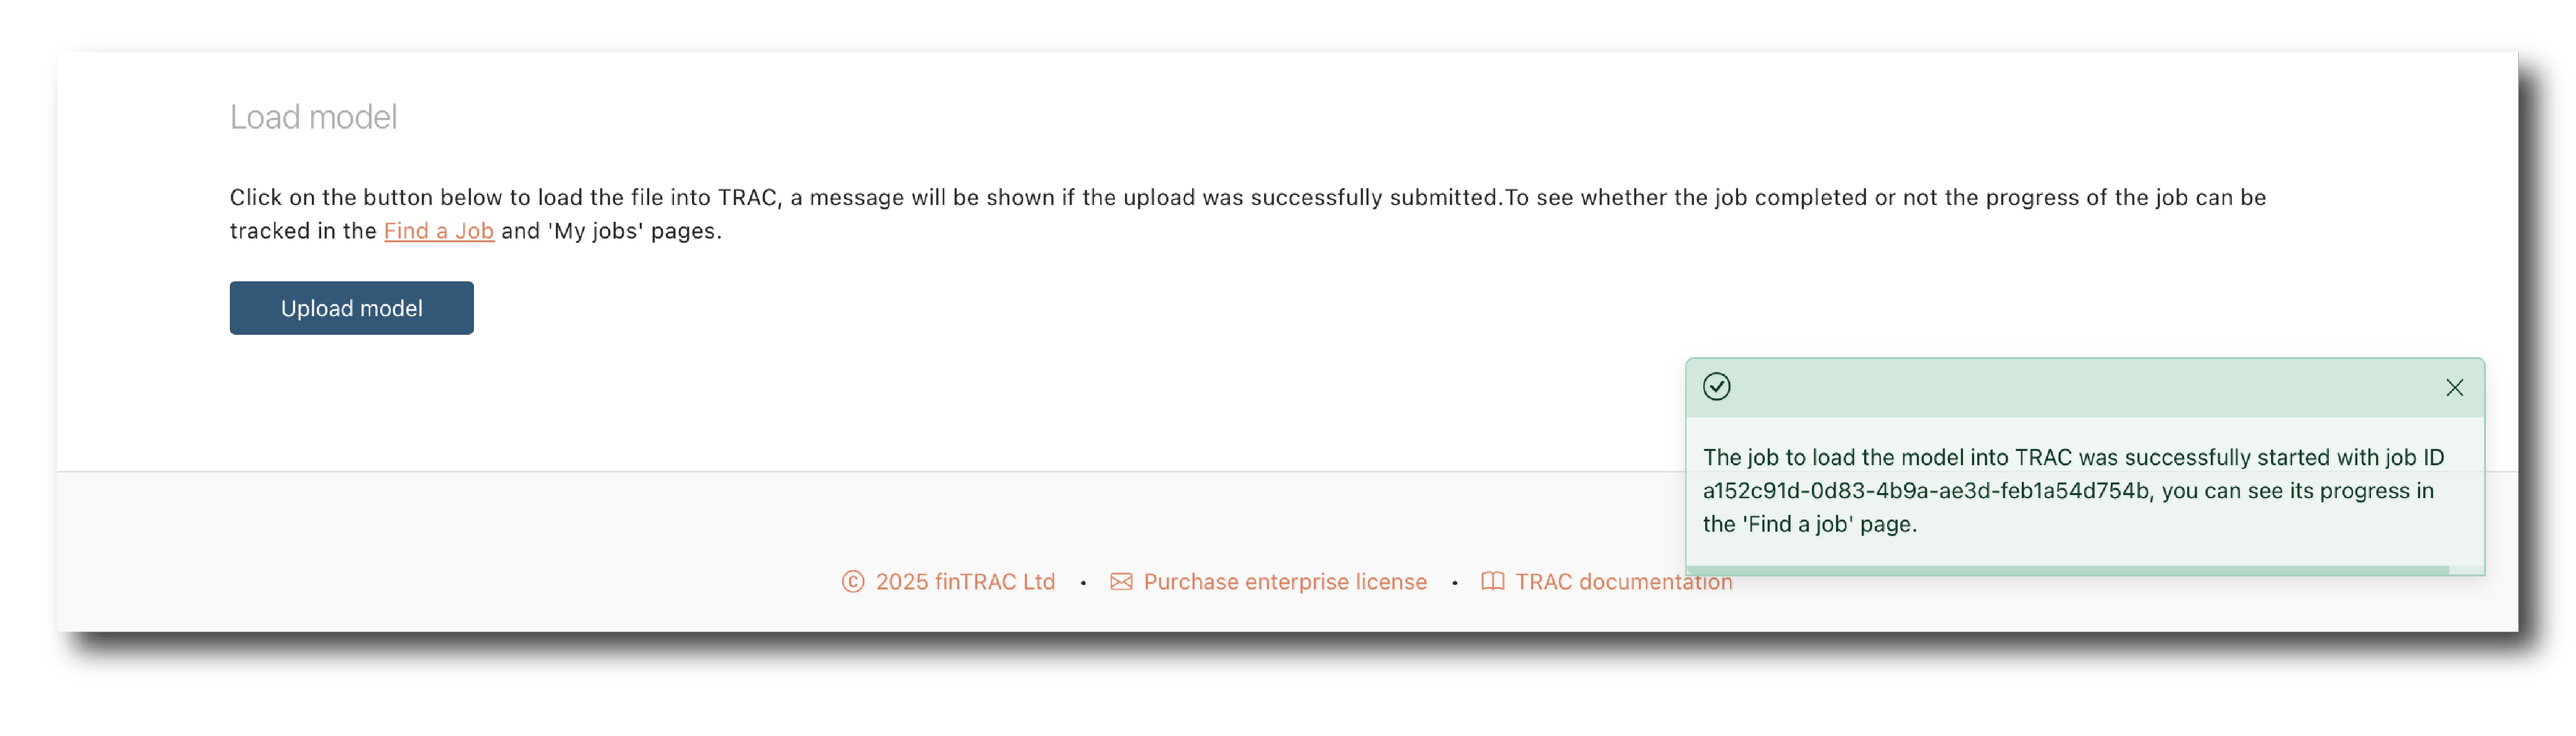
On the next screen just click ‘Upload model’ at the bottom. You should see a green pop-up telling you that the model upload has started.
Note
You would typically define attribute tags before completing the upload (Key, Name, Description etc…) but these have been pre-loaded.
Load input data
The model needs an input data set which you can get from the examples repository.
Find the ‘quick_start_input’ and hit ‘Download raw file’.

To import it, fro, the homepage or the main menu click ‘Loading tools > Upload a data set’.
Locate and select the file you just downloaded, click ‘Get schema’ and then ‘Upload’.
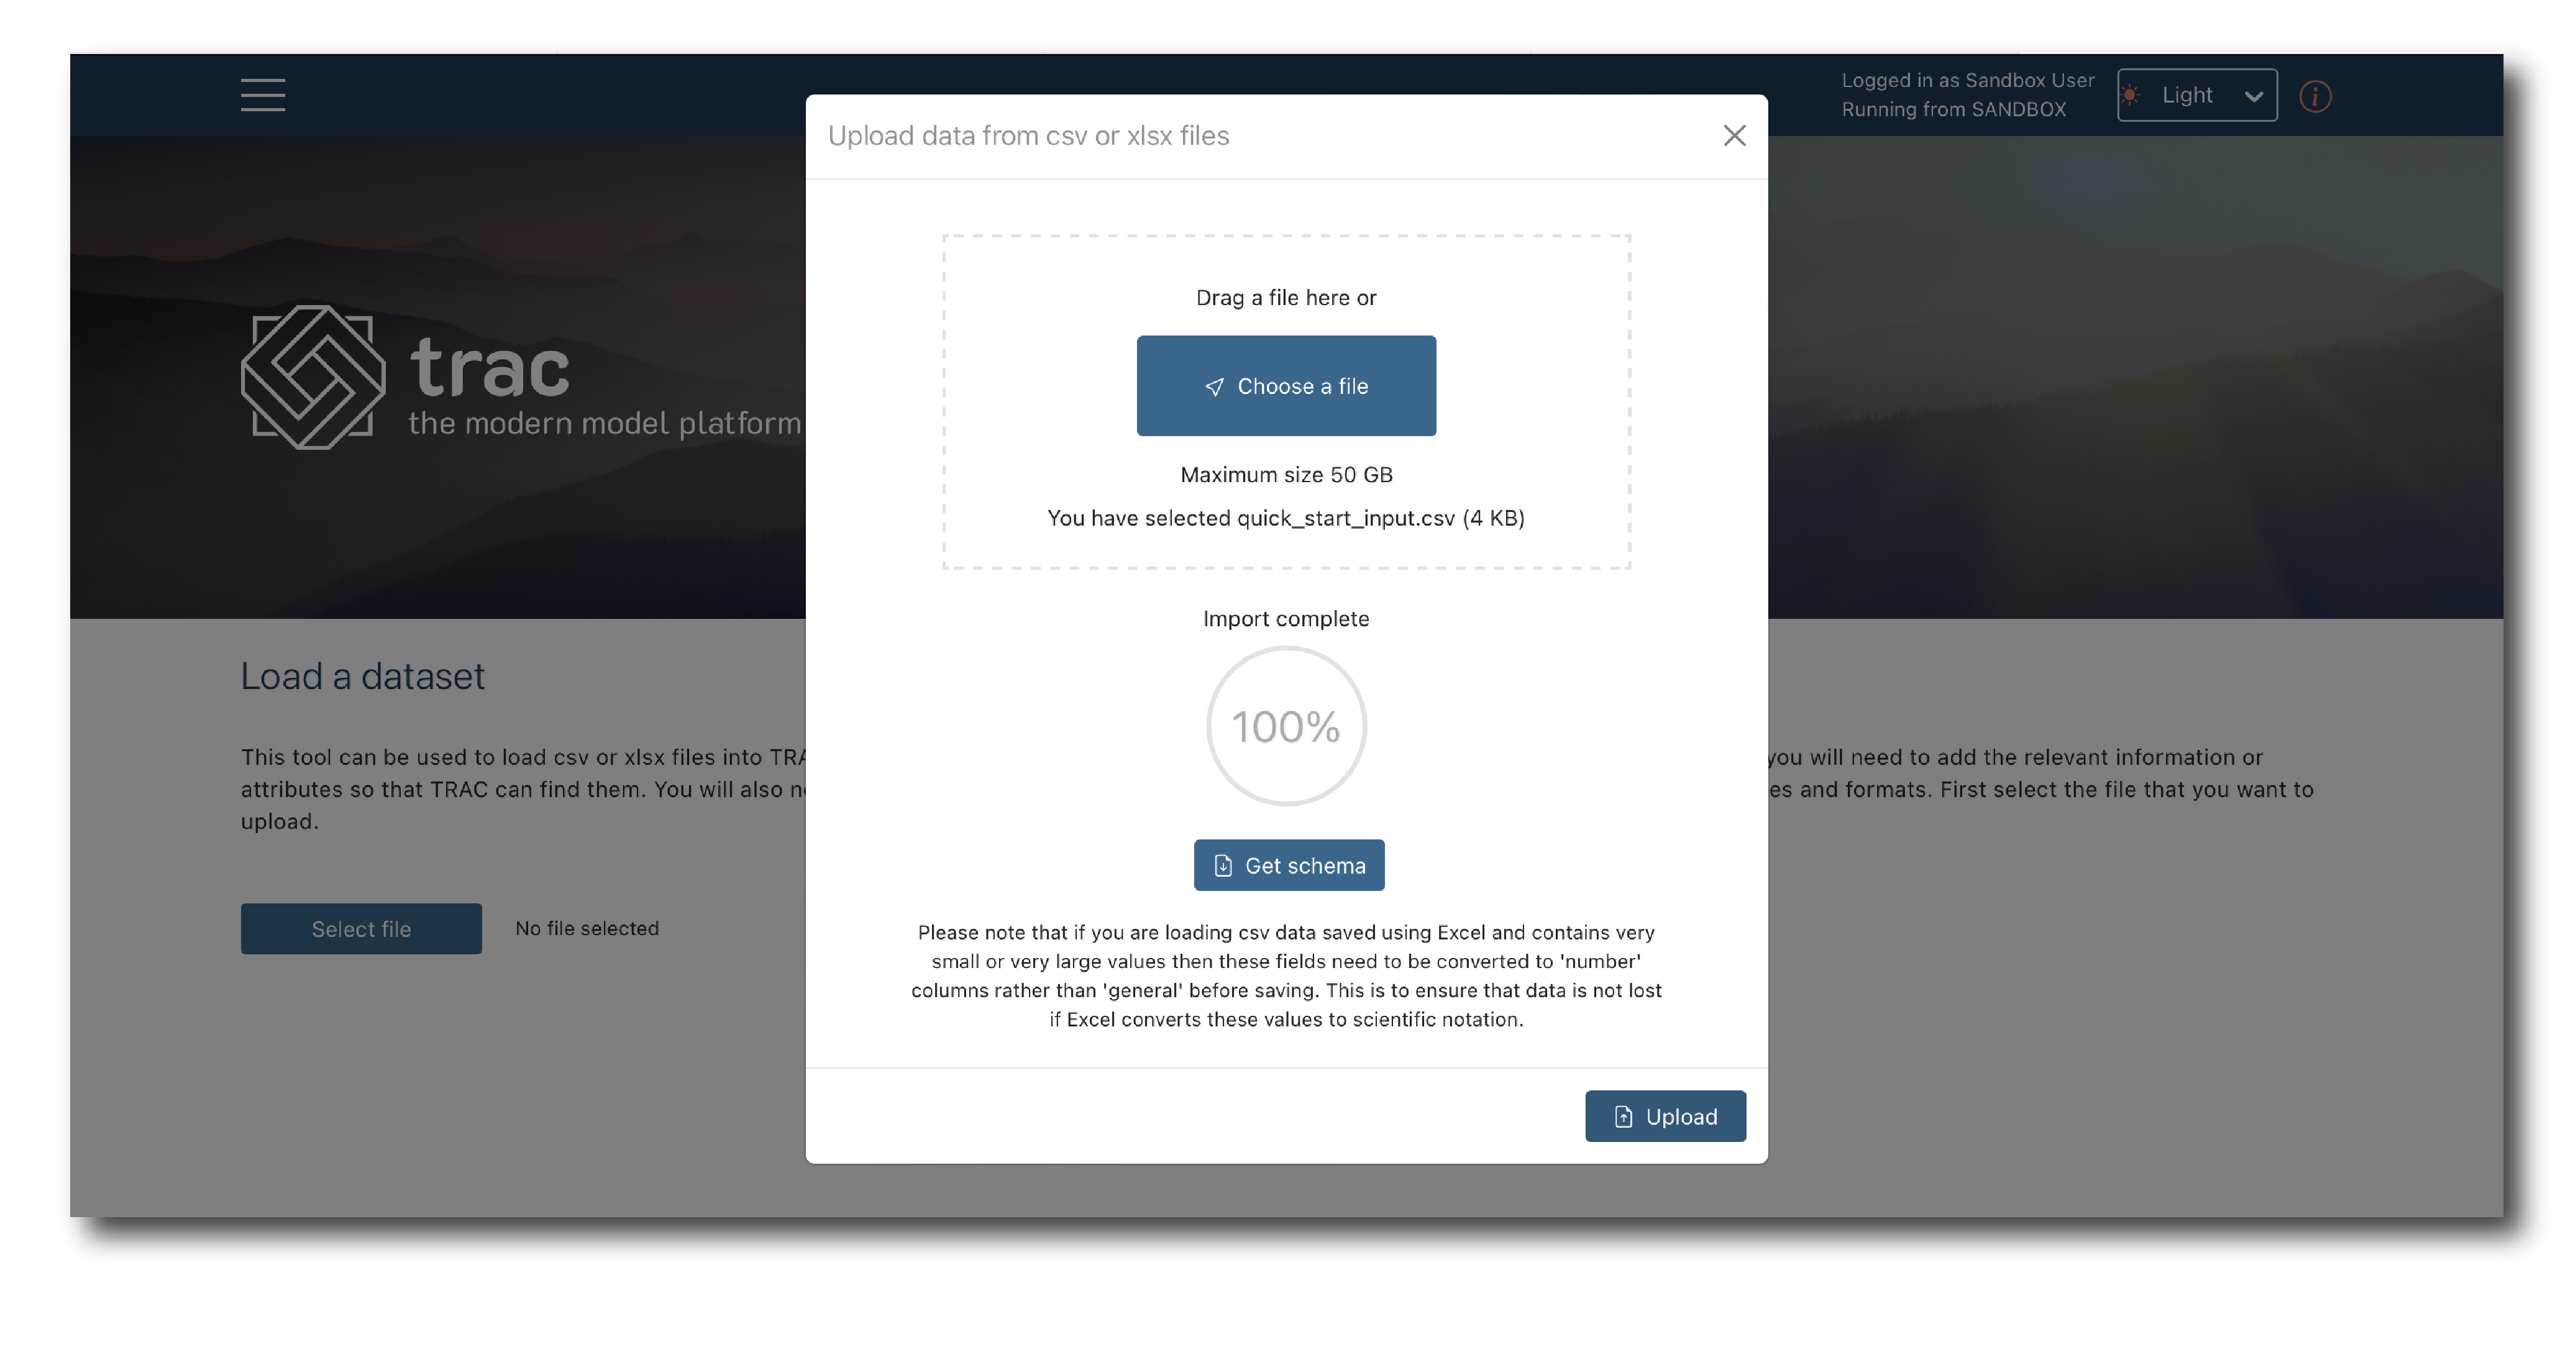
To complete the upload you need to assign a Key, Name and Description.
The Key should match what the model expects, which is ‘quick_start_input’. Name and Description are also required, but for this example it’s less important what you put.
To complete the process click ‘Upload dataset’.
Run the model
On the home page or in the main drop-down menu, click ‘Run a model’ then select the quick start model from the second drop-down.
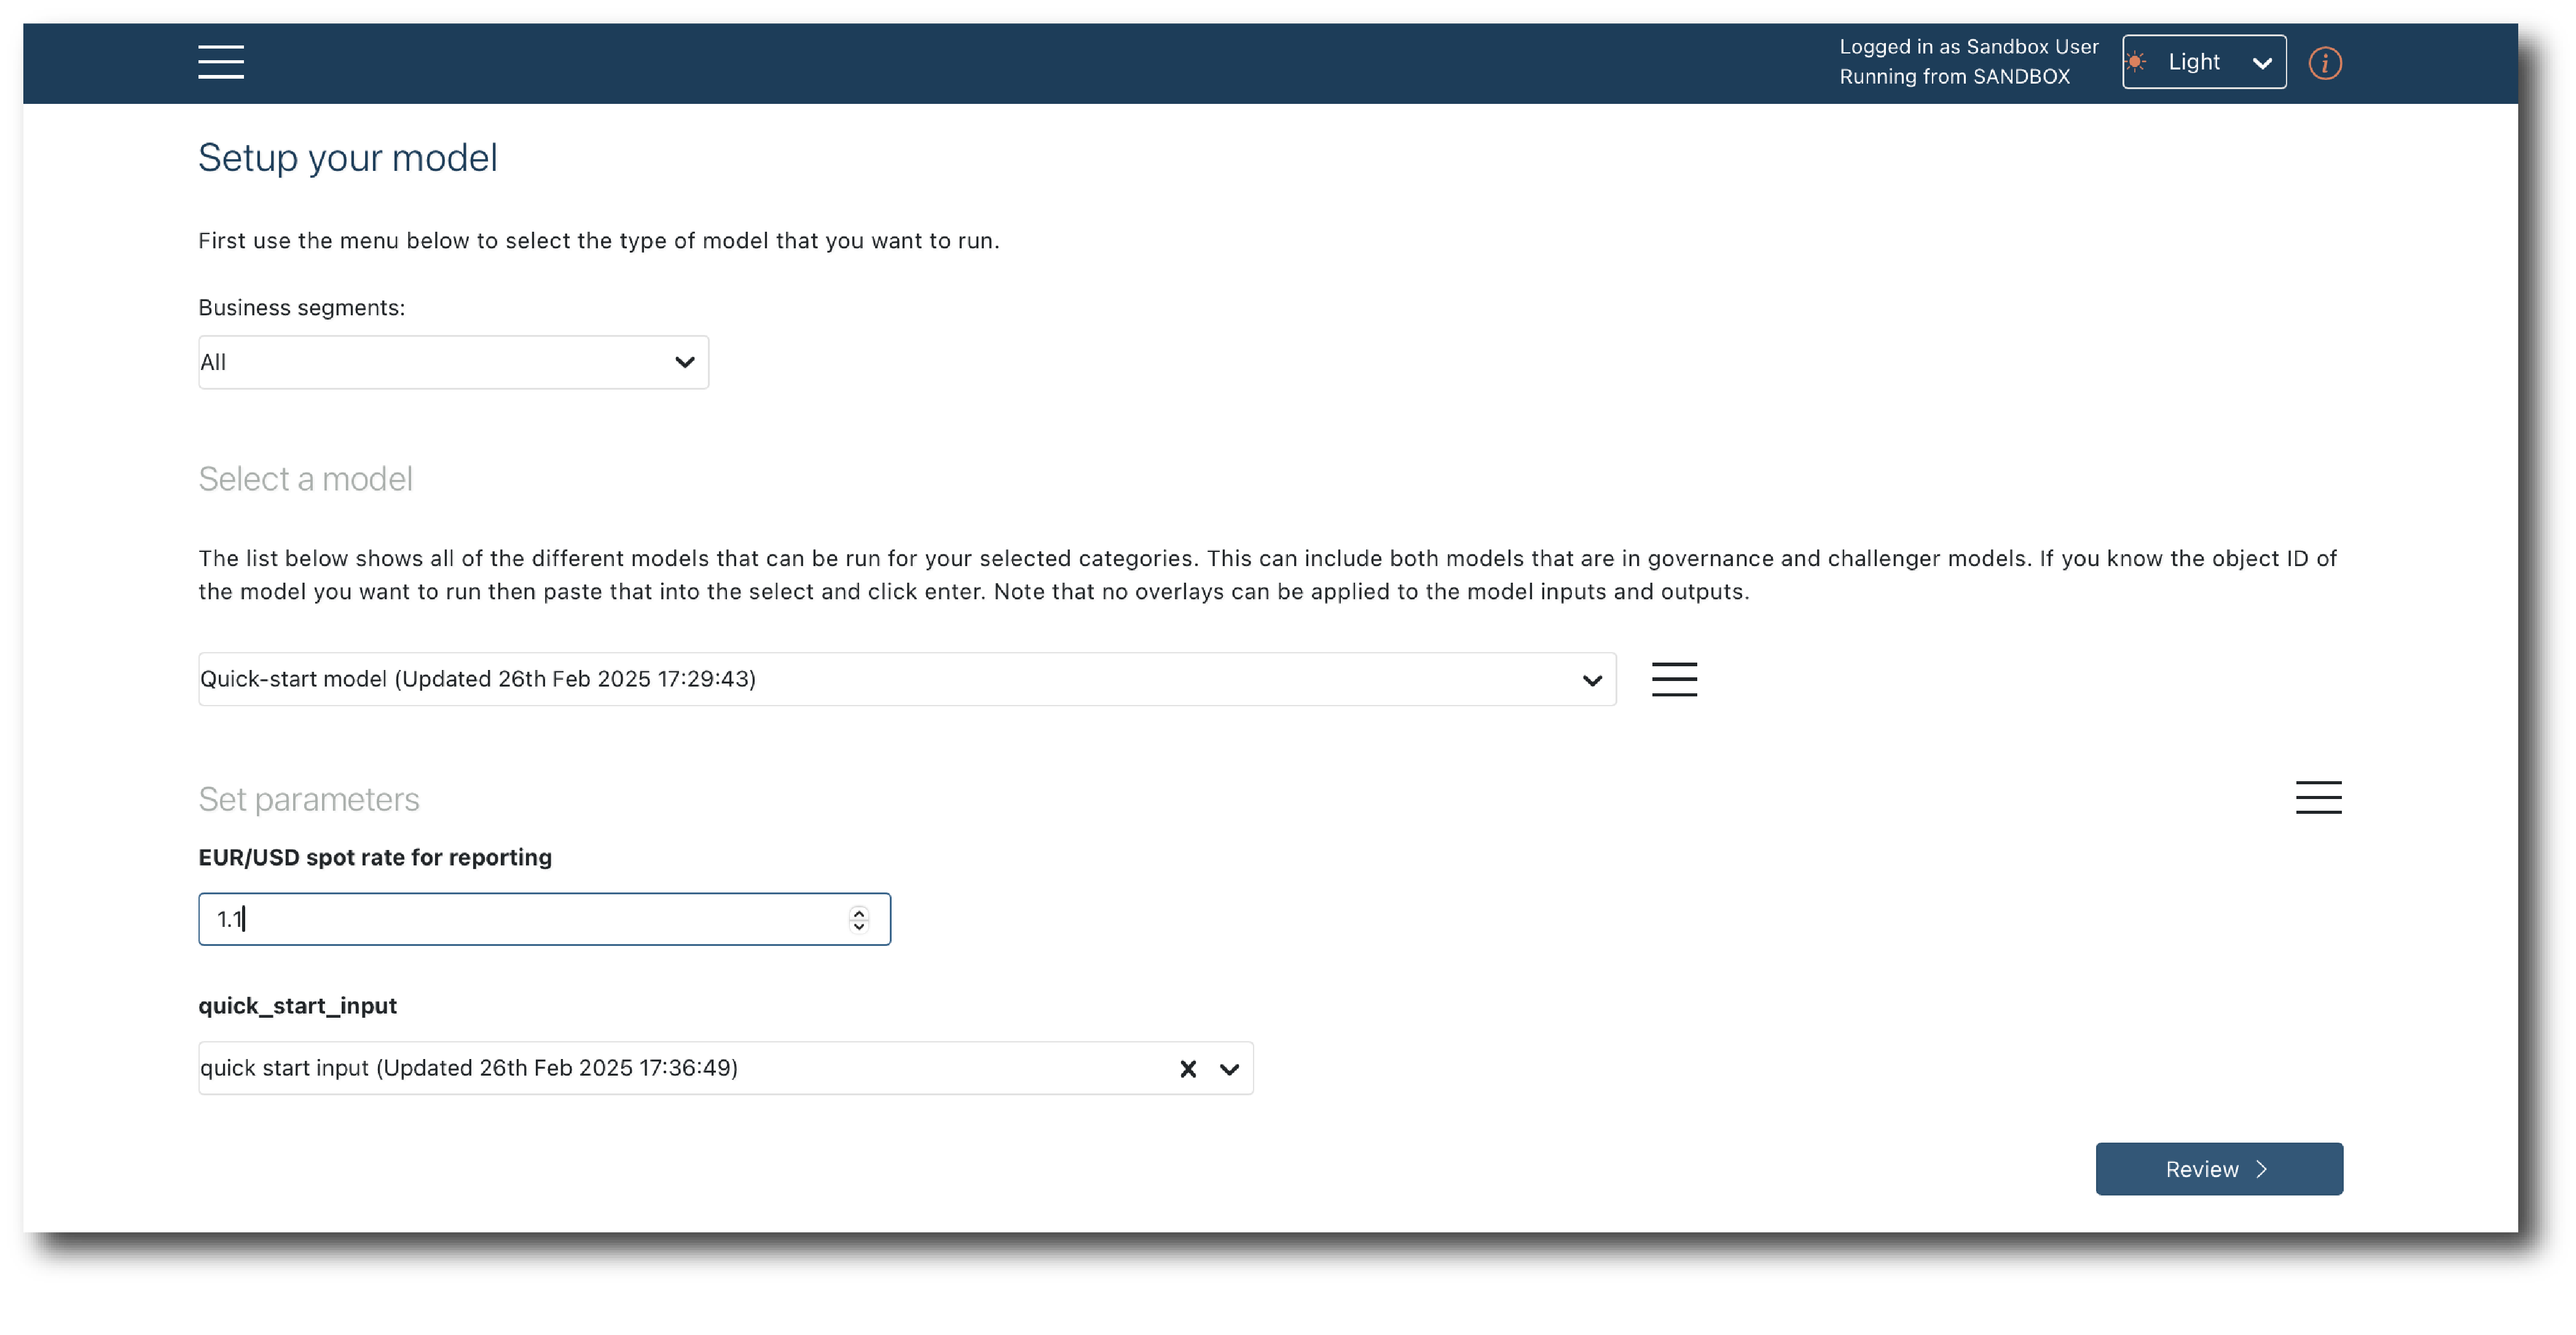
This model needs one numerical parameter (EUR/USD rate) and one data set.
The data you just loaded will be automatically selected if has the right Key. Type an exchange rate and click ‘Review’.
The next page summarises the Job. For more complex Jobs you should check this thoroughly, but just click ‘Run’.
You’ve executed your first Job!
See the result
Click ‘Search’ then set the first drop-down to ‘Job’ and hit refresh. You should see two completed jobs; one with type = ‘Import model’ and one with type = ‘Run model’.
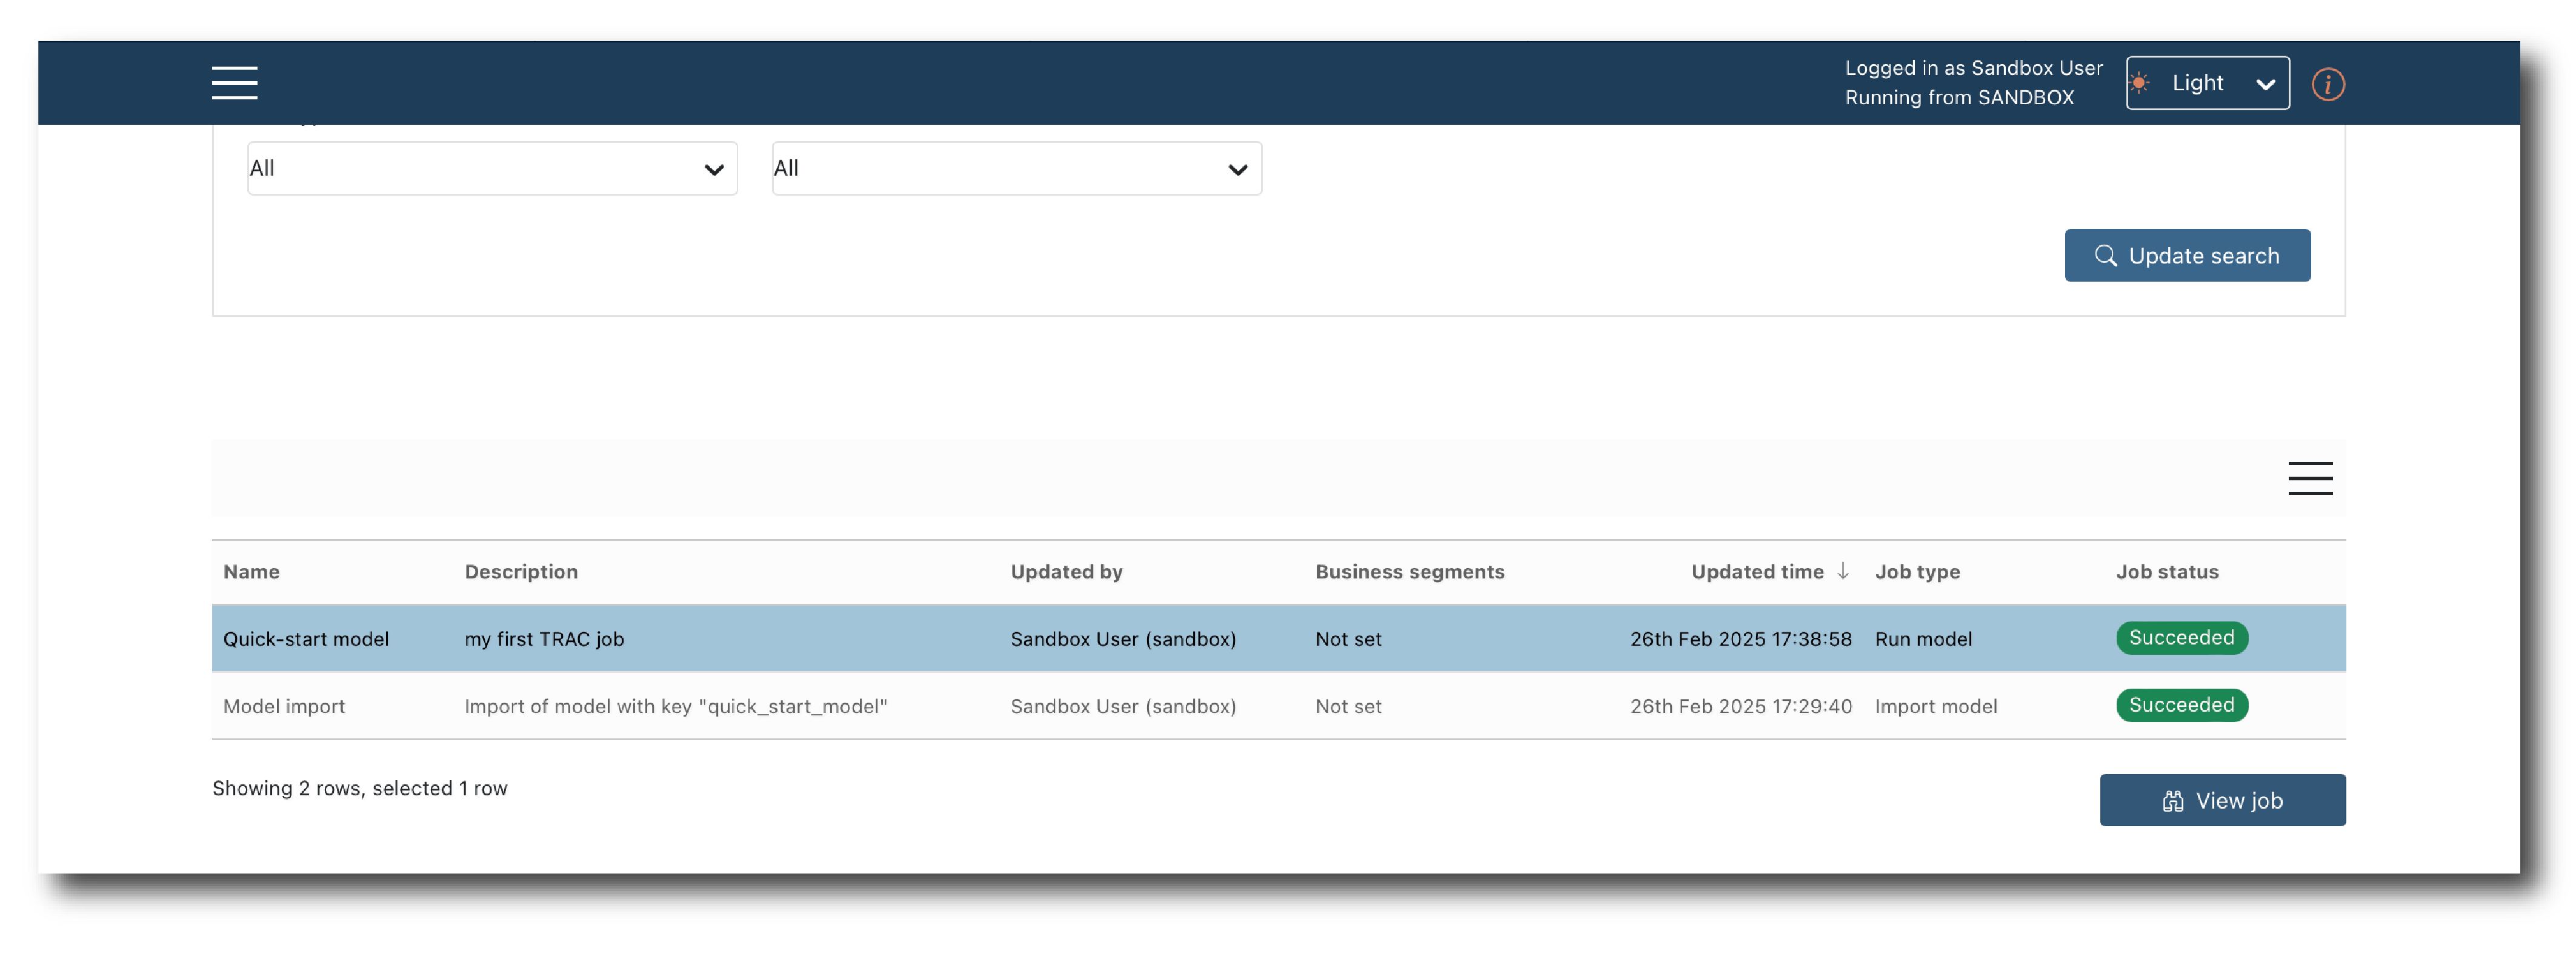
Select the ‘Run model’ job an hit ‘View Job’.
The summary page provides a full audit record for the job, showing the input data sets, parameter values, model version and outputs.